Start the school year off on the right foot with these fun, beginner-friendly DIY shoe clips from textile artist Maryanne Moodie.
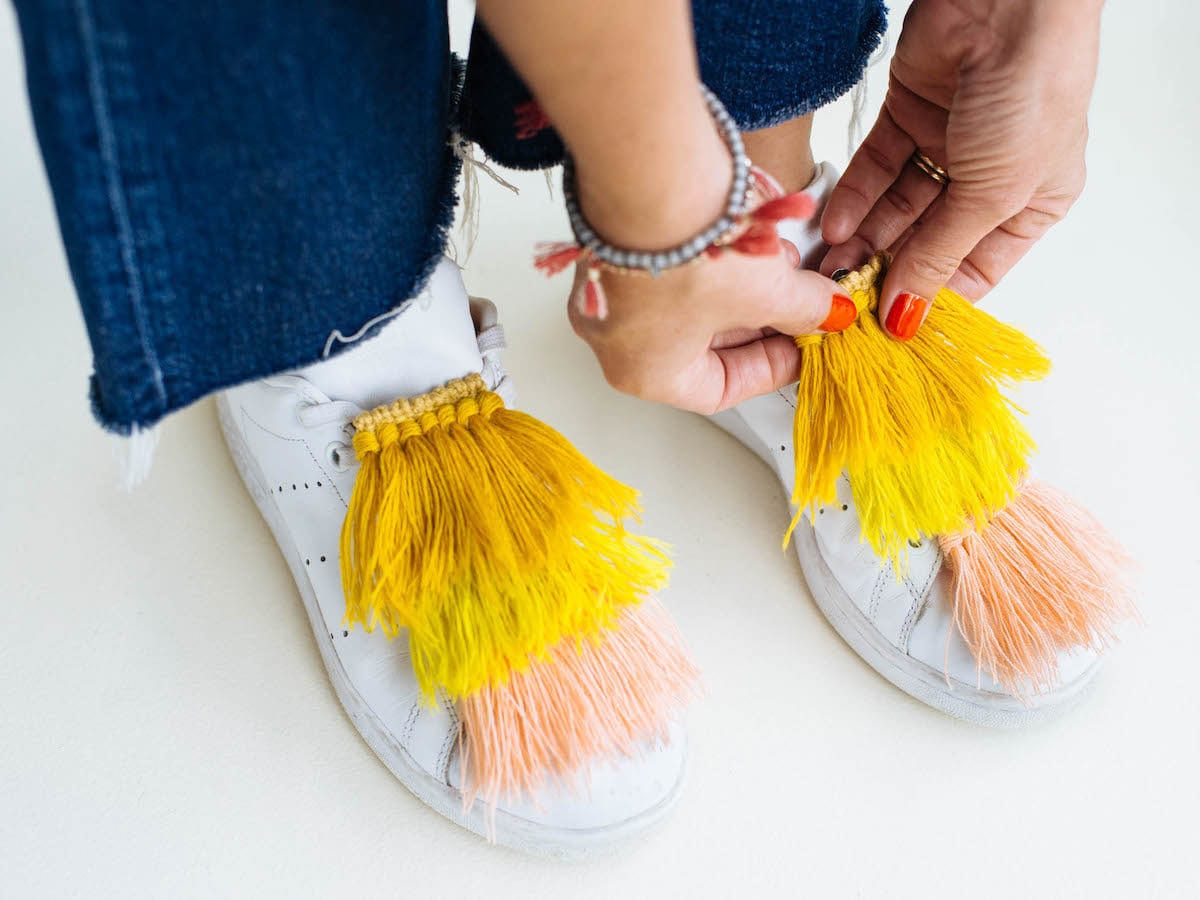
Back-to-school season: the time of year we dutifully (read: delightedly) stock up on sweet gear, fresh supplies, and adorable accessories, all in the name of the new academic year. From personalized pencil cases to desk and dorm-worthy decor, the possibilities are as limitless as the promise of a squeaky clean blackboard and reset report card. Whether you're a scholar or a student of life, take your fall look up a notch (and show off your sweet fiber art skills) with this woven shoe clip DIY. Customize in the colors of your choosing to match any outfit you're planning to rock this term, in or out of the classroom. Ready to get started? Read on (and shop back-to-school trends). At a glance Time: 1 hour or less Difficulty: Intermediate This weaving project requires some familiarity with basic weaving techniques. Brush up on the fundamentals and browse expert tips.
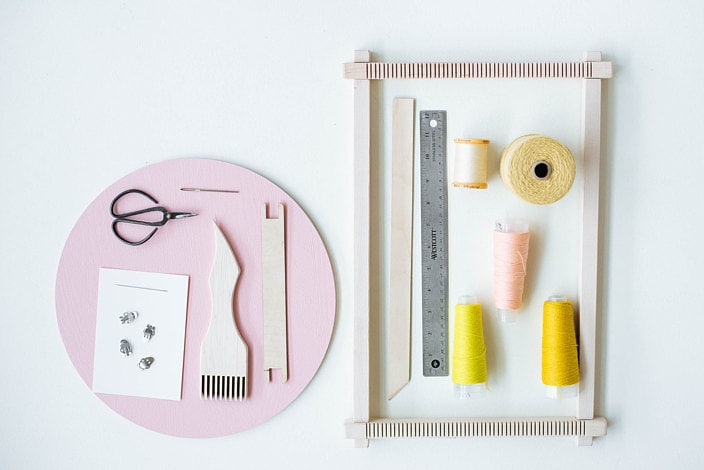
You will need
- Frame loom
- Warp cone
- Small piece of cardboard
- Weaving sword (optional)
- Embroidery floss for weft thread
- Tapestry needle
- Scissors
- Sewing needle
- Cotton sewing thread to match weft thread
- Shoe clips
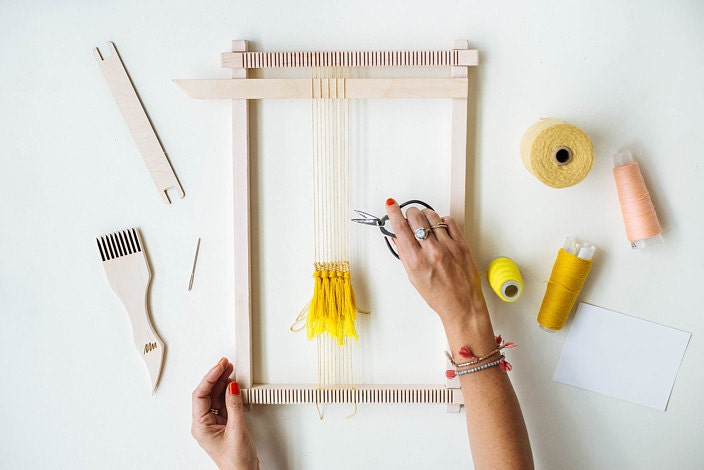
Step 1: Warp your loom
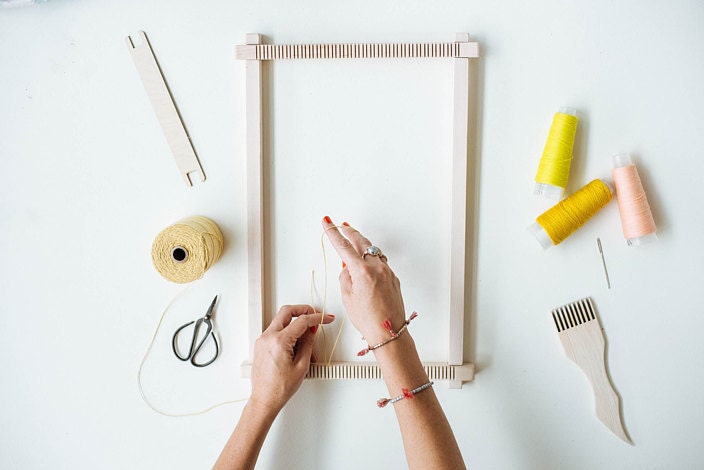
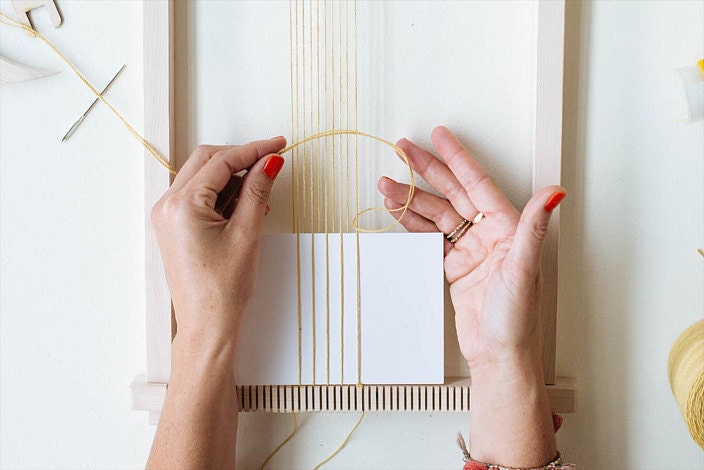
Tip: Before you get started, measure your shoes to figure out how wide your shoe clip weavings should be. We made ours 1 1/2 inches across. To begin making your shoe clips, assemble your frame loom and use your warp cone to warp the loom. Your warp thread will serve as the base of your weave, so you want to make sure it's tightly spun and able to withstand a little tension. Tie a slip knot around one of the bottom notches of your loom, on the left side. Pull the warp thread up to the loom's corresponding upper notch, wrap it around the top, and bring it back down to the bottom, hooking around the next notch to the right. Continue zigzagging from bottom to top until your warp is as wide as you want your shoe clips to be, keeping it evenly tense across the loom. Tie your warp thread off at the bottom, using another slip knot.
Step 2: Add a spacer
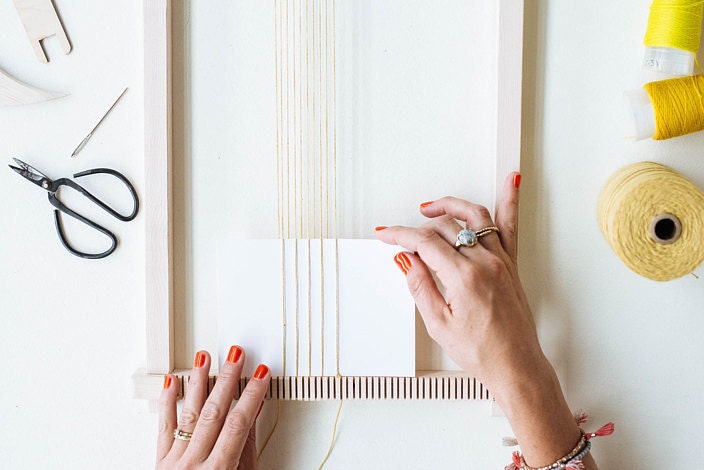
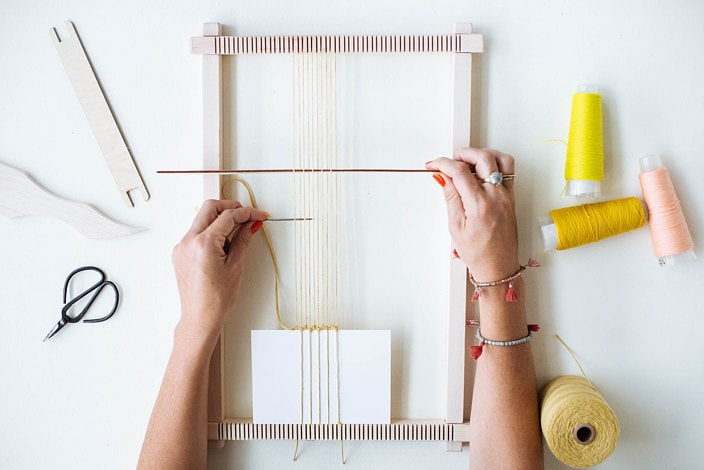
Weave a small piece of cardboard into the warp, guiding it over and under alternating warp threads. Push the cardboard to the bottom of the loom so it's flush against the frame; this will act as a spacer, giving you enough room to cut your shoe clips off the loom when the time comes. If you're using a weaving sword, weave it in at the upper end of the loom.
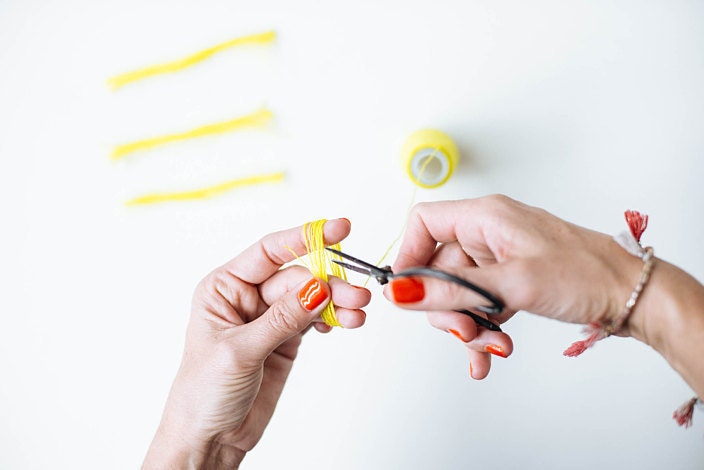
Step 3: Cut thread

Cut a piece of embroidery floss approximately 2 feet long—this is your weft thread, which will create the body of the weave. Fold it in half and loop it around the first warp thread on the right-hand side.
Step 4: Create a row of double half hitch knots
Create a row of double half hitch knots. This will create a barrier at the bottom of your weaving and help to hold your shoe clip together, so nothing unravels. To create a half hitch knot, make a capital D shape with the doubled embroidery floss, then pass the live end of the thread over the warp and back through the middle of the D, pulling the thread tight. Make a second half hitch knot on the same warp thread before moving on to the next thread to the left. Continue until each warp thread has two half hitch knots.
Step 5: Weave
Thread your tapestry needle and begin weaving from left to right, using a basic tabby stitch to weave your weft thread tail over and under your warp, until you reach the right-hand side. Once you've returned to the right side, weave basic tabby on the next row from right to left in the opposite sequence of the row below. (For example, if you went under a warp thread on one row, you should be going over that warp thread on the row above). Continue until you've woven approximately eight rows. Then weave your ends back into the weaving, tucking the tails away. Tip: Be sure to bubble your weft thread on every pass—this will help keep the tension even across your weave and stop you from pulling too tightly. To create a bubble, just pull the weft thread up and then down the warp on each pass.
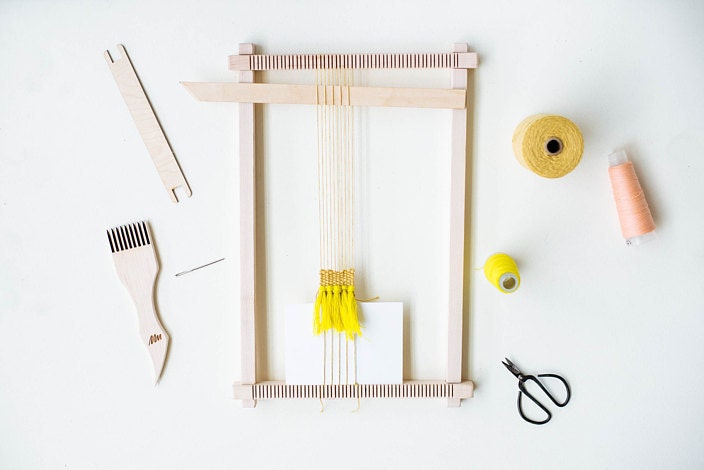
Step 6: Add rya knots
It's time to make your tassels, also known as rya knots. To start, cut ten lengths of embroidery floss, each measuring 3 inches long, for your first rya knot cluster. Repeat this step for as many tassels as you'd like to make. (We cut seven clusters to create seven tassels in total.) Next, hold one cluster horizontally over two warp threads, above the top row of your tabby weave. Pass the left side of the cluster behind the left warp thread and back through the middle of the two threads. Then pass the right side of the cluster behind the right warp thread and through the middle, to join the left side. Gently pull down on the two cluster ends, until the rya knot sits snugly on top of your tabby weave. Repeat to create your additional tassels, until the row of rya knots is complete. Lock your tassels in with another eight rows of tabby weave, weaving your ends in at the top. Tip: For a layered look or larger shoe clip, add another row of rya tassels or continue with tabby weave.
Step 7: Lock it all together
When you're happy with the length and design of your shoe clips, it's time to lock your work in with another row of double half hitch knots. Create your knots in the same manner as step 4, then weave your ends in by tucking them into the back of the weave.
Step 8: Remove weaving from loom
Remove the cardboard spacer, then use your scissors to cut the weave off the loom, leaving 1-2 inches of warp on either end. Take your tapestry needle and weave these warp threads into the back of your weave.
Step 9: Attach shoe clip
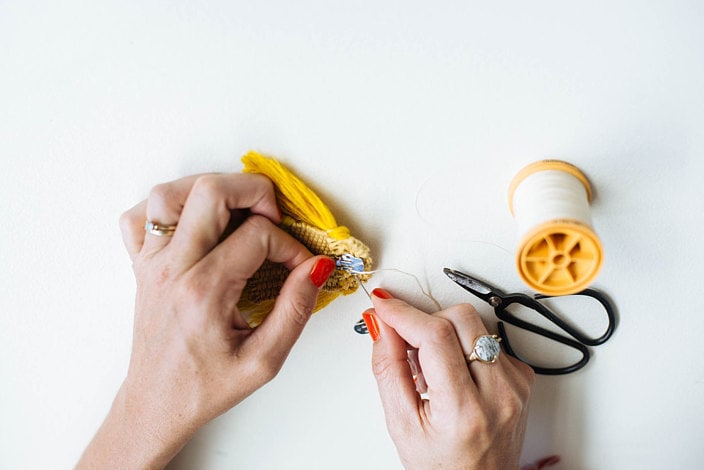
Thread your sewing needle with cotton sewing thread and position the shoe clip against the back of your weave, close to the top. Sew the shoe clip onto your weave, using the holes in the clip to secure it. Repeat steps 1-9 to create a second shoe clip for your other shoe.
Step 10: Clip on and strut your stuff
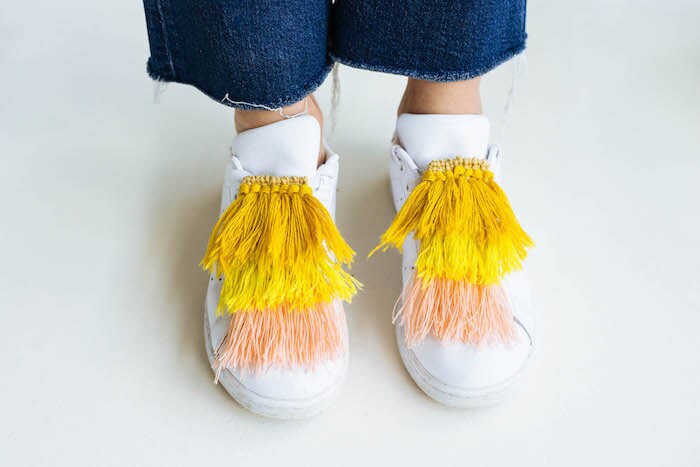
Your shoe clips are finished and ready to wear. Just clip them onto the tops of your kicks and you're all set! Tip: Create additional pairs of shoe clips in complementary colors and layer them for an extra-fun look. We made a coral pair of shoe clips to offset our mustard and neon-yellow pair. Process photos by Maryanne Moodie.


