With a little help, you can learn how to upholster a bench yourself that’s just your style with these DIY upholstery tips from Honestly WTF.

If you’re the kind of person who obsessively collects fabrics and textiles—a vintage mudcloth here, an embroidered swath of salvaged kimono silk there—you’ve likely run into the very common conundrum of how best to display your treasured fabrics on a daily basis.
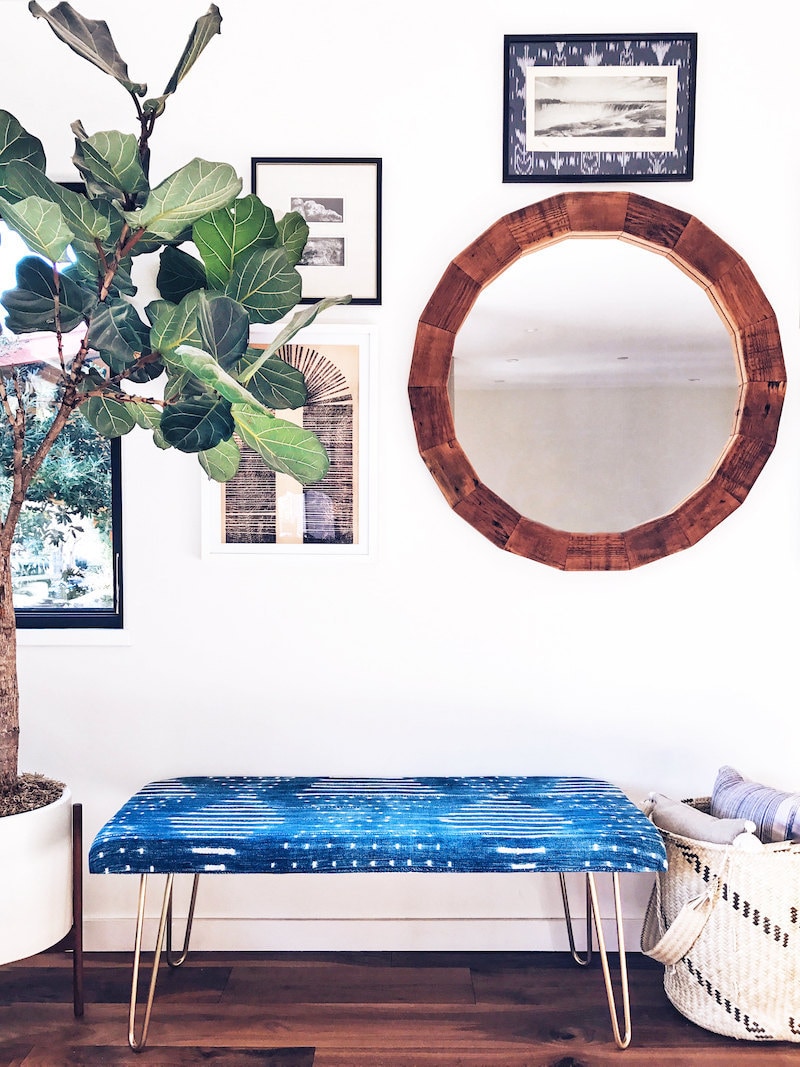
With this easy, DIY upholstered bench how-to from the talented people at Honestly WTF, you can turn your favorite piece of fabric into a functional piece of custom furniture that’s easier and more affordable to make than you might think. The best part? No sewing or carpentry skills are necessary for this upholstery project—as long as you can use a staple gun, you’re golden.
To begin learning how to upholster a bench, it’s best to start with a piece of plywood that’s pre-cut to your desired bench size; because most upholstery foam maxes out at 24 inches wide, you’ll want to keep your wood slab within that range, too. Make sure that whatever fabric you’ve chosen is at least 10 inches longer and wider than your plywood base.
DIY Upholstered Bench Tutorial
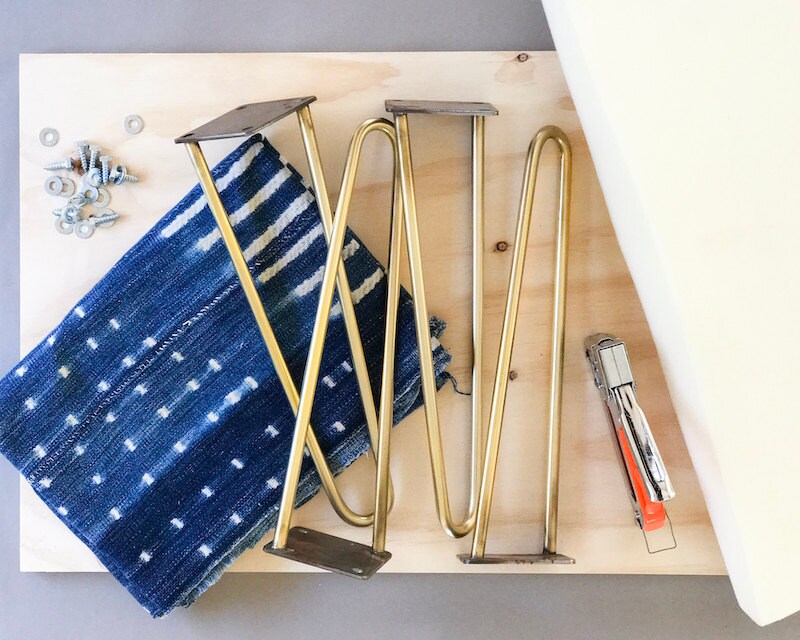
You will need:
- ¾-inch plywood, cut to your desired dimensions
- 2-inch upholstery foam in a similar size
- Fabric
- Ruler
- Fabric marking pencil
- Fabric shears
- 4 hairpin legs
- 8 washers
- 8 wood screws
- Power drill with drill bits
- Staple gun
- Felt-tip marker
Step 1: Trace the base of the plywood
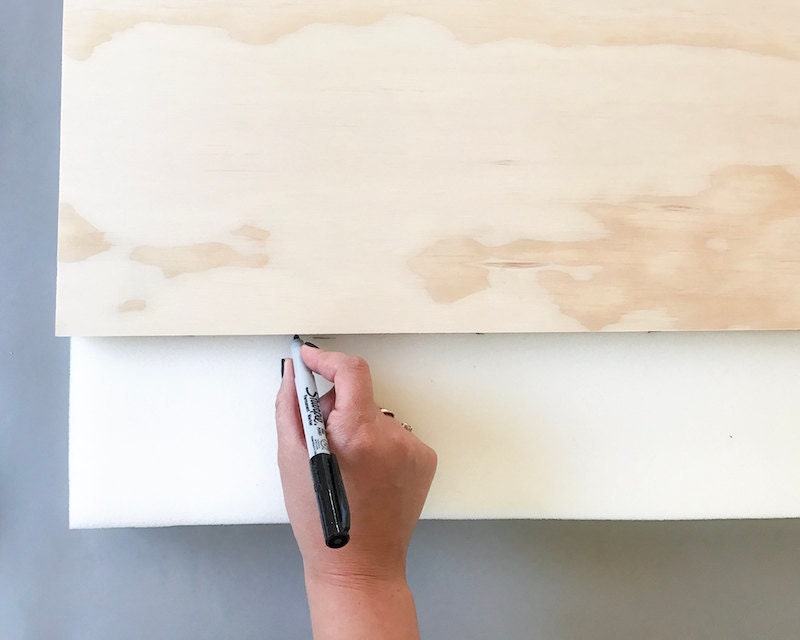
To get started, position the plywood on top of the foam and trace its outline with a marker.
Step 2: Cut the foam
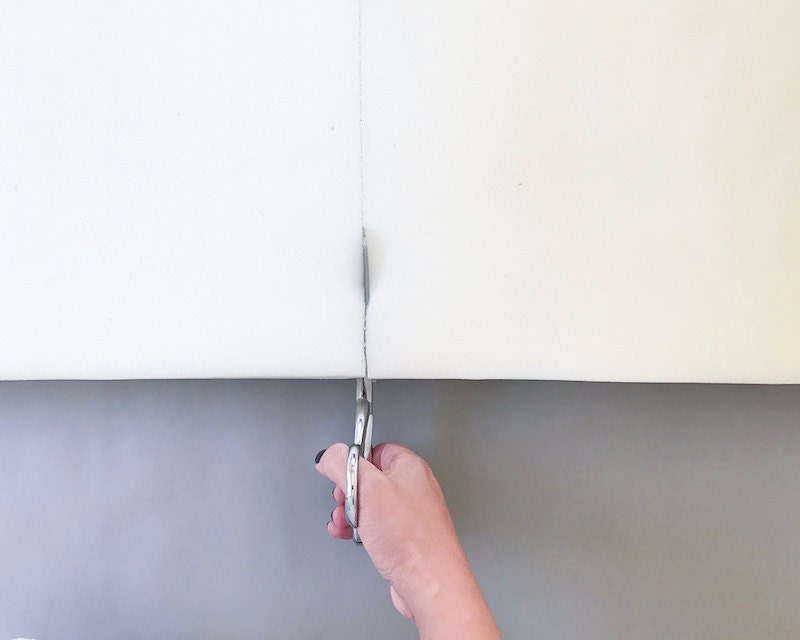
Cut the foam along the line with a pair of fabric shears.
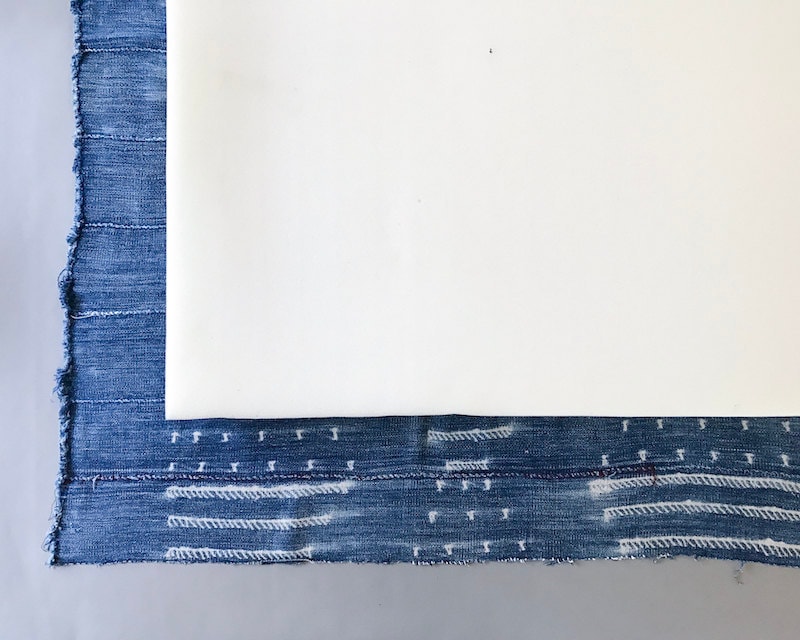
Step 3: Measure and cut the fabric for your bench
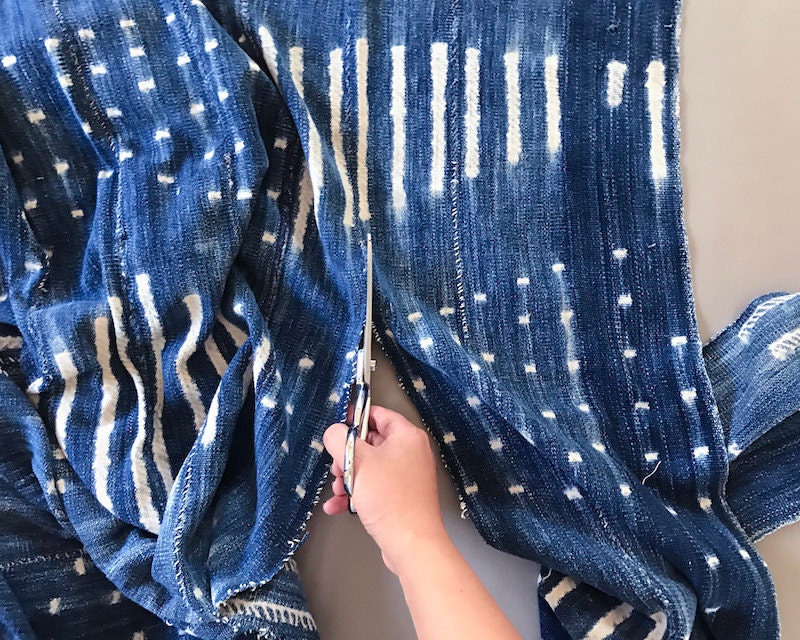
Center the cut foam over the fabric. Use a ruler and a fabric marking pencil to mark off a rectangle of fabric that is five inches wider than the foam on each side. Cut the fabric along the lines you’ve drawn.
Shop indigo fabrics similar to the one we used here.
Step 4: Layer the foam and fabric
Flip the fabric right side down and center the foam on top of it.
Step 5: Add the wood
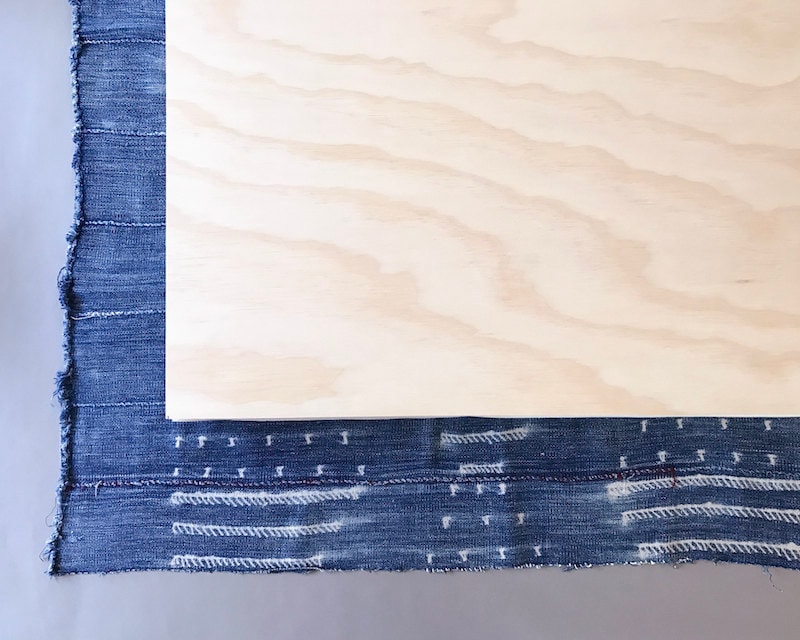
Place the plywood directly on top of the foam, making sure that all three layers of materials remain centered.
Step 6: Begin stapling your upholstered bench
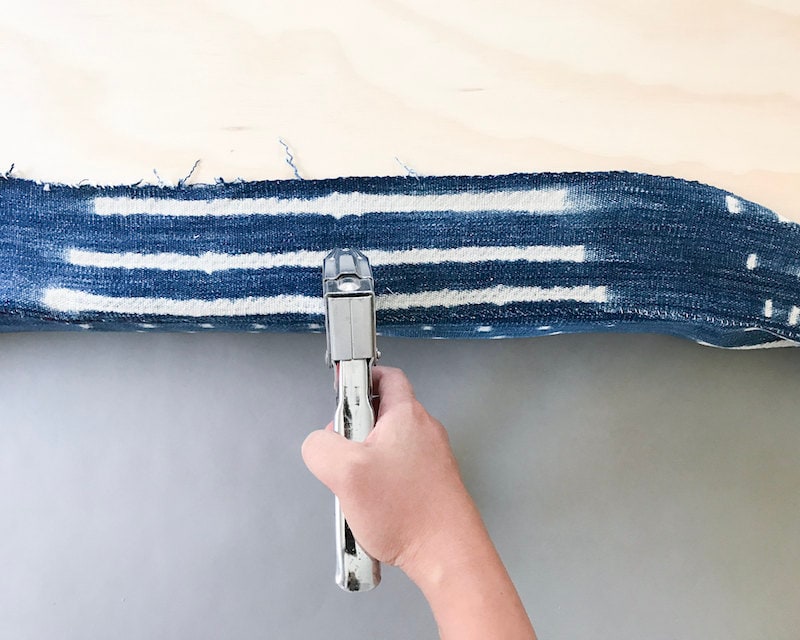
Starting at the center of one of the longer sides, fold the fabric up and over the edge of the wood so that it conceals the layer of foam. Pull the fabric taut toward the center of the wood, and staple it directly to the wood about an inch from its edge. Repeat at the center of the opposite side. Continue stapling along each longer side, working from the center to the edges and alternating between the left and right sides as you move outward. Note: Leave the last few inches of fabric at the corners unstapled—you’ll secure those sections last. Next, staple along the shorter sides of the wood, starting at the center and working toward the edges as you did before. Stop before you reach the corners.
Step 7: Staple the corners of the fabric
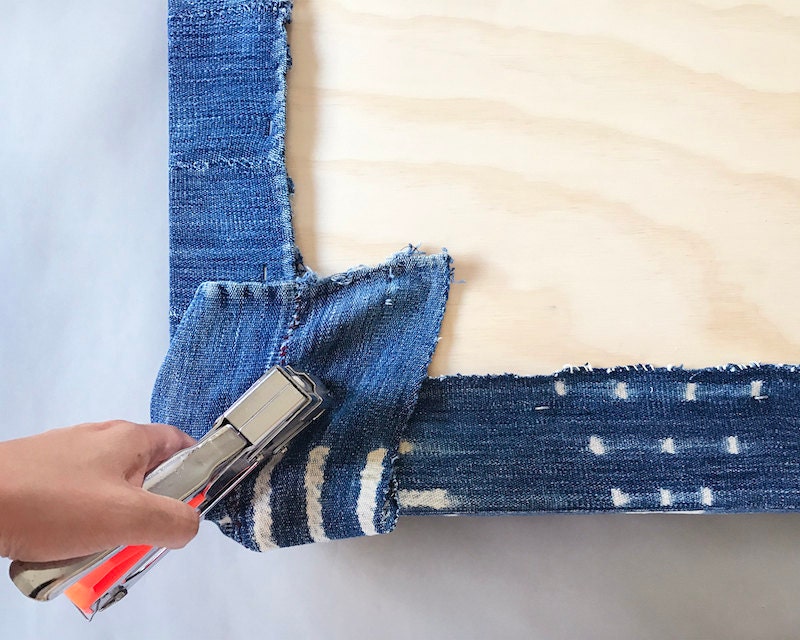
To finish a corner, pull the fabric taut toward the center of the wood, then staple it in place. Next, fold in both sides of the remaining fabric to create two even pleats. Carefully hold each pleat in place as you staple them to the wood. Repeat on all four corners, then trim away any excess fabric.
Step 8: Attach the legs of your bench
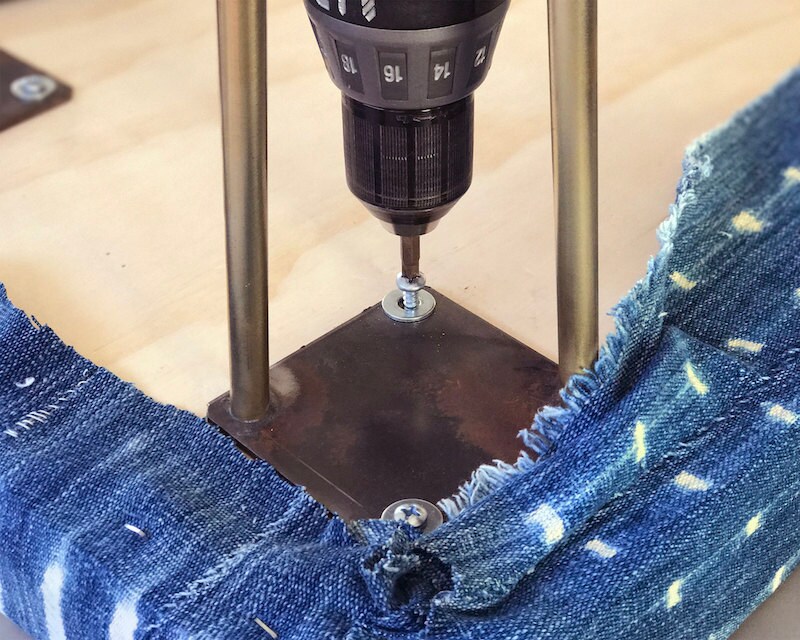
While the bench is upside down, use a ruler and pencil to measure and mark a spot two inches in from each corner to position the hairpin legs. Use the legs’ mounting hardware as a guide to mark drill holes, then drill a pilot hole with a drill bit a few sizes smaller than the wood screws you’re using (this will make driving in the wood screws easier). Position a washer between the screw and the leg base, then attach the legs with the drill and wood screws.
After you've secured all four hairpin legs in place, trim away any remaining excess fabric.
Process photos by Erica Chan Coffman.


