
Have a pile of derelict boxes hanging around? Upcycled cardboard lanterns are the perfect way to transform trash into imaginative home decor that you can enjoy all year ’round. These simple lanterns are a breeze to make and add a cozy glow to any space. Any cardboard box will do, so have fun mixing shapes and sizes to make a dynamic display.
You will need:
Large cardboard box
Box cutter or craft knife
Tissue paper
Hot glue gun
Metal straight edge
Gold spray paint
Twine
LED lights
Duck tape
Wooden dowel
Paper lantern template (Download PDF here)

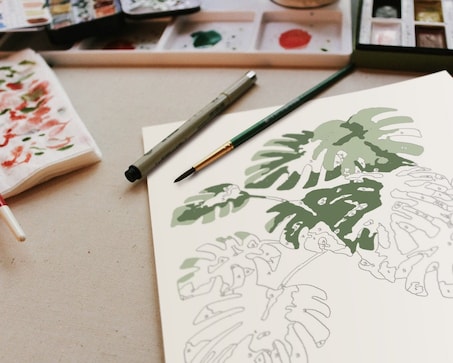
Take a cardboard box and cut so that the entire box lays flat and there’s a large surface to work with. Use the template to measure and draw each piece of the lantern on the flat cardboard. Cut out the lantern design using a box cutter or craft knife. You should have 4 of Piece A (side panels), 8 of Piece B (triangles), and 1 of Piece C (top panel).

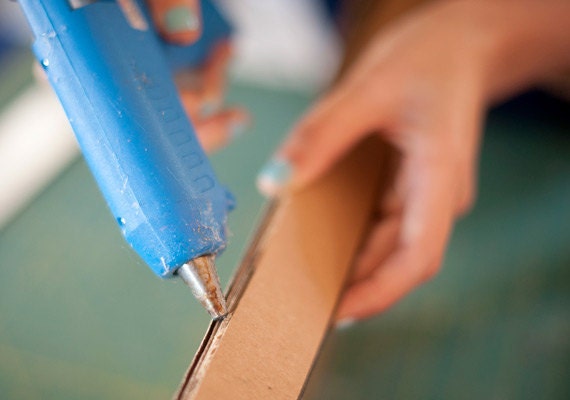
To score the sides of the box, take your craft knife and apply half pressure along the middle corners that are going to be folded to create the lantern shape. Fold the scored corners of Piece A and hot glue all the open sides together. Hot glue the triangles (Piece B) to the main body of the lantern. Cut out the top piece, but wait to attach it until the end.

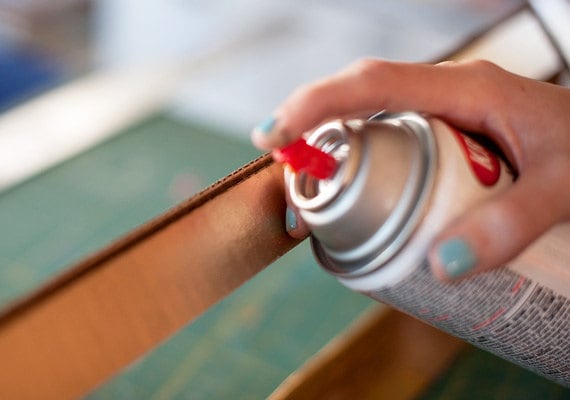
When all pieces are connected, prime the cardboard with white spray paint. Once the coat is dry, add a top coat using metallic gold spray paint. Don’t forget to paint the top piece, too!

Once the paint has dried, take the colored tissue paper of your choice and cut enough so that it will cover the window shapes of the lanterns. Reach inside the lantern and hot glue the tissue paper to the open windows.

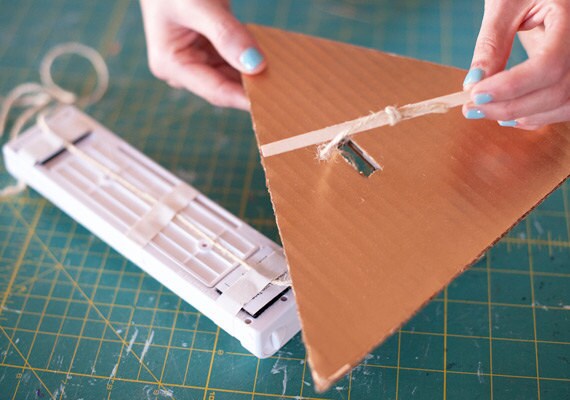
We used an under-cabinet LED strip to light our lantern, but any battery-operated LED light will work. To create the light fixture for your lantern, tape twine securely to the back of the LED strip, then hang the light in the lantern to measure how long you want your twine. Cut the twine, leaving about 1 inch extra. Pull the twine through the hole in the top piece of your lantern and tie the other end to a popsicle stick or wooden dowel.

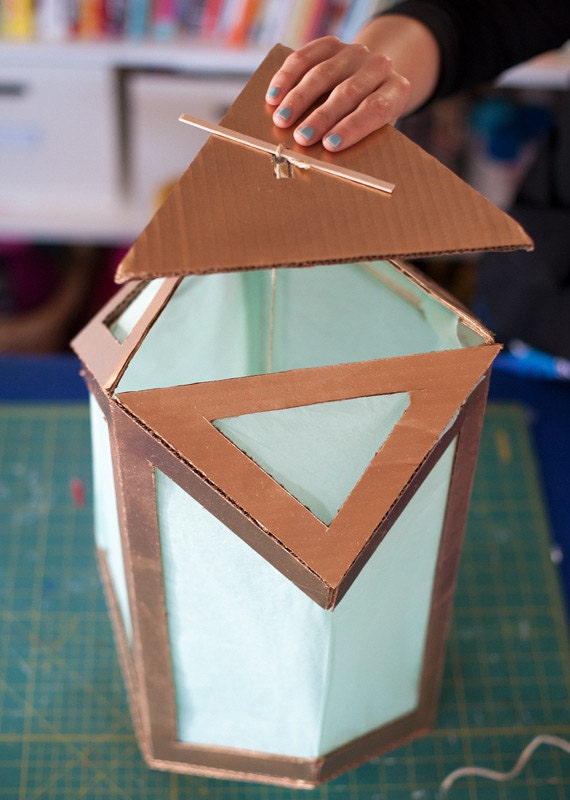
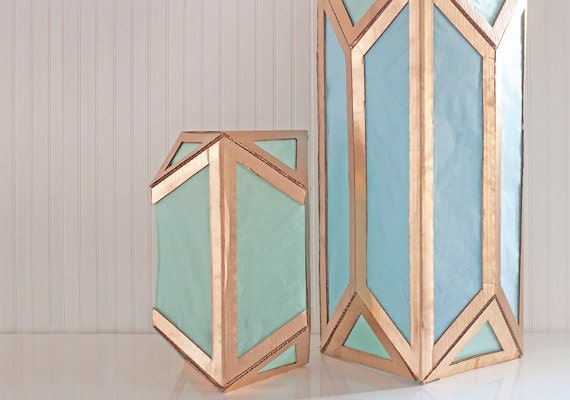
Finally, place the LED light into the lantern and secure the lid tightly on top.

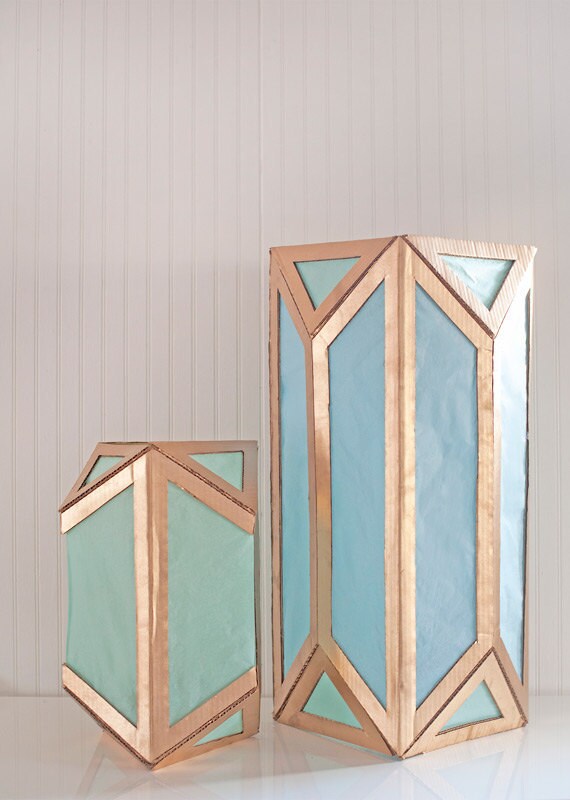
Now sit back and enjoy the beautiful glow of your handmade cardboard lantern!
All photographs by Handmade Charlotte.
101 comments
lemonlizdesigns from lemonlizdesigns said 6 years ago
Looks like a fun stormy day project :-)
Vintage White Whale from VintageWhiteWhale said 6 years ago
Adore! This would be wonderful lighting for the powder room that is dark in the corner! off to make these!! LOVE! thank you, so much for sharing this fun project!
Cindy from SweetStillwater said 6 years ago
I enjoy the how-to blogs. Great for learning techniques to apply to different projects.
Mary Jo and Rachael from SouvenirAndSalvage said 6 years ago
What a wonderful reuse of materials! Very inventive project. Congrats on the feature DIY article. Your blog is very inspiring too!
Stephanie White from STEOHANE said 6 years ago
These are awesome! They will look great in my non-functions fireplace.
LivingVintage from LivingVintage said 6 years ago
Wonderful idea! Clever.
Shelley Robillard from ThisThatAndChristmas said 6 years ago
Well those are beautiful. Thanks for sharing.
ArtelierEcojwelry santos from ArtelierEcojwelry said 6 years ago
What a brilliant creation! Thank you for sharing your creativity.
Asma from AsmaOriginal said 6 years ago
Love the idea! and the outcome is stunning!
Maude from BitsandBarley said 6 years ago
Such a cute idea! Must make one soon :)
Liana from WildRoseAndSparrow said 6 years ago
I love the geometric look of these lanterns. :) So modern and cool! It reminds me of I.M. Pei's glass pyramid in the interior court of the Louvre! It's a great, trendy way to refresh and reinvent something that would otherwise be thrown out in the recycling bin.
Kate Towers from KTFineArtPrints said 6 years ago
Love
Teresa from ForestMeetsSea said 6 years ago
Its amazing what you can create with things easily found around your home. I love how you could adapt this idea and create a lantern to suit any style.
Mia Blaz from MiaBlazdesign said 6 years ago
Lovely! I´ll try to make my own!
Ariel from Hairfetti said 6 years ago
Really pretty! These caught my eye right away in margin of my activity page- love the geometric shape (and aqua, because it is hard not to love aqua, right?)
Aga from AgasJourney said 6 years ago
interesting design. Thank you for sharing!
Christen Boyd from ShopGreyweather said 6 years ago
Super cute! You could also add seam binding tape on the edges for even more polish. I may have to try these :)
Kashuen Collectibles from Kashuen said 6 years ago
It looks like a very fun project. Thanks for sharing.
Natalia Snemis from expressyourself said 6 years ago
Awesome design!
Paula Mucha from ilPiccoloGiardino said 6 years ago
These are so cool! Would look great on a deck in the summer or hanging from trees for a garden party, very festive idea!
SimplyBlingBiz from ShopSimplyBling said 6 years ago
My kiddos would love to make these!
Elizabeth Knaus from FreshRetroGallery said 6 years ago
I’ve built play houses out of refrigerator boxes and painted flower boxes and hung curtains in them. What fun to build LED lanterns by upcycling such simple, common material!
nikki from NikkisFunFinds said 6 years ago
Amazing! They look lovely.
Andrea Walser from BellissimiOrnamenti said 6 years ago
Very cool! I may have to try this out. Thank you.
Rosemarie Sparrow Randolph from SparrowsNestGallaria said 6 years ago
Love the idea. Will definitely have to try one. I'm thinking too of using at a campsite, could have as walkway path lights, a table centerpiece, [pretty daylight and nite], camper lights [using a string of lights in small lanterns], now you've got my energies flowing and I'm not at home!
StringBeadsGarden from StringBeadsGarden said 6 years ago
I am going to make some of these! Thank you :)
ThePattypanShop from ThePattypanShop said 6 years ago
Cool!!! Great project!!!
Caroline Barbosa from OldSoulVintageLtd said 6 years ago
Really cool diy!
Narwhal Needlework from NarwhalNeedlework said 6 years ago
Such a cool idea!
Megan from MegansMenagerie said 6 years ago
Neat project!!!
Sharon Henry from PlumroseLane said 6 years ago
Love, love, love this idea!! Thanks for sharing~♥
Rebecca Shelly from RebeccaShellyArt said 6 years ago
These are lovely! I love using unlikely materials to transform them into completely different items!
Kalisa L. from MuchandQuick said 6 years ago
Oh wow! I have a room that these would be PERFECT in! Love the geometric shape and how customizable you can make the color schemes.
ACR from WoodsyWools said 6 years ago
Love this project :-)
ACR from IntoTheBluePaintShop said 6 years ago
These are really pretty !
Fishcouple from fishcouple said 6 years ago
Lovely! Thanks for sharing! :)
little Lia from LittleLiaGraphic said 6 years ago
Very lovely! I will try to make one :D
Charles Wang from Yideceramic said 6 years ago
very cool!will try it
A. G. from CollectorsatticB said 6 years ago
Too kewl. I'll try this. thanx 4 posting. come by my Etsy site CollectorsatticB
Lana Manis from HoneysuckleLane said 6 years ago
What a fun idea!
Jason and Andie from andiespecialtysweets said 6 years ago
Rachel, these are the most gorgeous paper crafted lanterns we have ever seen. Thanks so much for the tutorial! :)
Paper Picker from PaperPicker said 6 years ago
Beautiful. I love the metallic and pastel color combo.
Faith Designs from Kamaileuilani said 6 years ago
Love! #UpcycleSteward
Fertile Gems from FertileGems said 6 years ago
Love this idea!
Céline Lafargue from LejardindeCeline said 6 years ago
Very cute and modern ! I love this project ! :o)
Zoui from XZOUIX said 6 years ago
really cool, and it looks easy to make! :)
Taylor from TaylorsworldHandmade said 6 years ago
Really interesting project :)
Jess Masters from RefinedRock said 6 years ago
Love it!!
Laura ✿ from BotanicalBead said 6 years ago
Very cool! Thanks so much!
Stephanie Maslow Blackman from metalicious said 6 years ago
Gorgeous, I can't wait to make one! Thanks for the template. :-)
Anna Kikute from fantasygarden said 6 years ago
Love this p
ZionShore from ZionShore said 6 years ago
They are just so beautiful!
Nami from Namigurumi said 6 years ago
Beautiful lanterns!
Sarah from SunsetStreet said 6 years ago
Fab idea!
Jennifer Wheatley from DestinysTreasures said 6 years ago
The lantern is pretty. I love it. Will make one soon for my living room. Thank you.
VintageFutures said 6 years ago
I love it..thanks so much for sharimg with us.
Marlous P from Lousje said 6 years ago
So cool!!!
Amber Hickey from BesosjewelrybyAmber said 6 years ago
So beautiful! I love that it can be made with mostly recycled materials too!
fineartstoneware from fineartstoneware said 6 years ago
Thanks for sharing!
Ploy from SphynxLeatherworks said 6 years ago
Awesome! These are great ideas!
Katrina Liu from MyBookArt said 6 years ago
Very nice! A very good use of colored tissue paper! Never thought about that.
Matejka Max from NattyMatty said 6 years ago
Interesting!
BEATRIZ DE ESCALA from DeEscalaArt said 6 years ago
Wow! Great idea.
Jeanne S from EclecticSageVintage said 6 years ago
Beautiful jewel tones. It reminds me of the Emerald City in The Wizard of Oz.
Natalia from KMalinkaVintage said 6 years ago
Very nice design!
RoyalCrownHandmade from RoyalCrownHandmade said 6 years ago
They look great! Nice! Congrats on the feature !
Susan Gehrig from LoveDecoLanterns said 6 years ago
Wish I had thought of the design! I love it! So stylish and elegant. Clever you.
Marie from HideFruitsANDveg said 6 years ago
These are great!
aressa from OriginalBridalHanger said 6 years ago
Nice tutorial....They look awesome!
B.K. Scriblz from ThisnThatCraftSupply said 6 years ago
Very easy to follow tutorial. We're going to try some this weekend. Thanks!
Mariah Green from MariahFotografia said 6 years ago
Just be sure not to knock one over! I'd imagine they're highly flammable. Beautiful though.
Debra Presutto from speakloud said 6 years ago
What an awesome idea!
Bruce and Jon Maria Taylor from VintageTypes said 6 years ago
Gorgeous!
Nathanael La Framboise from BrilliantDesignsShop said 6 years ago
WoW! Thats really cool! =)
Marlena Burger from MarlenasArtSilks said 6 years ago
So much nicer than I had imagined. Nice job and very cool idea!
Ana Pereira from Atocks said 6 years ago
Cool. Nice project, and I can find other projects were use the idea.
Alina Kaploon from KleverHandMade said 6 years ago
cool idea =))
Julia K Walton from FireHorseVintageHQ said 6 years ago
Lovely project and great, creative way to re-use old boxes! :)
Kathy and Karen from TheSalvagedBoutique said 6 years ago
These look great! For Christmas, we upcycled cardboard boxes, a wooden dowel rod and a vintage glass insulator to create a table top Christmas tree. The ideas for recycling cardboard boxes can really be endless.
Paula from TheOldSouthVintage said 6 years ago
Beautiful!
Trang Dai from TDNCreations said 6 years ago
Wow! That's really nice! Great idea!
kristen said 6 years ago
Ohh, I love this so much! Can I ask where you found such beautiful colors of tissue paper?
Cristy Ramos from ArtisanBathandBody said 6 years ago
Beautiful!
jenny present from jpstyle said 6 years ago
So simply beautiful!
Katie Anne from MiddleCoast said 6 years ago
Bookmark this idea for later! ;)
Andrea Gilletti from KillinMeSoftly said 6 years ago
so cool! these are amazing!
julz from julzcraftsupplies said 6 years ago
lovely idea - will it work without a hot glue gun?
joanne smith from BizarreBazaare said 6 years ago
duct tape not duck tape
Marcie Adams - Commercial Use Digital Graphics and Printable Art from HAUTEGRAPHIQUE said 6 years ago
Love this project!
Debbie Roberson-Brown from TheBrassHussy said 6 years ago
What an awesome project! This weekend my son had to do a project for his Greek Mythology class. We adapted this idea to create a pyramid that fit over a lantern we had. We cut out cardboard, painted it, and added colored tissue paper. Perfect!
Amber from BambuEarth said 6 years ago
So cute! Looks like fun, and I love the colors ♥︎♥︎♥︎
TropicalGarden from TropicalGarden said 6 years ago
Great idea, amazing cardboard lantern! Thanks for sharing!
Sabine Miner from StudioSabine said 6 years ago
certainly creative - thank you!
Stephani from SparklngCreations said 6 years ago
Love this tutorial! these lanterns would look great at a party, especially an outdoor one
GreenChickenDesigns from GreenChickenDesigns said 6 years ago
Very cool! We're really into upcycled products and ideas to inspire us. So far we just have upcycled fabric. Great Idea! Thanks!
Paging Supermom from pagingsupermom said 5 years ago
Those are incredible Rachel!!
MyChouchou from MyChouChou said 5 years ago
love these lanterns! absolutely great for party center pieces! the colors are perfect for my dining room thanks for sharing!
Groucho's Stache from GrouchosMustache said 5 years ago
I broke a lamp and now I know how to make a Lantern from the remaining parts!
TheBoutiqueJewelry from ParakeetsPerch said 5 years ago
Cool! Great for recycling cardboard.
Grace Meyer from GetFestive said 5 years ago
I love it! Thanks Rachel!
Erica said 4 years ago
Love...thanks for the tutorial