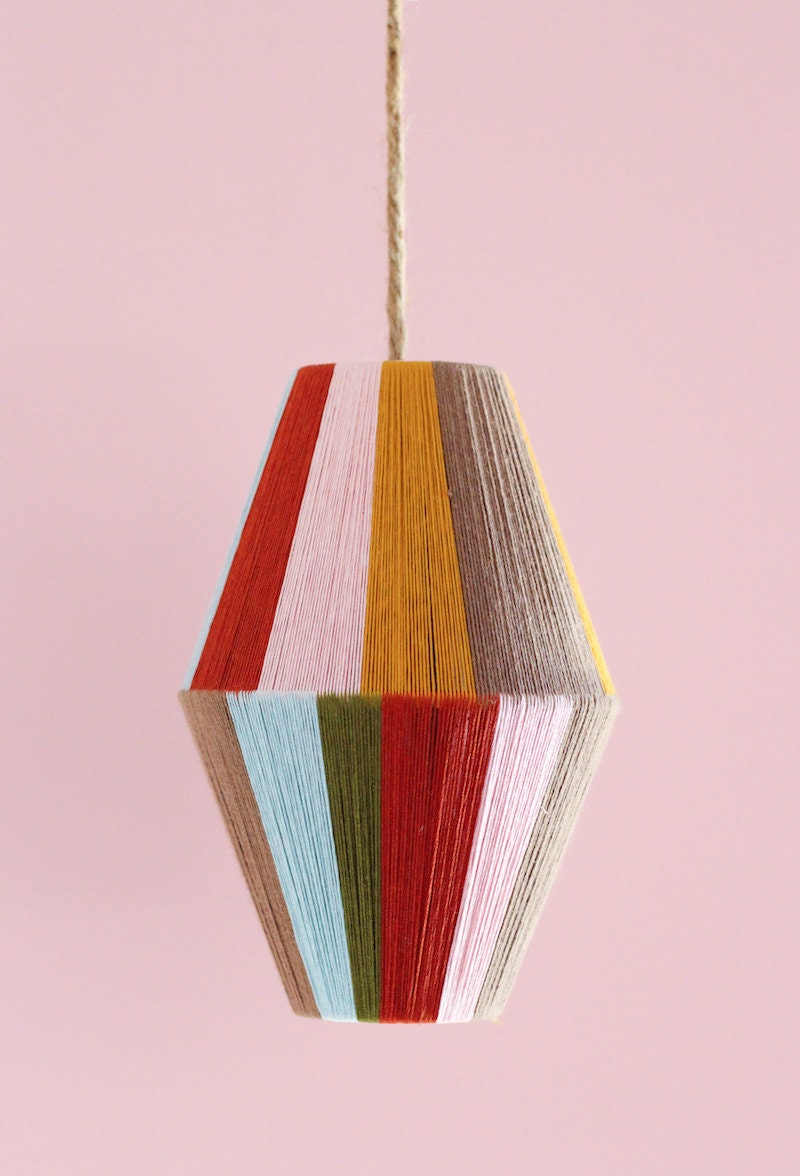
Because who cares if it's getting dark earlier when you have this adorable (and easy-to-make) pendant lamp around?
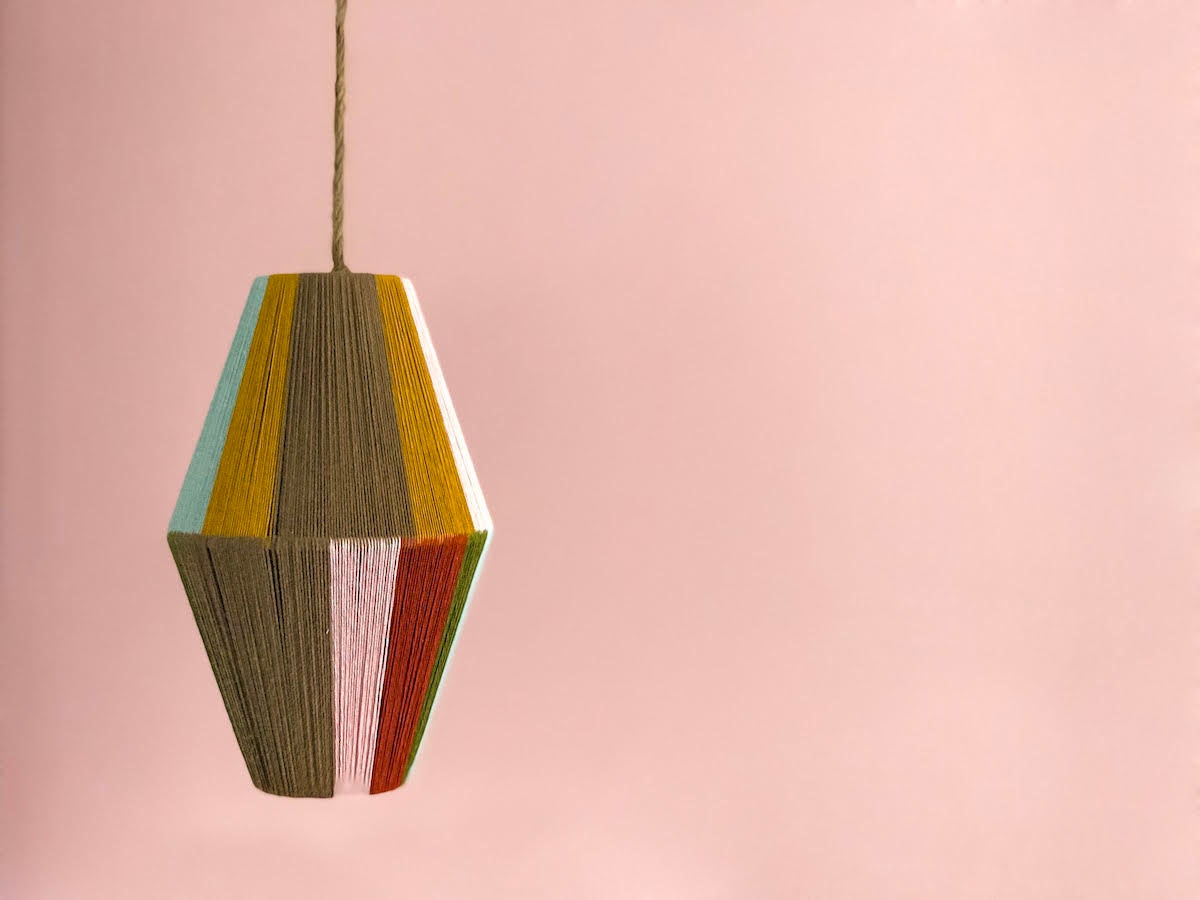
For those of us in the Northern Hemisphere, darker nights are setting in earlier and earlier. Since we haven't figured out a way to fast-forward to summer—and really, we'd never want to skip the holidays anyway—we might as well embrace it and make the most of the extra hours indoors. Just think of all you could accomplish: getting organized, experimenting with a new decor trend, or testing your DIY skills with a cool creative project. This cheerful, easy-to-make pendant lamp is the perfect cure for the dark-at-5pm blues. With just a few skeins of embroidery floss and a couple of upcycled lampshade frames, you can brighten up the corner of a room—not to mention your mood—in no time flat. Read on to get started. At a glance: Time: 3-4 hours Difficulty: Intermediate
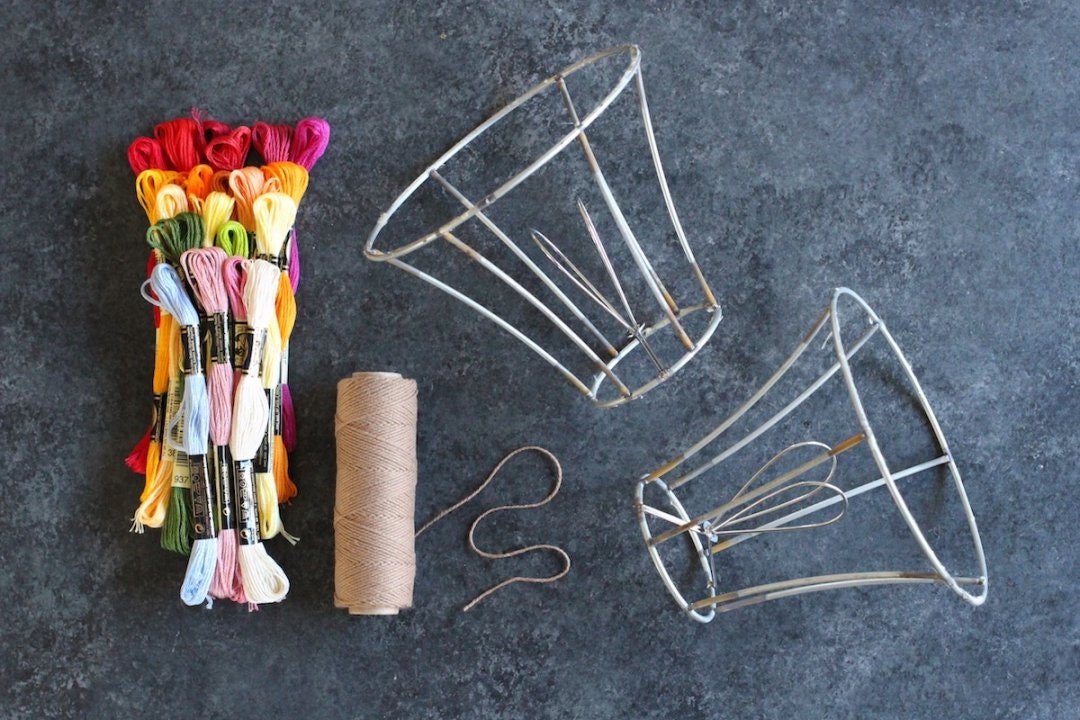 >
>- 2 wire lampshade frames of equal base diameter
- Washi tape
- Embroidery floss in the colors of your choice
- Embroidery floss bobbin
- Scissors
- Pendant lamp cord kit and bulb
Step 1: Connect lampshade frame bases
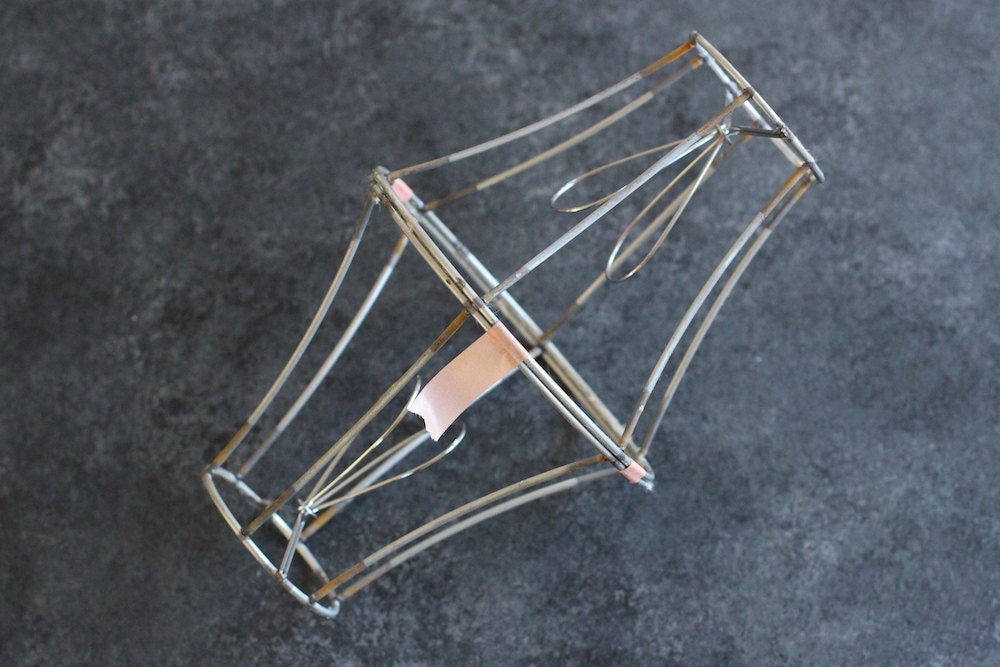
Line up the bases of two lampshade frames of equal base diameter and use washi tape to attach them in three to four places, creating a cage.
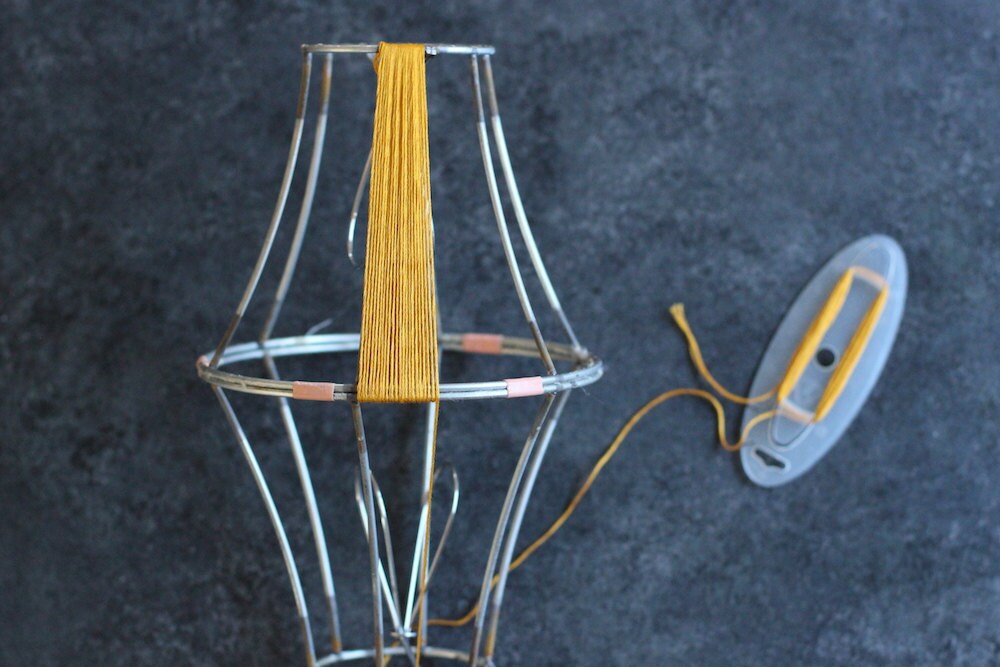
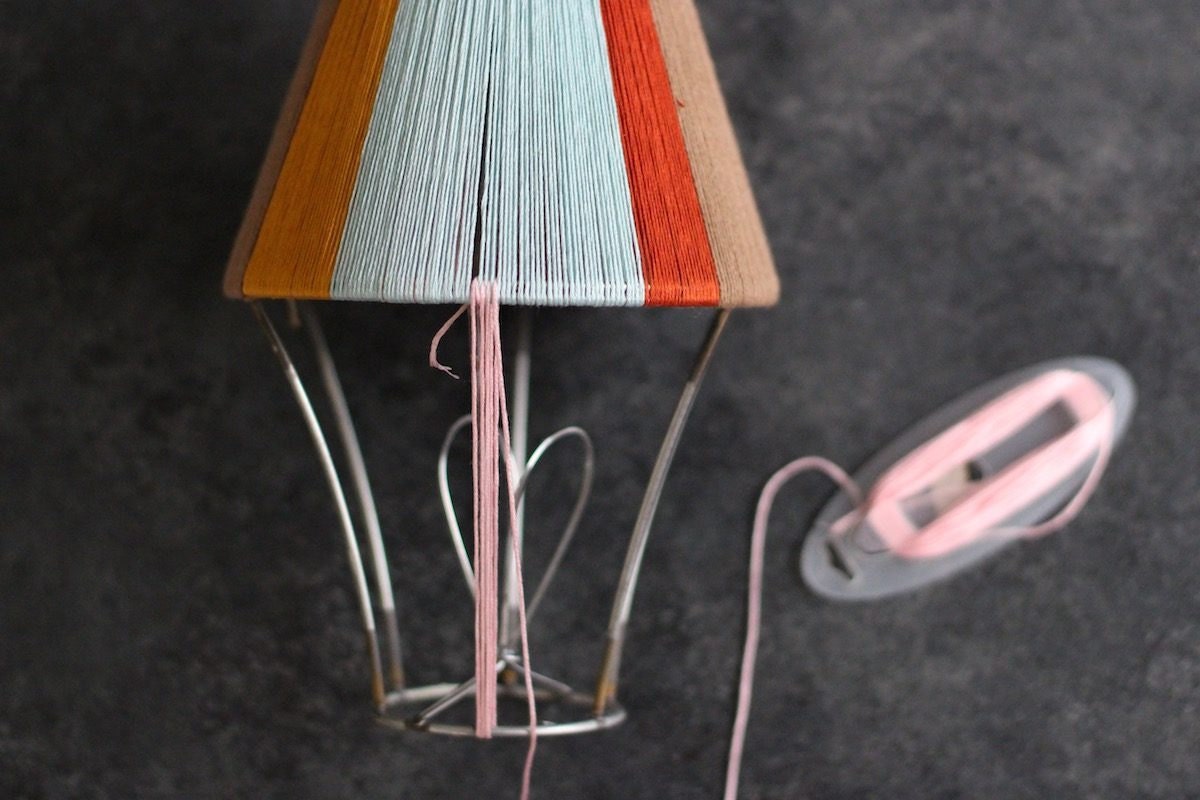
Step 2: Prep your embroidery floss
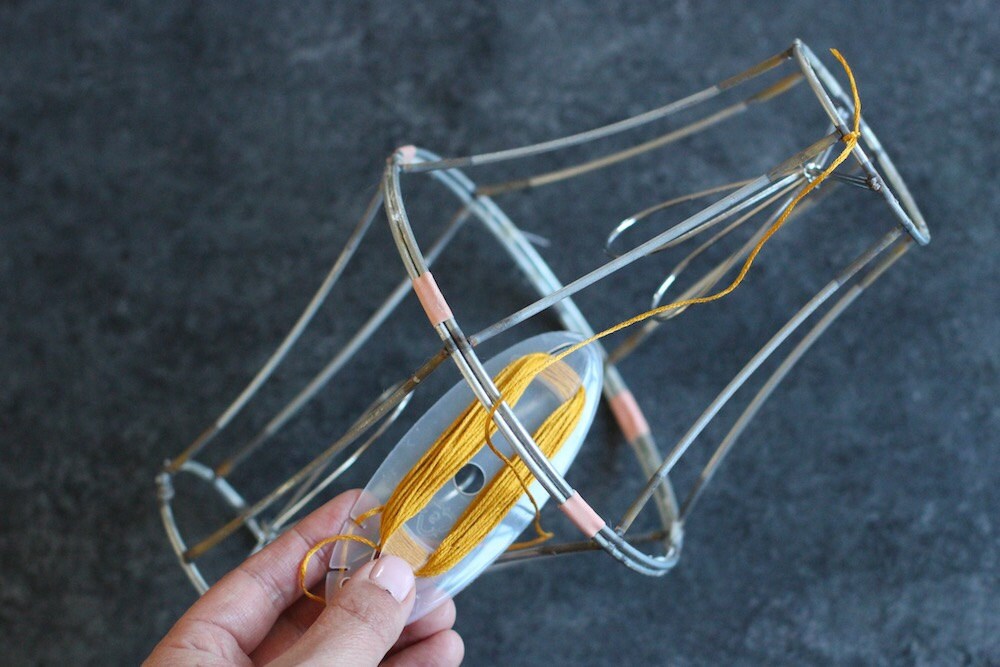
Wrap a skein of embroidery floss around a bobbin. (This will make wrapping the floss around the lampshade cage much easier.) Tie the end of the floss in a double knot at the top of the upper lampshade frame. Bring the bobbin of floss down the front of the lampshade cage, then under the connected bases, and up through the inside of the cage.
Step 3: Wrap the upper lampshade frame
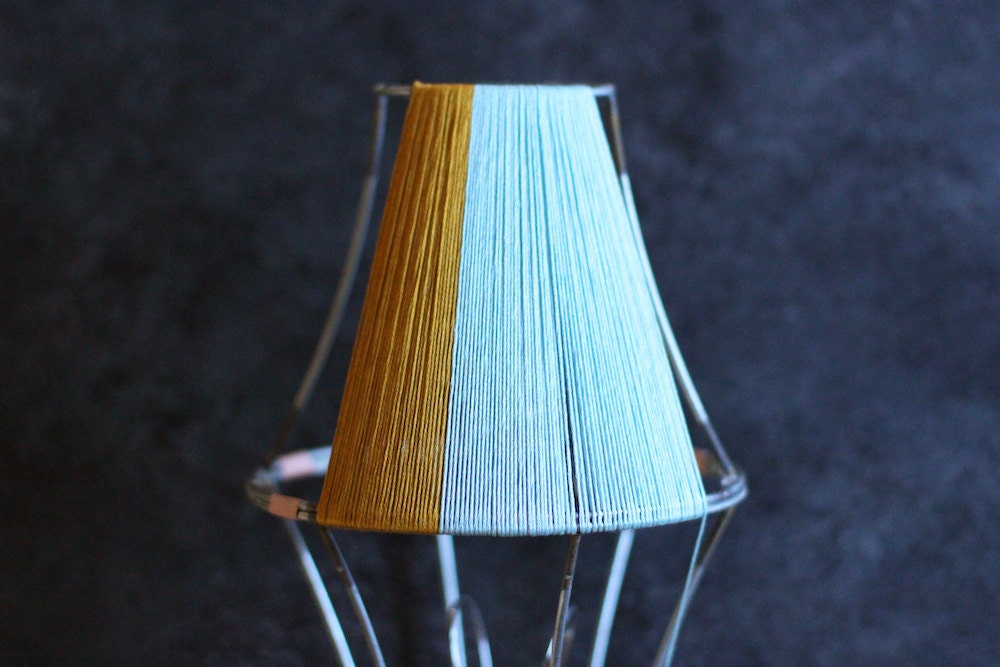
Guide the bobbin around the top of the lampshade cage and repeat the loop. Continue wrapping tightly, making your way around the cage, and using your fingers to push the floss together as you go. You’ll want the floss strands to be close together and evenly spaced. When you're ready to change colors (or your floss runs out), simply tie a new skein onto the previous skein with a double knot, making sure the knot falls on the inside of the lamp cage.
Step 4: Wrap the lower lampshade frame
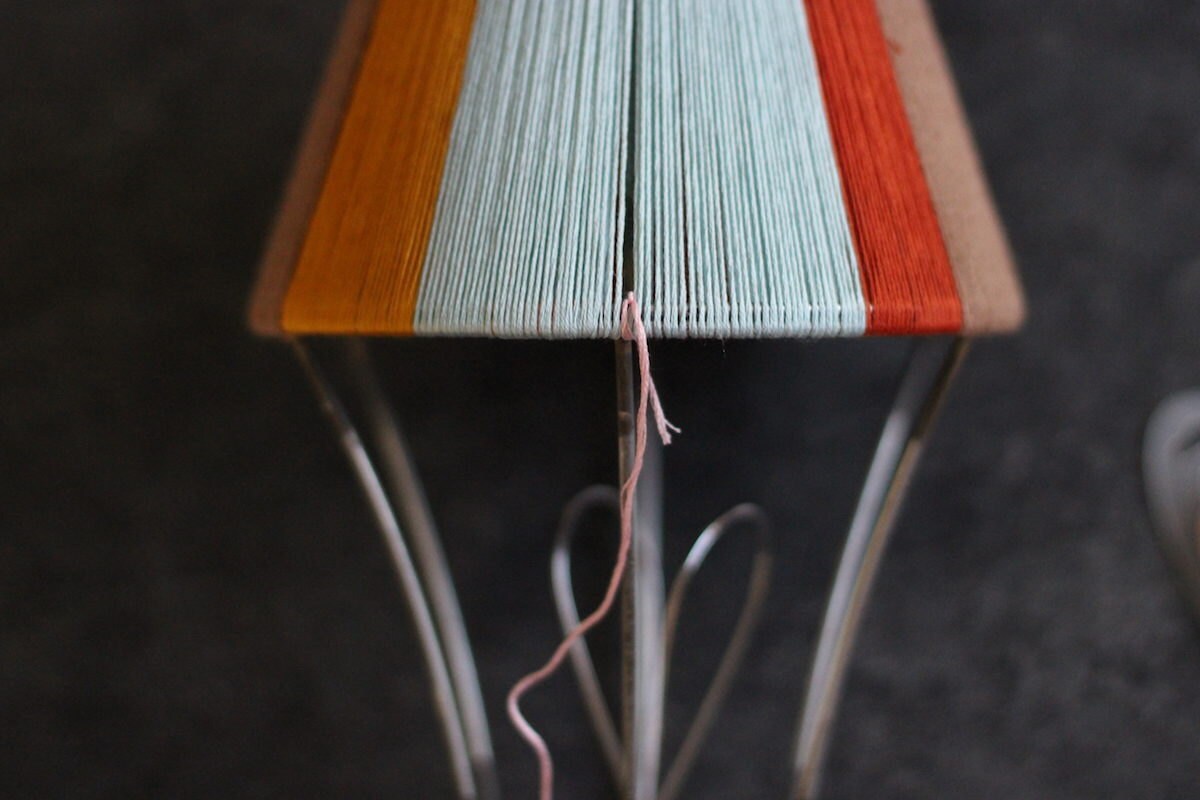
When the top half of the cage is completely wrapped, tie a new skein onto the connected frame bases.
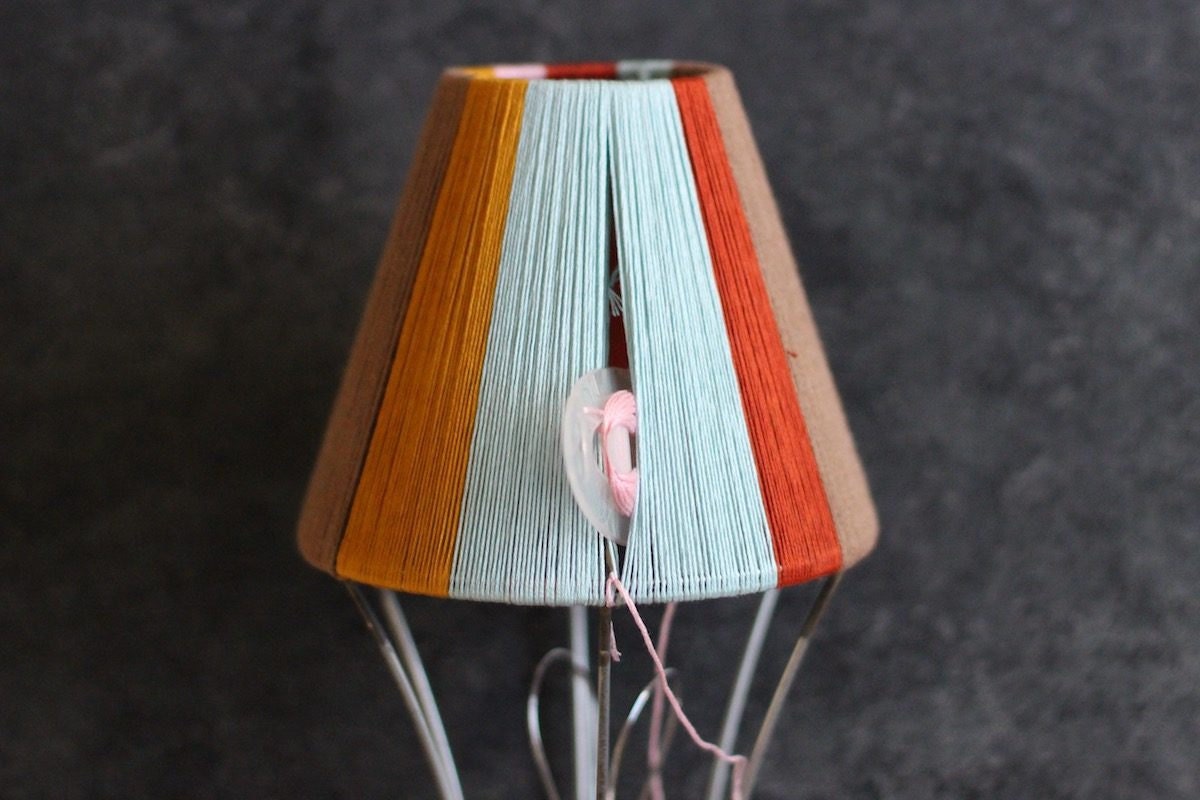
Use your bobbin to wrap the new skein around the lower frame, guiding the floss around the bottom of the cage, up into the middle, and between two pieces of floss on the upper frame. Continue wrapping, bringing the floss through the next two pieces of floss on the upper frame each time.
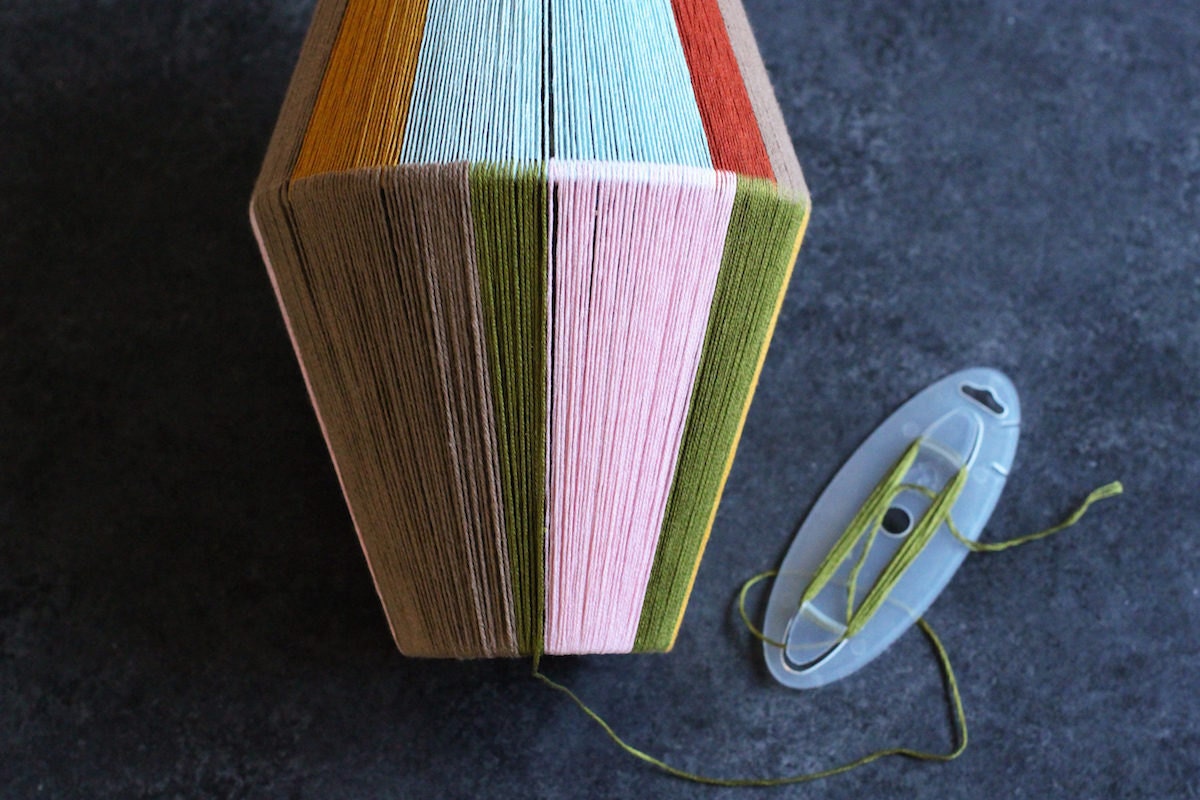
Once you’ve made your way completely around the bottom frame, simply double knot the floss around the bottom of the cage, and cut off any excess.
Step 5: Add a lightbulb and display
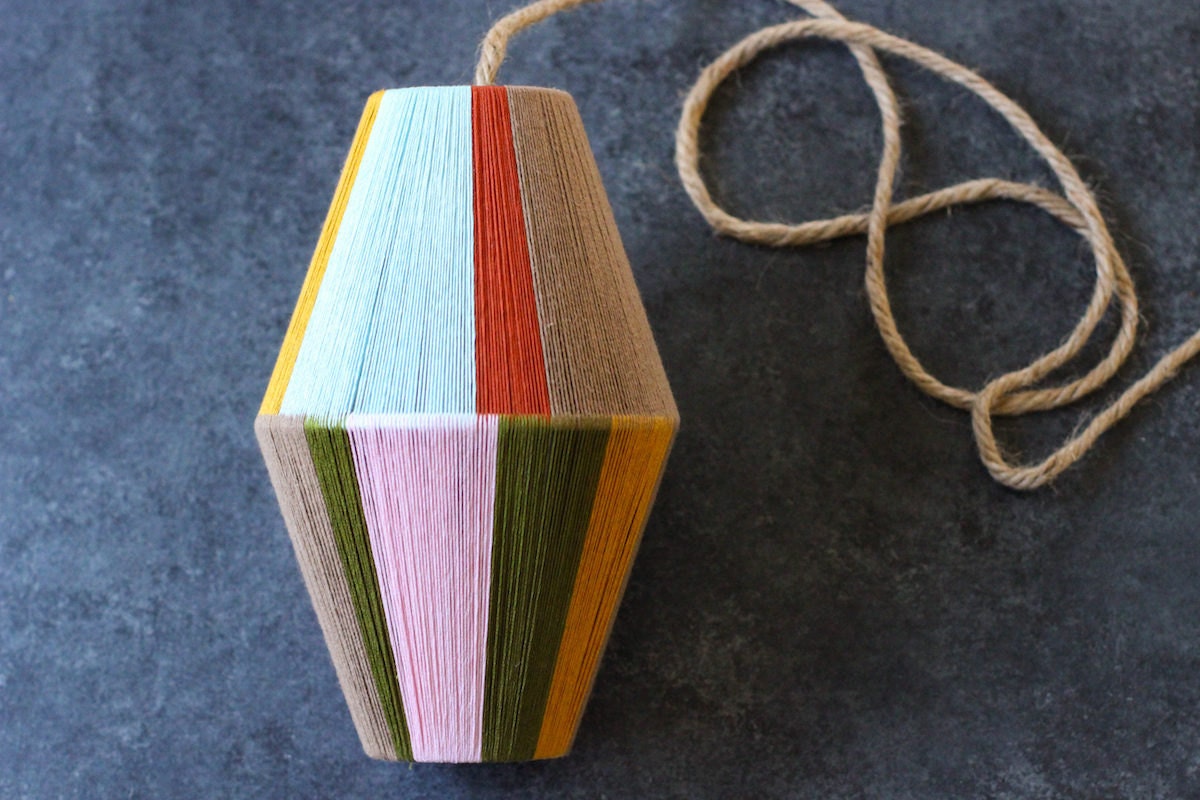
When the lampshade cage is completely wrapped, you're ready to add a lightbulb and display. If the upper lampshade is designed for use with a pendant fixture, just slide the cord through the fixture and hang. If you're using a different shade style, use zip ties to secure the cord to the frame so that the bulb hangs in the center of the lamp, at its widest point.
Photographs courtesy of Erica Chan Coffman.


