Dunking hard-boiled eggs in dye isn't the only way to get your Easter crafts fix. This no-sew felt bunny basket is as cute—and easy—as can be.

If you ask me, Easter baskets are so much better than Christmas stockings, Valentine boxes, or Halloween trick-or-treat bags. First, you've got the colors. When it comes to Easter, all the pastels are fair game—pinks, greens, purples—and the light, bright hues help to stir us from our dreary winter woes. Next, and probably most important, is the cute factor: Everything gets more adorable when you put a bunny on it. This no-sew felt Easter basket is super easy to make, and you can customize its size with practically zero effort—simply adjust the diameter of the base to scale it up or down. Here's what you’ll need:
- 18-by-18-inch piece of gray wool felt
- 12-inch round object to trace (I used a cardboard cake circle)
- Pencil
- Ruler
- 4-inch round object to trace (I used a glass bowl)
- Thin cardboard
- 2-by-18-inch piece of pink wool felt
- Scissors
- Hot-glue gun
- Black enamel dot stickers
- White embroidery floss
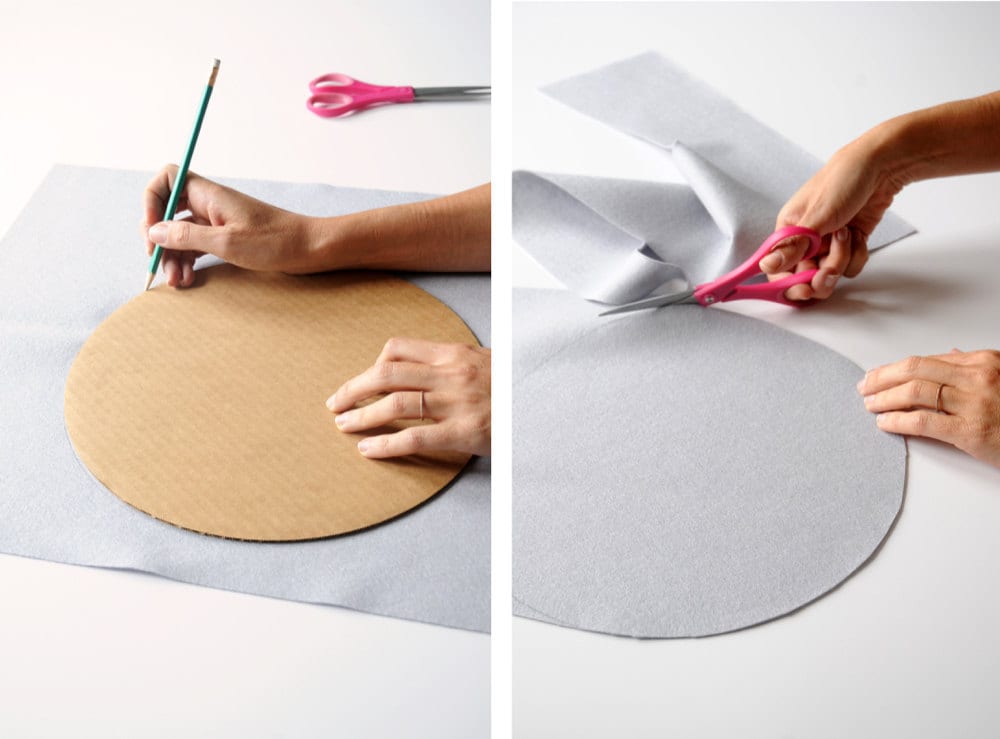
Step 1: Position a 12-inch round object or template near one corner of the gray felt and trace. Cut out the circle and save the felt scraps.
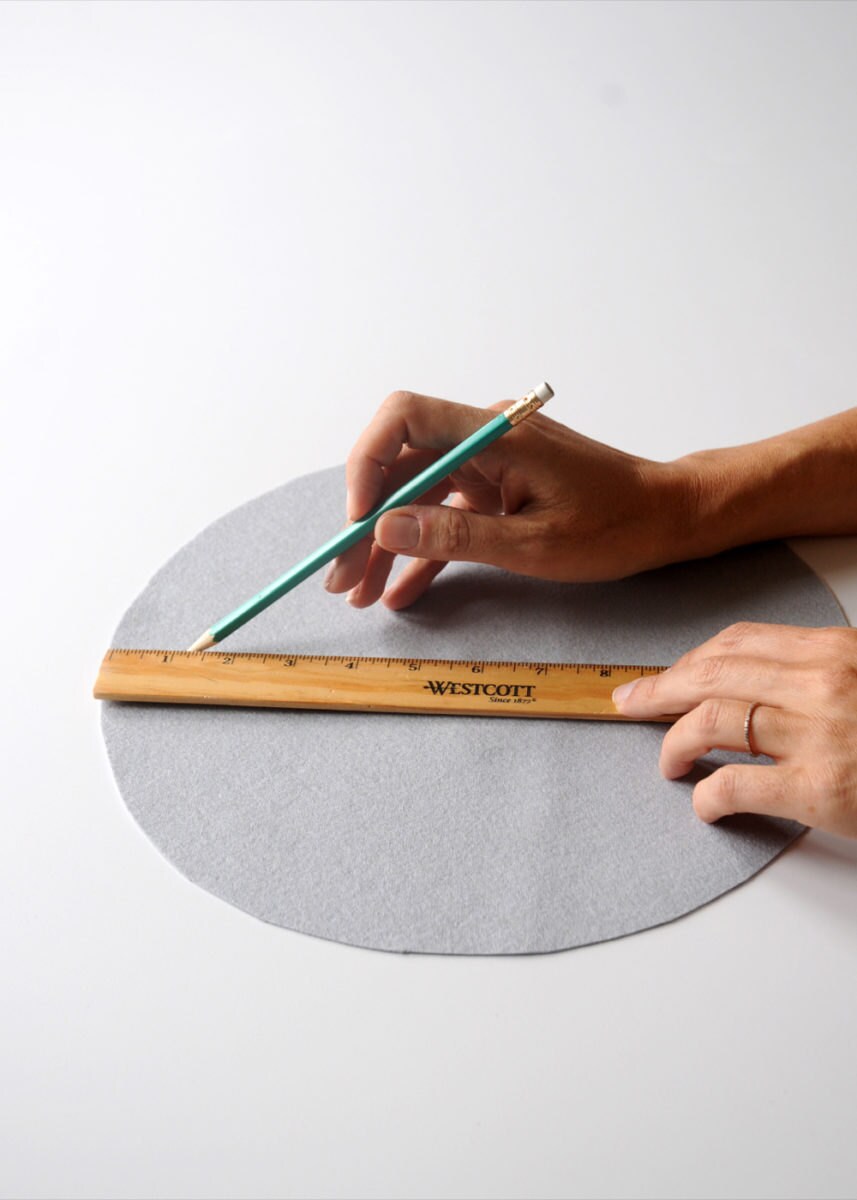
Step 2: Use a ruler and a pencil to draw a line across the center of the circle. Picture the way a pie or a pizza is sliced, then draw two more lines across the felt to divide the circle into six equally-sized wedge shapes. Set the felt circle aside.
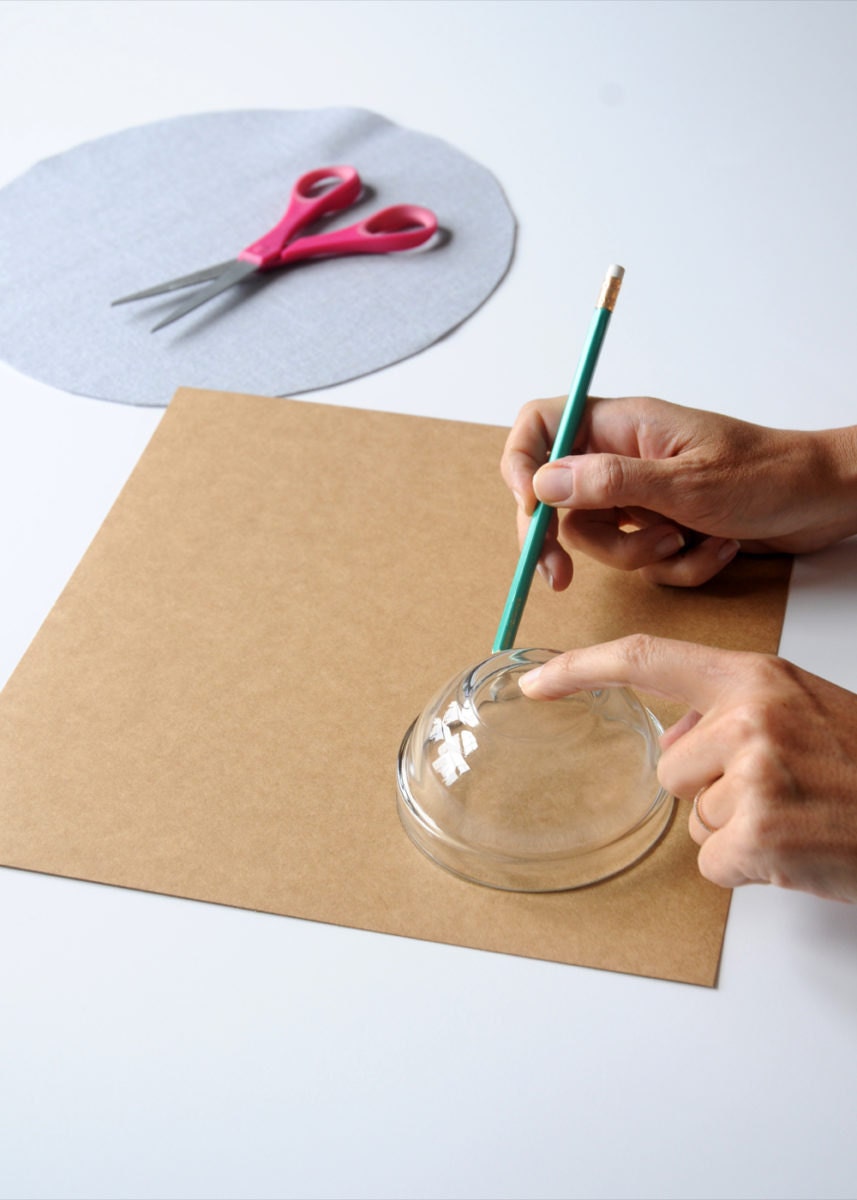
Step 3: Place a 4-inch bowl onto the thin cardboard and trace. Cut out the circle.
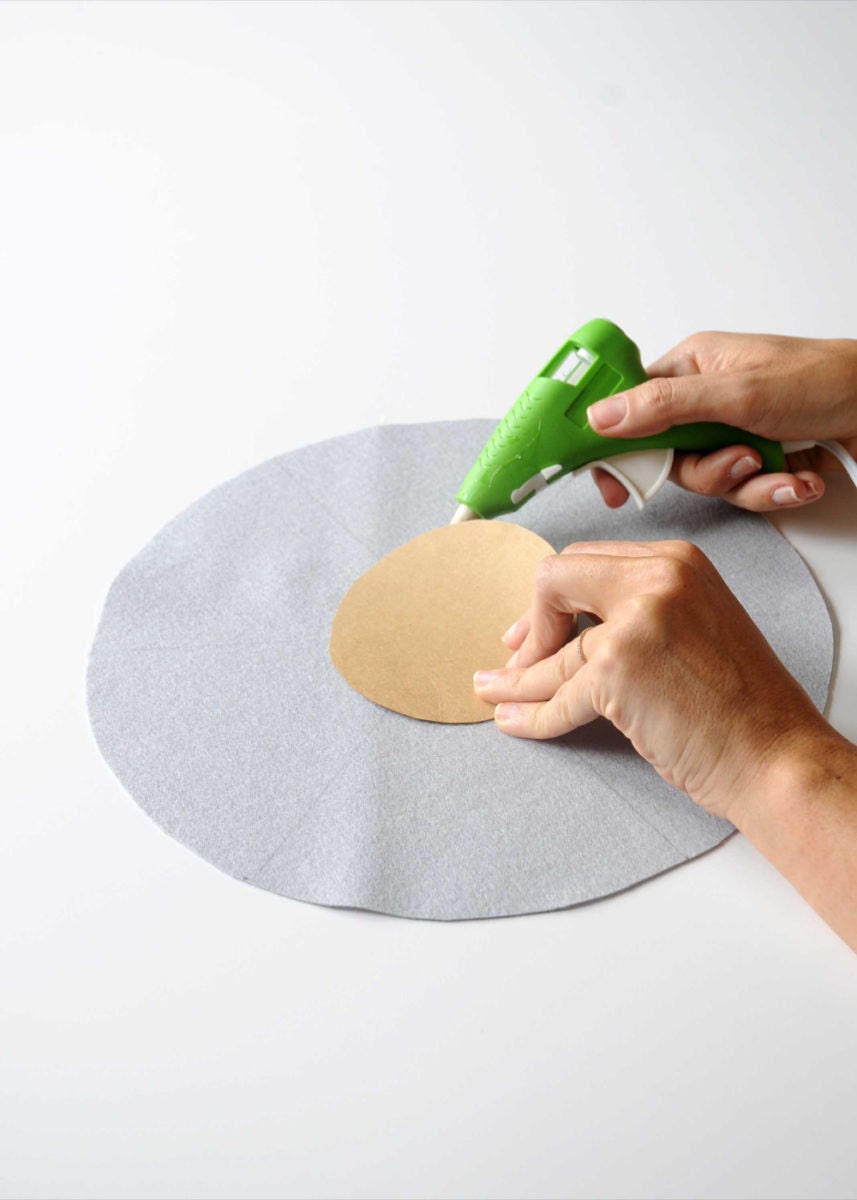
Step 4: Hot glue the small cardboard circle to the center of the gray felt circle.
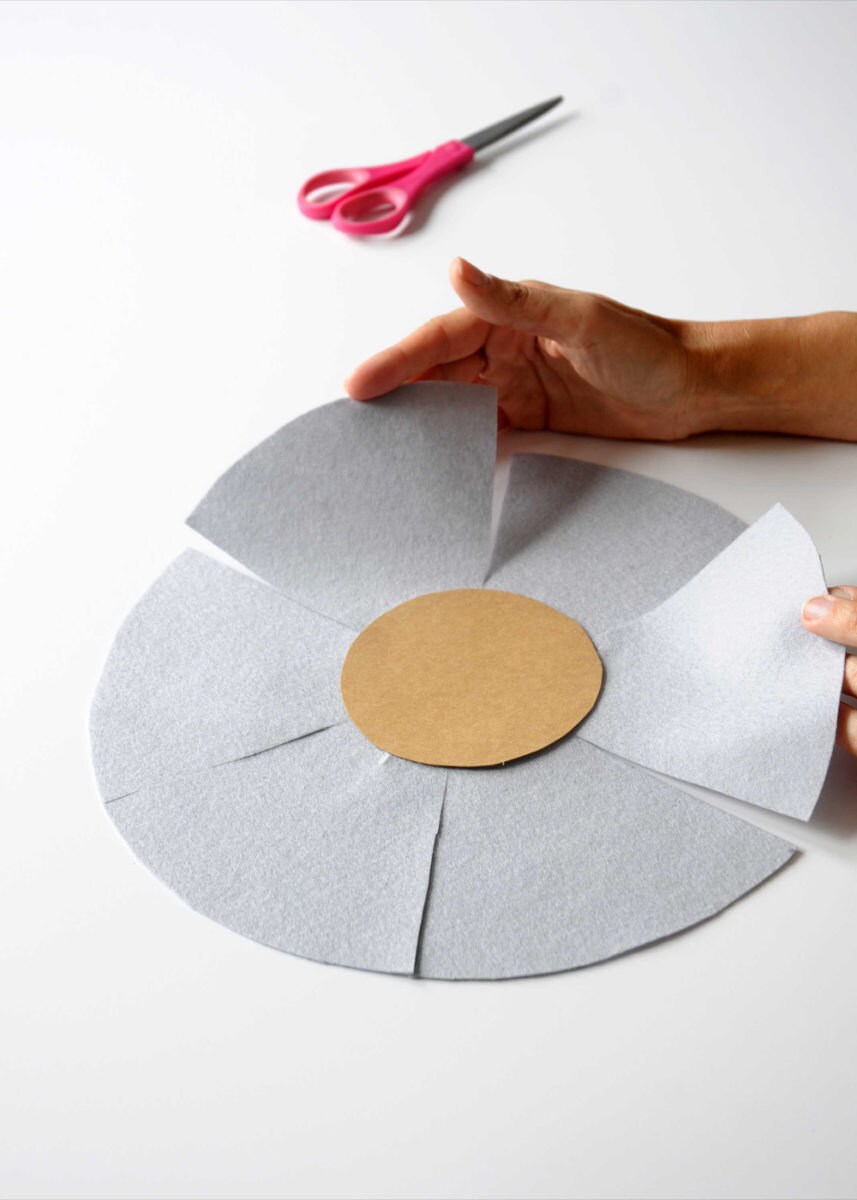
Step 5: Cut along the six pencil lines toward the cardboard circle, stopping at its edge.
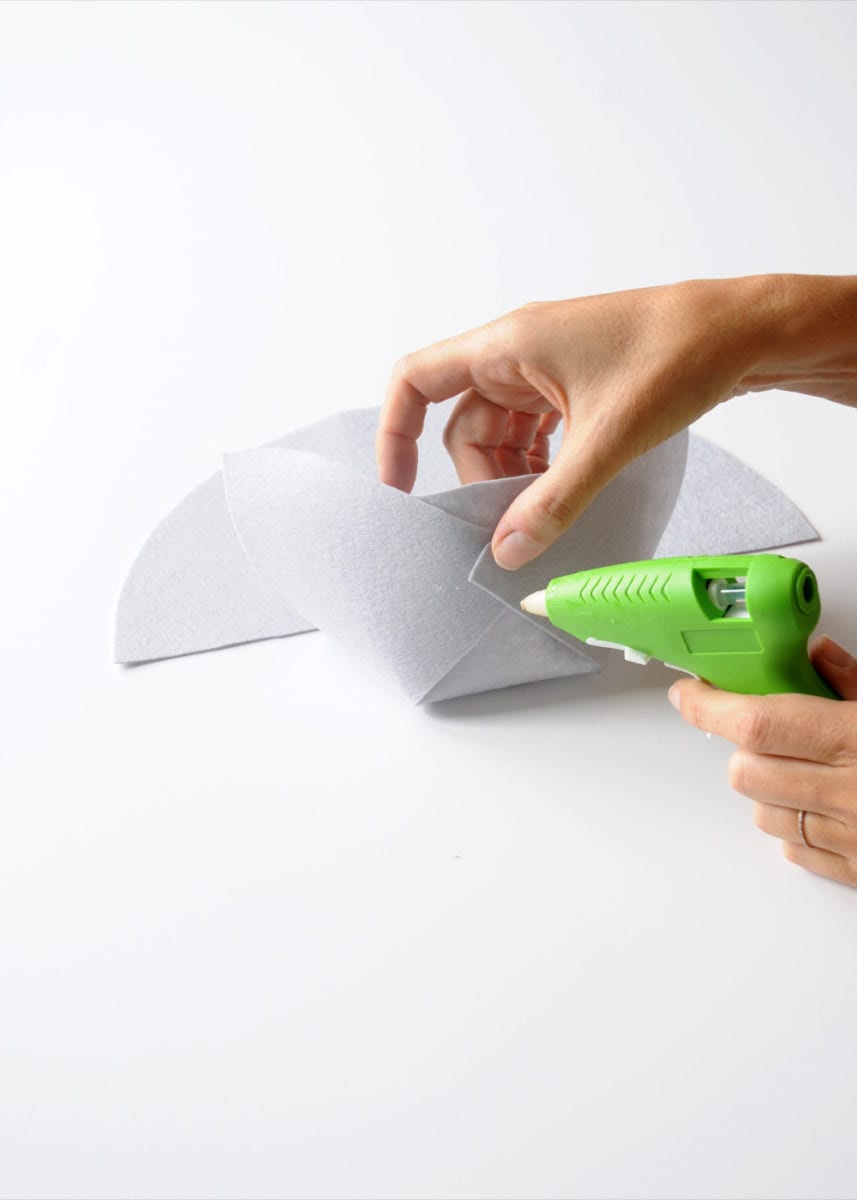
Step 6: Fold in one of the six felt sections and bring the corners of the adjacent two sections together in front of it, so that the points overlap by about half an inch. Glue each overlapping section in place. This will become the front of the basket. Repeat these steps on the opposite side of the circle. Overlap the felt on the remaining open edges and glue them in place to complete the basket shape.
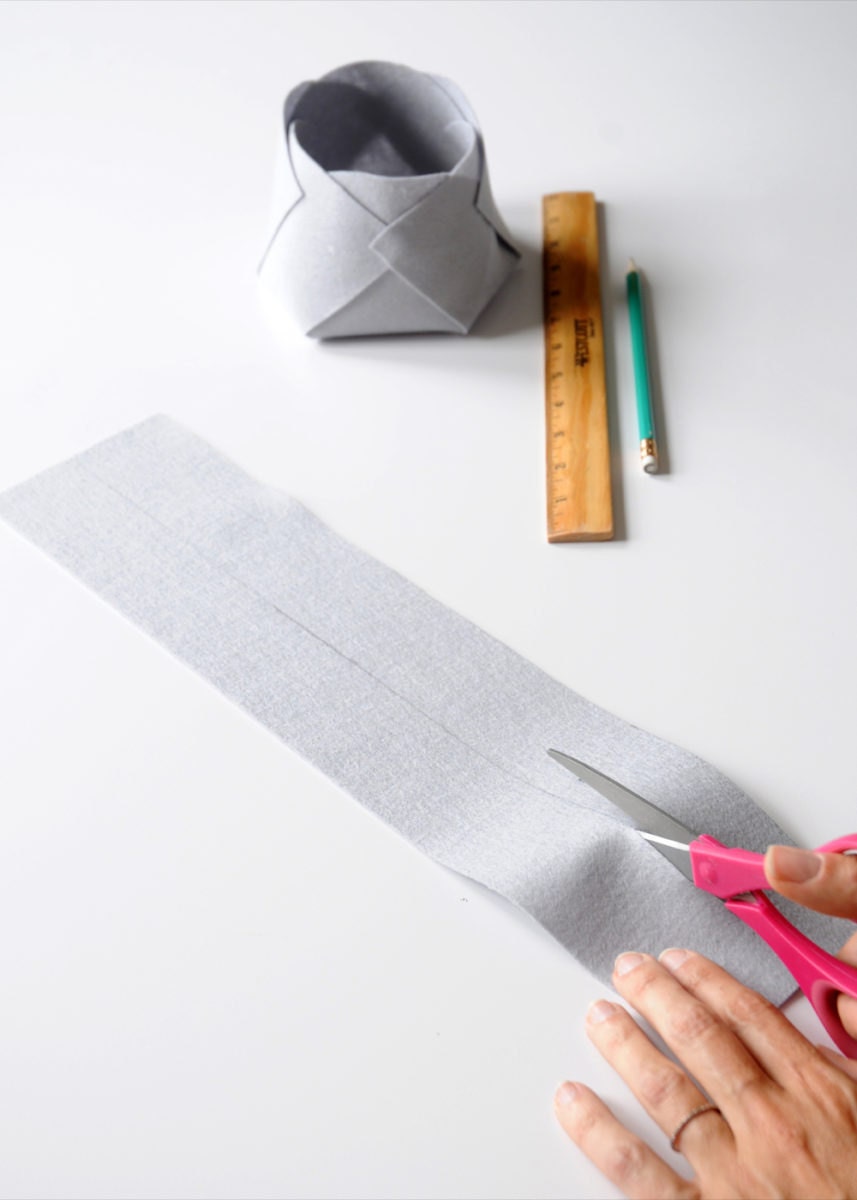
Step 7: From the gray felt scraps, cut two 2-by-18-inch strips.
 Step 8: Cut two 1-by-18-inch strips of pink felt.

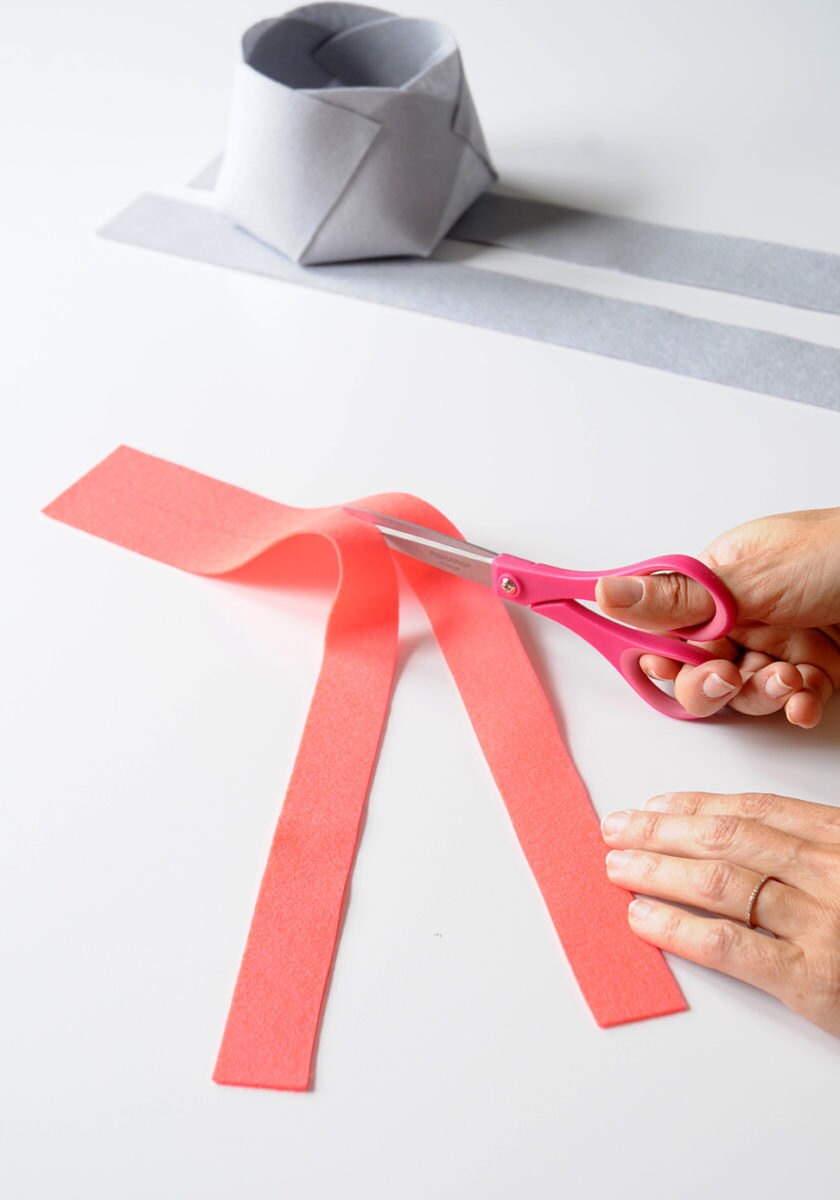
Step 9: Trim the ends of all four strips of felt into points that resemble a rabbit’s ear.
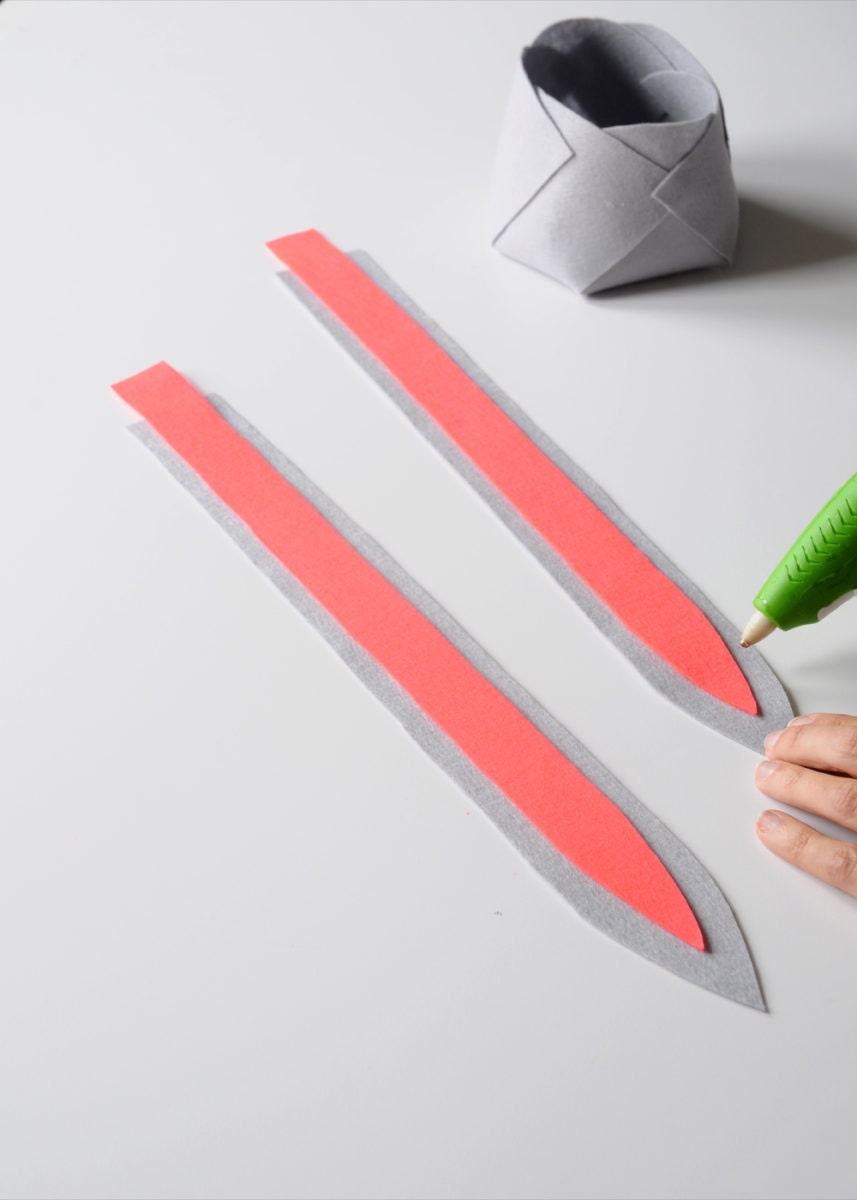
Step 10: Hot glue each pink strip on top of a gray strip so that the pink strip's pointed end is about 3/4-inch down from the gray strip's pointed end. Trim the excess pink felt from the opposite end and set aside. These two strips will become your basket's handle.
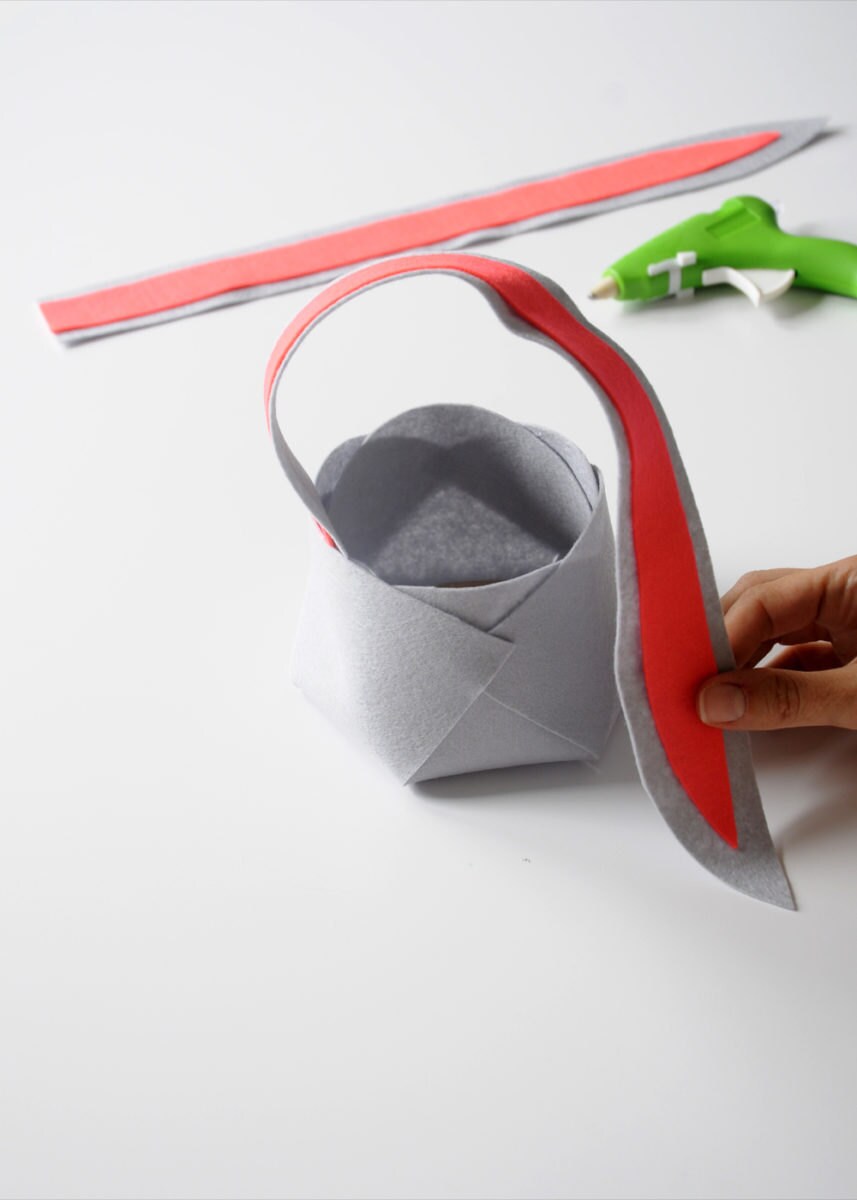
Step 11: Glue the square end of one of the felt strips, pink side facing out, onto the inside of the basket (centered between the front and back of the basket). Attach the other felt strip to the opposite side of the basket in the same way, then cross the pointed end of one strip across the other, about seven inches from the top edge of the bag. Hot glue the strips together where they intersect.
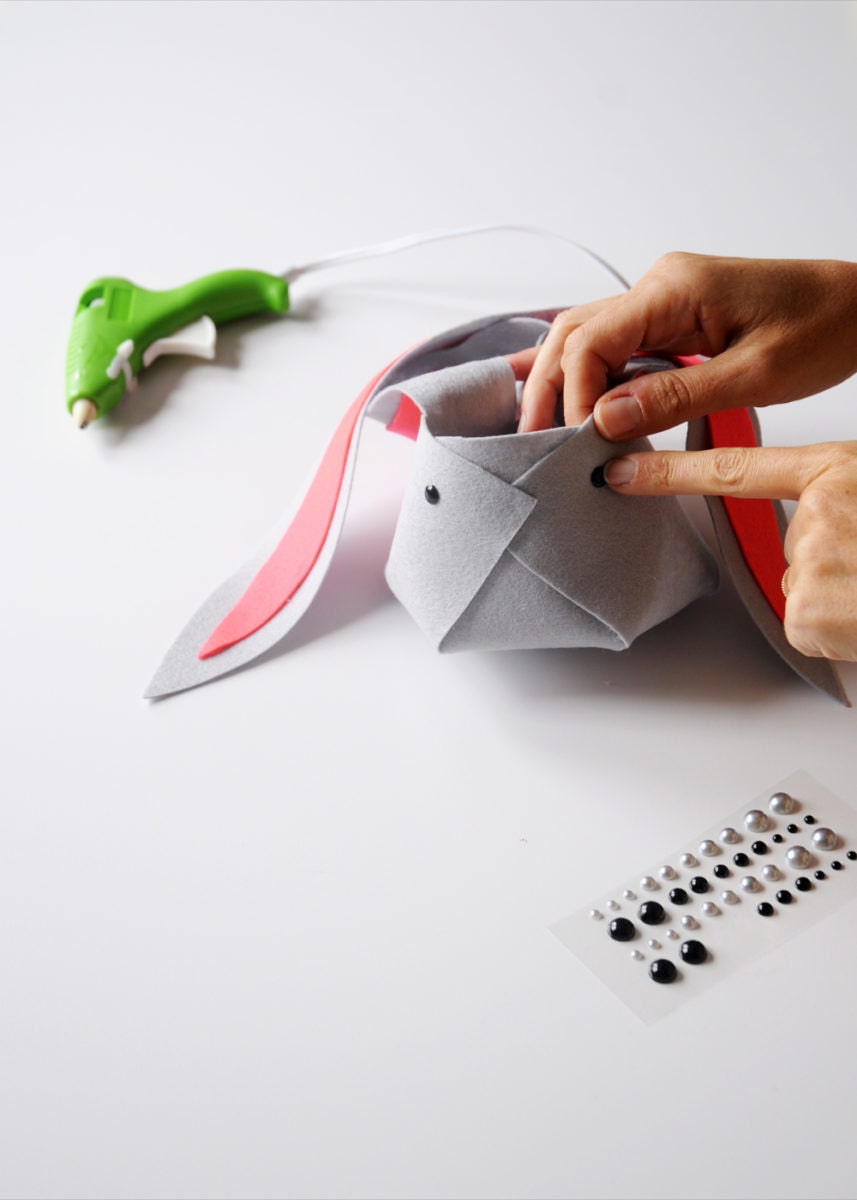
Step 12: Secure enamel dots onto the front of the basket with hot glue to form the bunny's eyes.
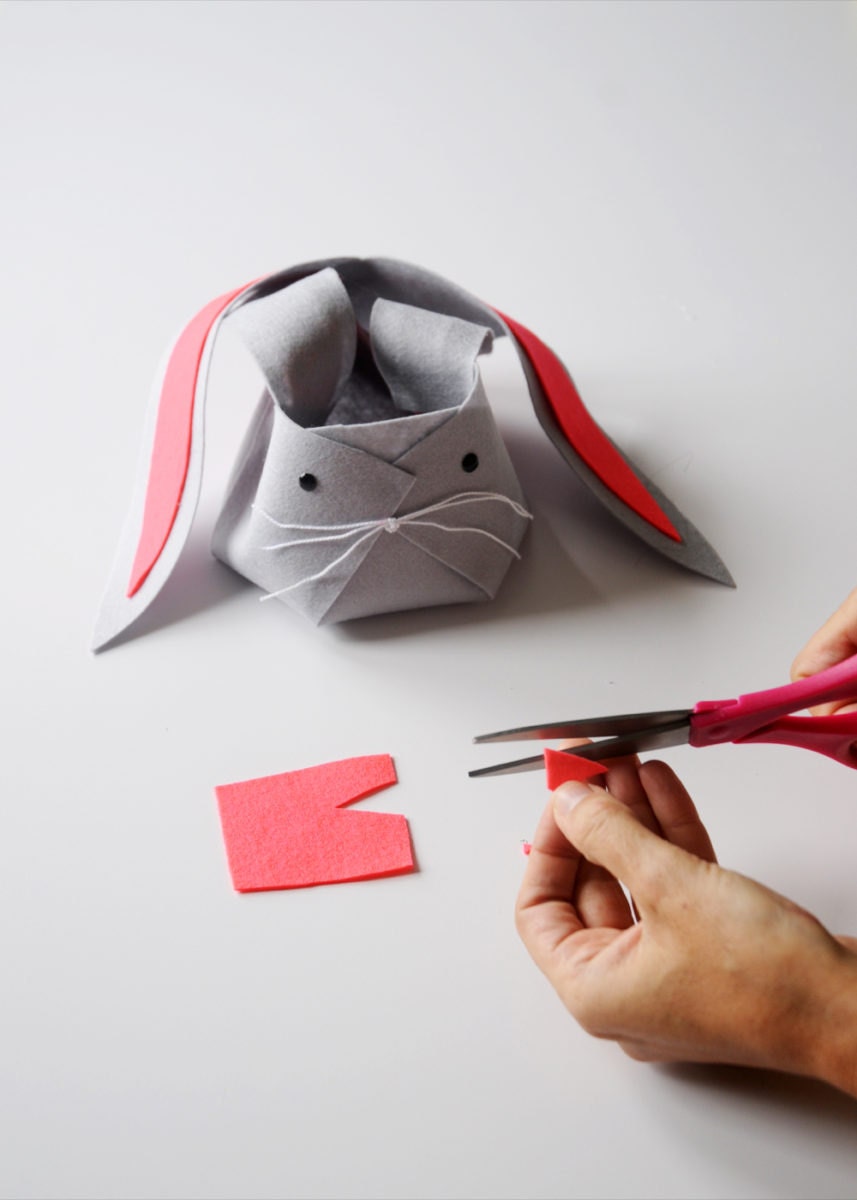
Step 13: Cut three 6-inch strands of white embroidery floss, knot them together in the center, then glue the knot in place; now the bunny has whiskers. Cut out a small, rounded triangle from the excess pink felt to create a nose and hot glue it on top of the knot.

Step 14: Allow everything to dry fully, at least a few hours, then let the egg hunt begin! Photographs courtesy Amanda Kingloff.


