Spruce up your fir with a festive gift wagon, upcycled from an old clementine crate and some jam jar lids painted like peppermints.
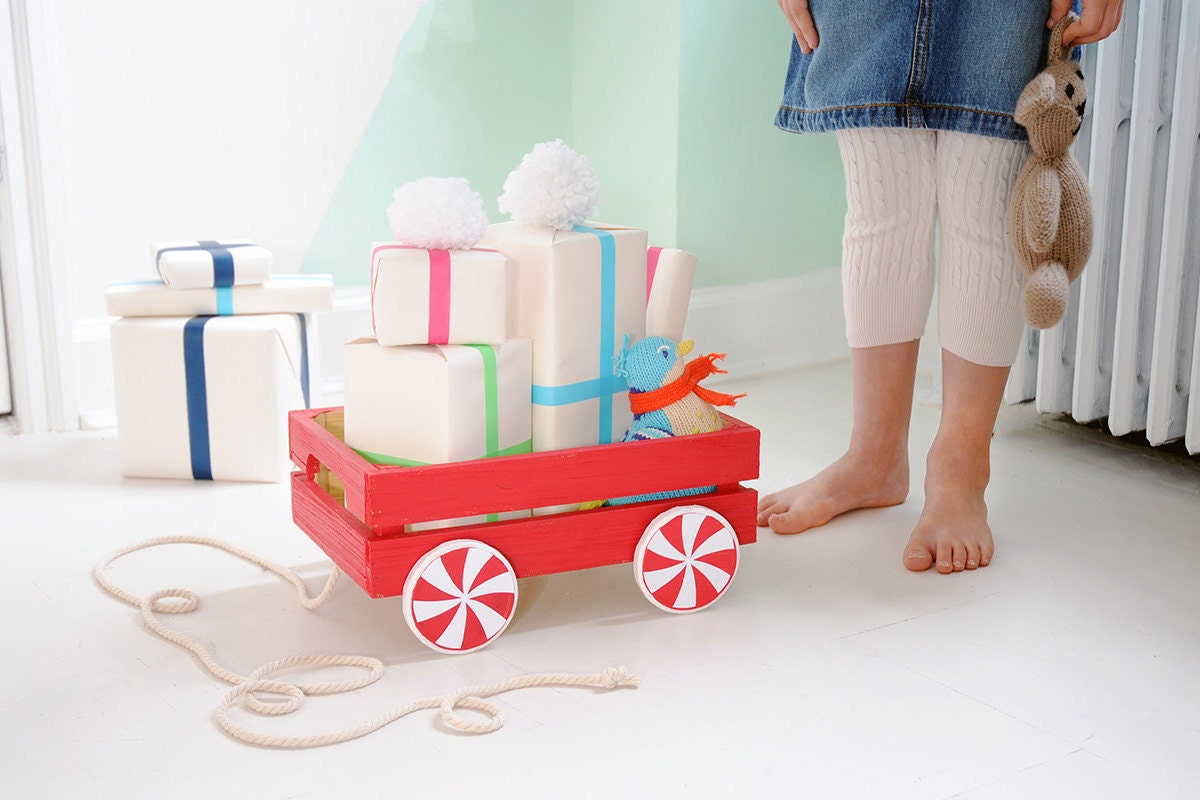
It’s the most wonderful time of the year, right? While sugarplum fairies are dancing in your head, your kids are bouncing off the walls with unbridled holiday excitement. You need some winter-break activities, and you need them now! This clementine crate–turned–Santa’s gift wagon is a perfect project for kids — and the end result is both festive and useful. Rescue a crate from the trash (or buy one like this) and gather up four jam or pickle jar lids (you know you have them). You can stick with the classic red and white paint shown here, or change it up with green, fuchsia, or teal. Once it’s finished, use the cart to hold small gifts under the tree, as a treat-laden centerpiece on the holiday party buffet, or as a toy wagon for your little elves to pull as they resume racing through the halls after the last gift has been unwrapped (you know, at 7:05 a.m. on Christmas Day).
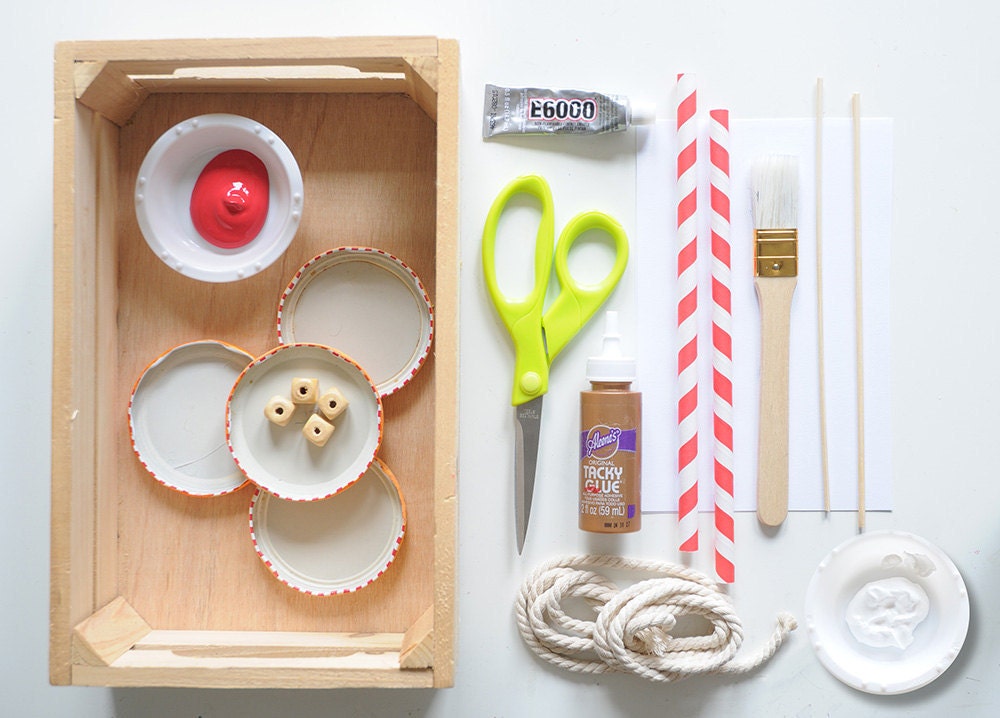
Here's what you’ll need: • 4 three-inch jar lids • Red and white paint • Paintbrush • 1 clementine crate • 2 straws • Tacky glue • White cardstock • Scissors • 4 beads (with large holes) • E-6000 glue • 2 wooden skewers • 4 feet of rope
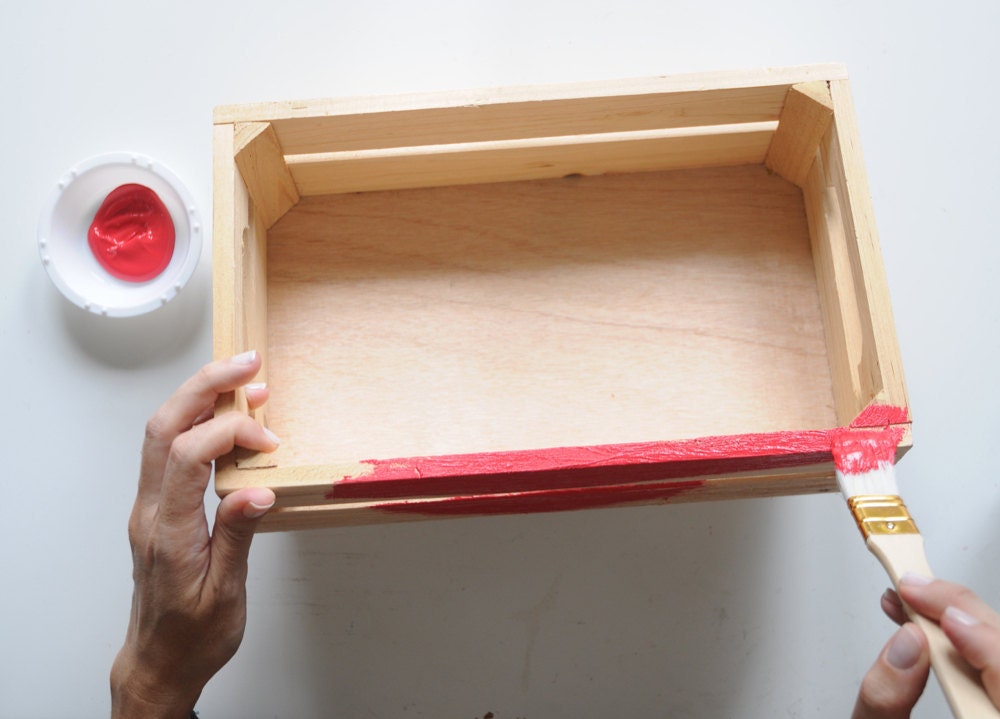
Step 1: Paint the crate red. Set it aside to dry.
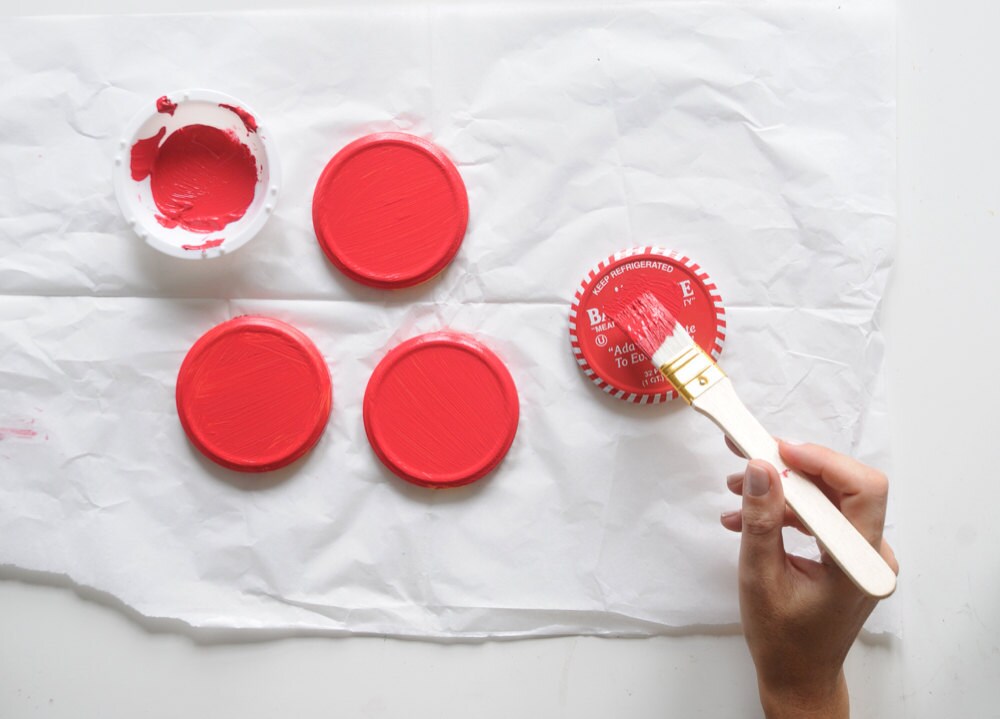
Step 2: Paint the outsides of the jar lids light red and let dry.
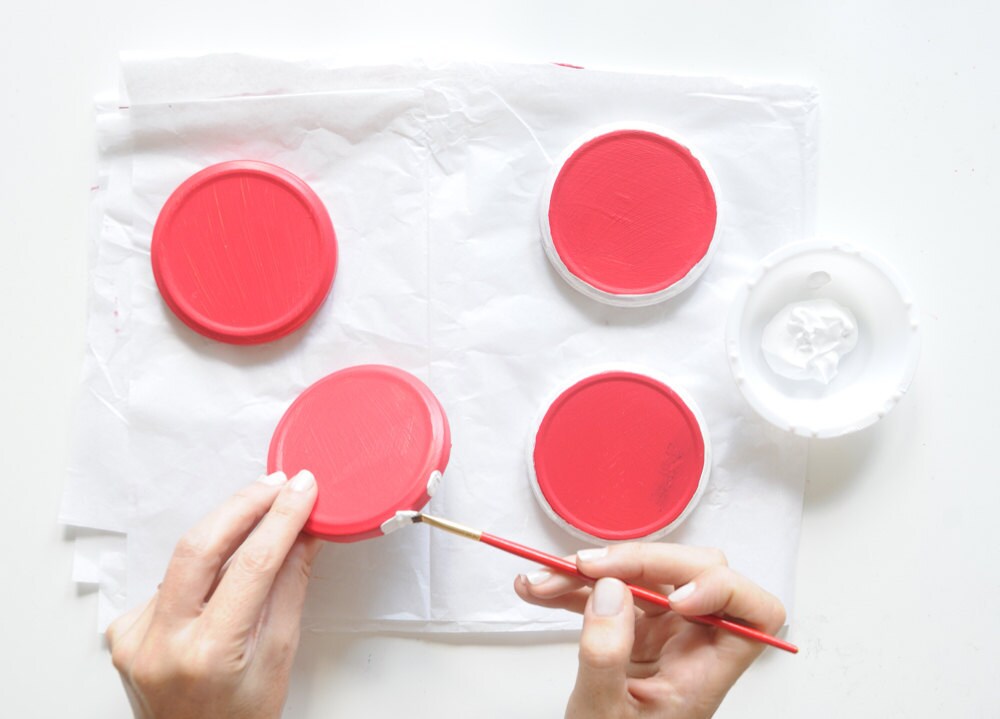
Step 3: Paint the edges of the red lids white.
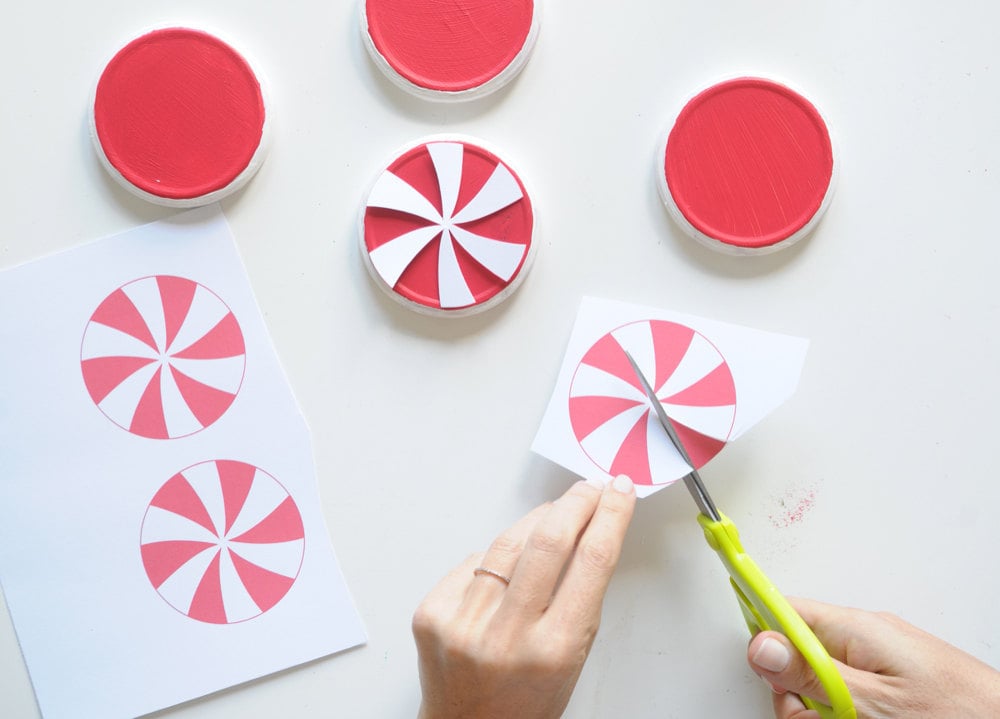
Step 4: Print out the peppermint wheel template and cut out the white shape, being careful to keep the center intact. Repeat with all four peppermints.
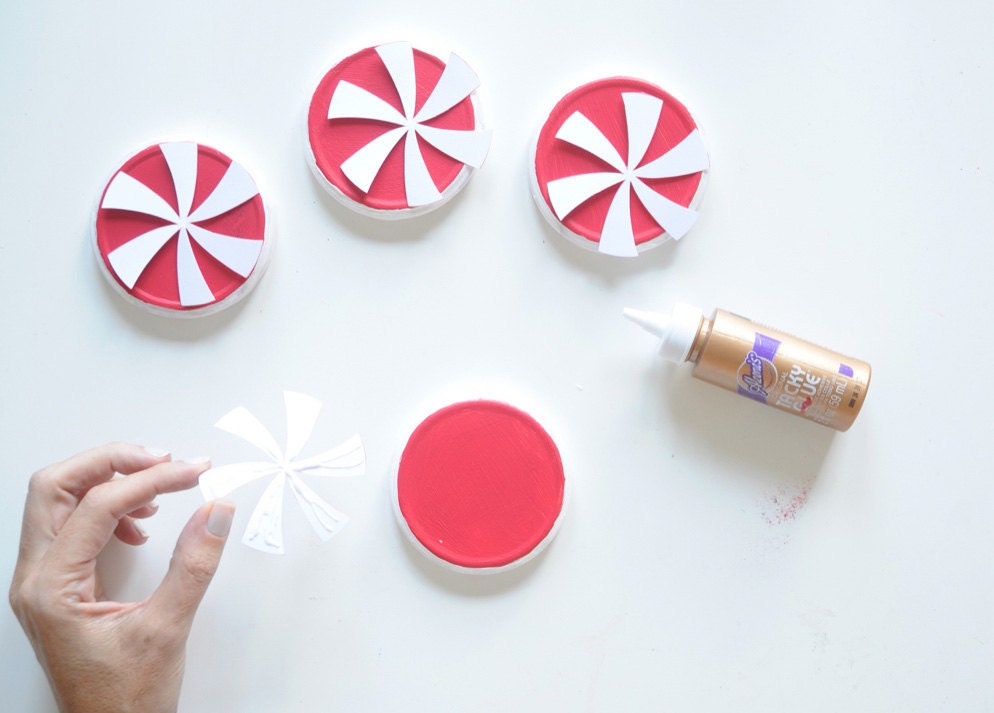 Step 5: Glue the white parts of the peppermints to the red jar lids.
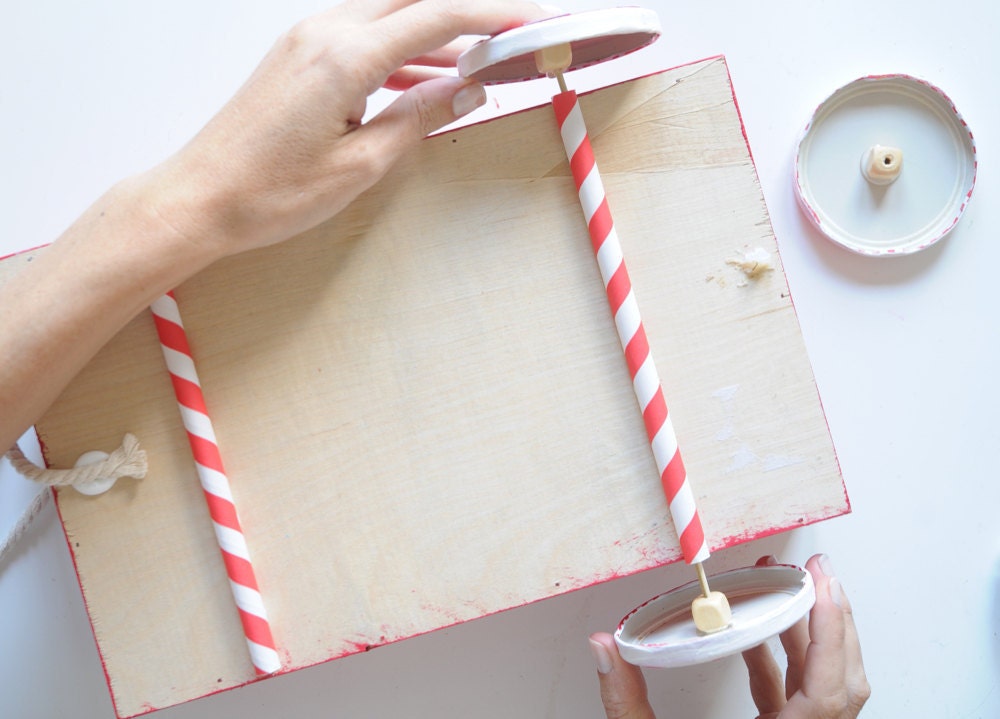
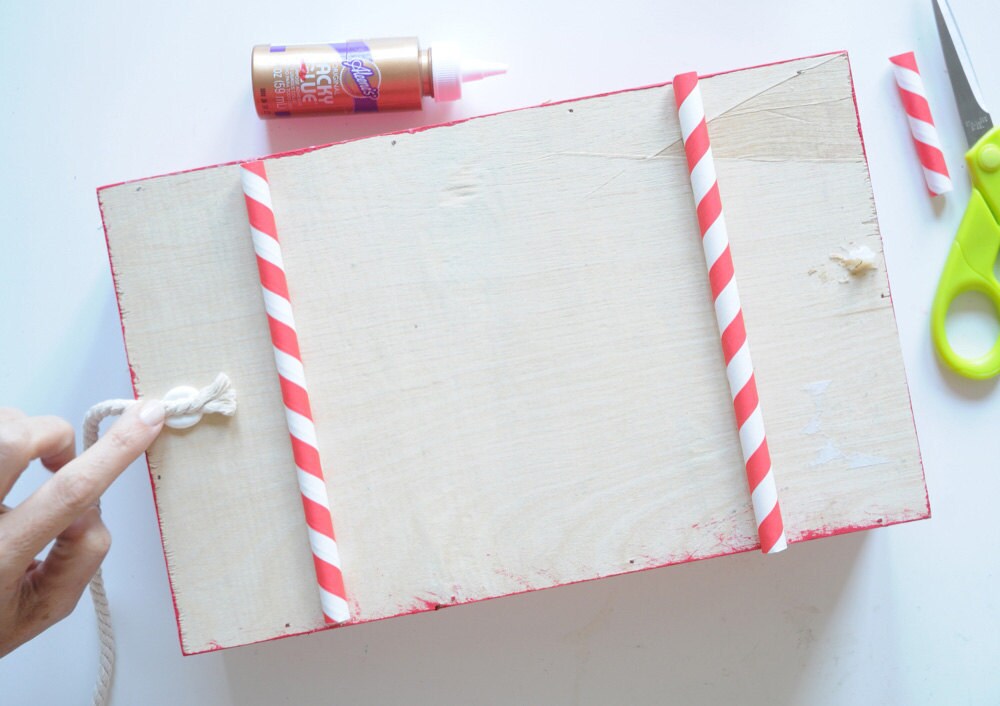 Step 6: Glue the straws to the bottom of the crate with tacky glue, positioning them parallel to the front edge and two to three inches from either end. Glue the end of the rope to one end of the crate.
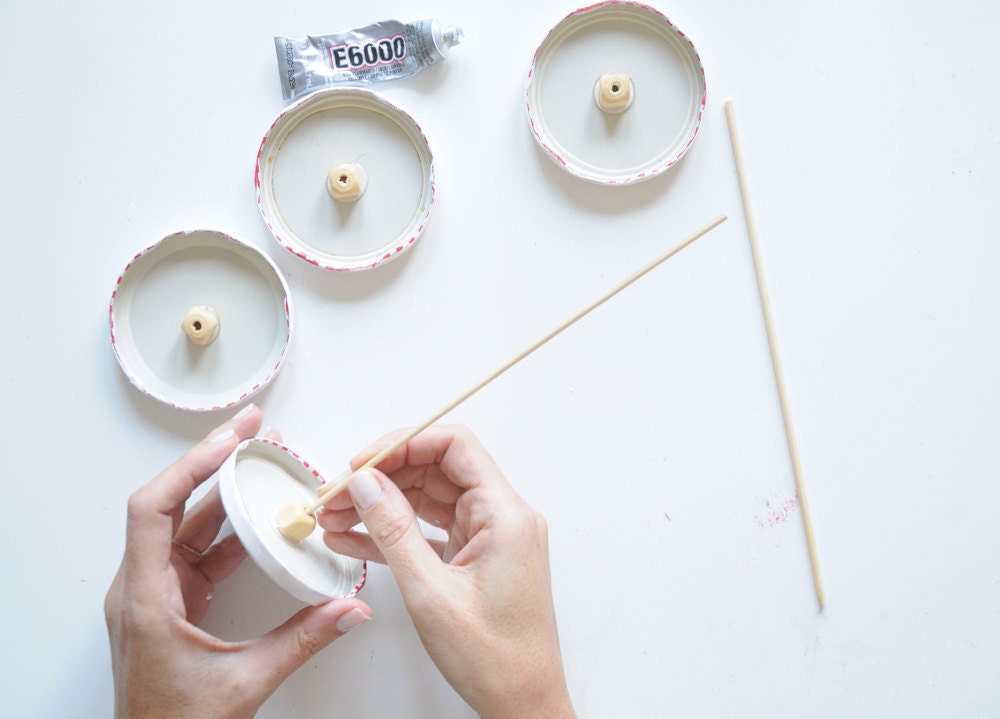
Step 7: Using E-6000 glue, have an adult glue one bead, hole-side down, onto the center of the inside of each jar lid. Let dry completely, about 20 minutes. Trim each skewer to be about 1 inch longer than the width of the crate, removing the pointed ends by scoring them with scissors and then breaking them off. Insert one skewer into each straw.
Step 8: Squeeze a dot of tacky glue into the center of each bead, then stick the lids onto the ends of the skewers. Prop a large book or box against either side of the wagon so that the lids remain perpendicular to the crate while drying.
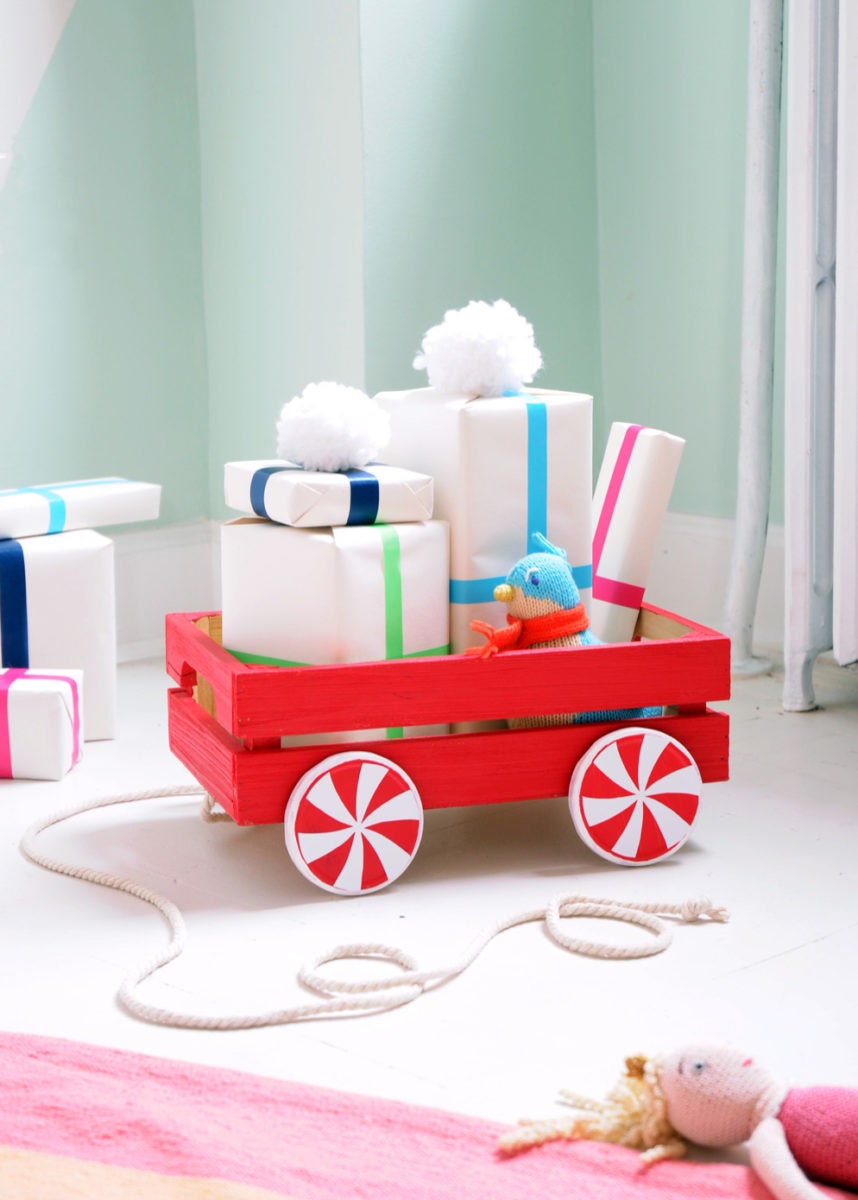 Once the glue has dried, your wagon is ready to roll!
If you're on the hunt for even more craft ideas to do with your little ones, check out Amanda Kingloff’s newest book, Project Kid: Crafts that Go! It’s a great distraction for holiday antsiness and a perfect gift for crafty kids.
Photographs by Amanda Kingloff.


