Not a carving whiz? No problem! Create an enviable pumpkin with download-and-trace templates designed by Etsy artists.

Oh, October: time for sweater weather, autumnal air, changing leaves and Halloween preparations. One of my favorite parts of the season is heading down to the pumpkin patch to pick out a little gourd to call my own. Once home, I put on a pot of tea and get down to business brainstorming what to carve. Personalization is awesome, but when my pen hits the pumpkin I'm reminded all too soon of my artistic limitations – freehand drawing on a curved object (or, let's be real, even a flat surface) is not exactly my forte. Enter the template, also known as your foolproof guide to Pumpkin Greatness. Since there are so many talented illustrators and artists here on Etsy, we decided to team up with three of them – Leah Goren, Bryce Wymer, and Ashley Pahl – to design original, exclusive, and totally awesome illustrations that you can easily trace and carve onto your pumpkin.
The Designs:

Leah Goren x Etsy (Download here)

Ashley Pahl x Etsy (Download here)

Bryce Wymer x Etsy (Download here)
You will need:
Downloadable template Pumpkin Push pins Marker or pen Scissors Large spoon Carving knives Tea light candle or small LED light Drill and drill bits (for Bryce Wymer's design)
Step 1: After you've chosen a design, download the template and print it out (using your printer's landscape orientation setting). Be sure to scale the design to fit the size of your pumpkin. (Note: For our large pumpkins, we printed at 75% scale.) Cut along the edges of the template with scissors so it will be easy to pin onto your pumpkin.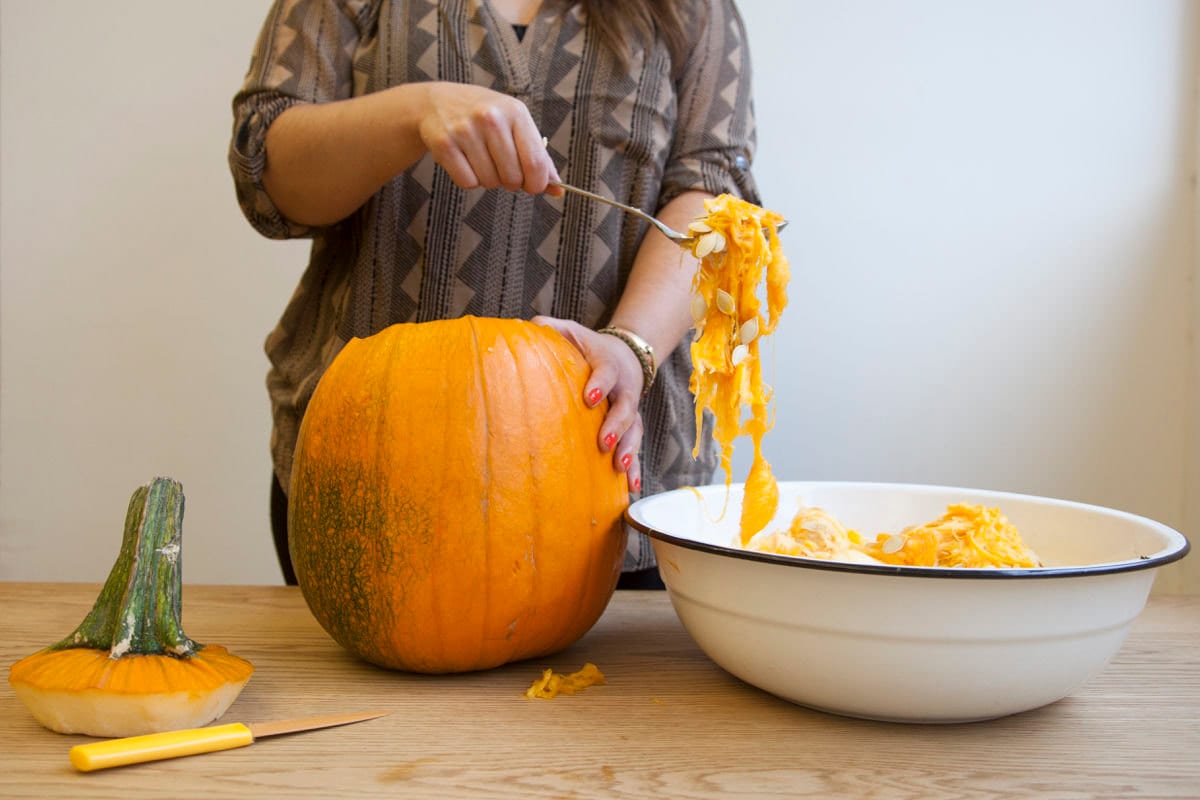
Step 2: Draw a circle around the pumpkin stem with your marker or pen. You want the circle to be at least as large as your fist so you can easily remove the pumpkin's seeds and pulp. Next, carefully carve along the circle with a knife. Scoop out the seeds and pulp using a large spoon.
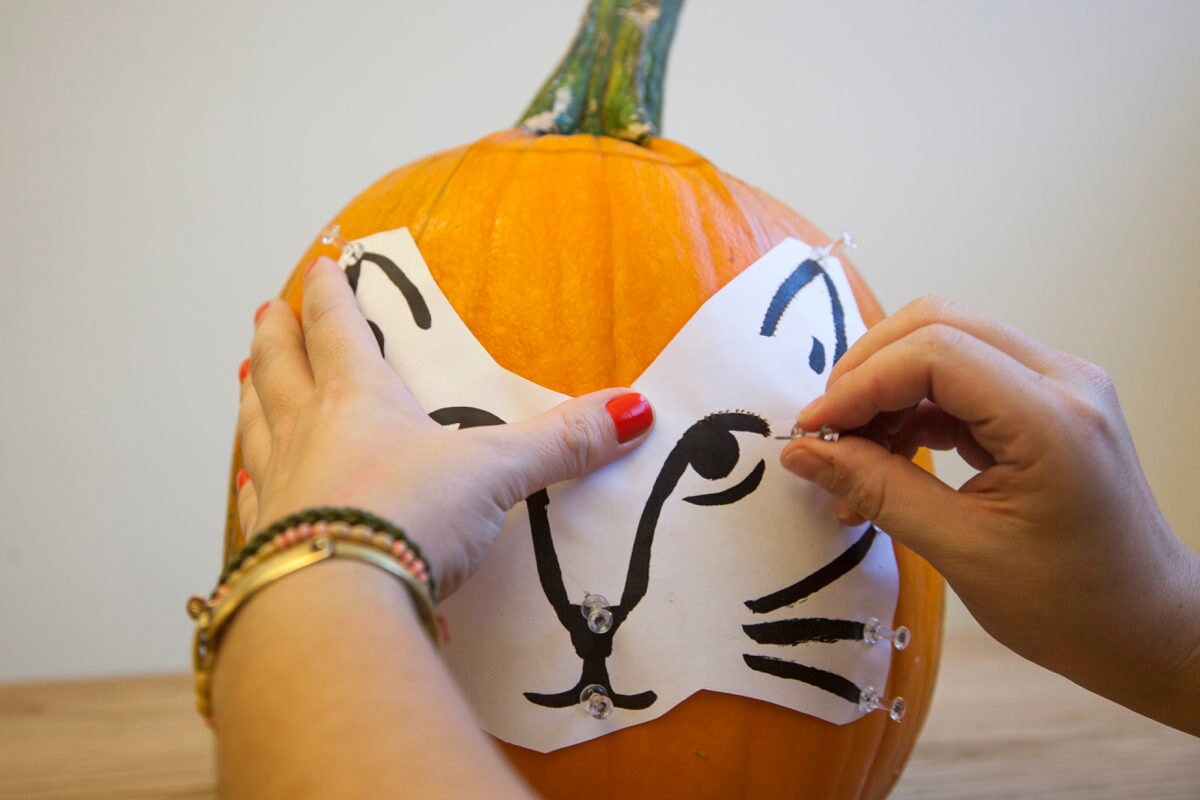
Step 3: Pin your template to the pumpkin. Use push pins to poke holes along the black lines of your template, tracing the design onto the pumpkin. Keep in mind that you will be carving and removing only the black sections of the illustration from your pumpkin.
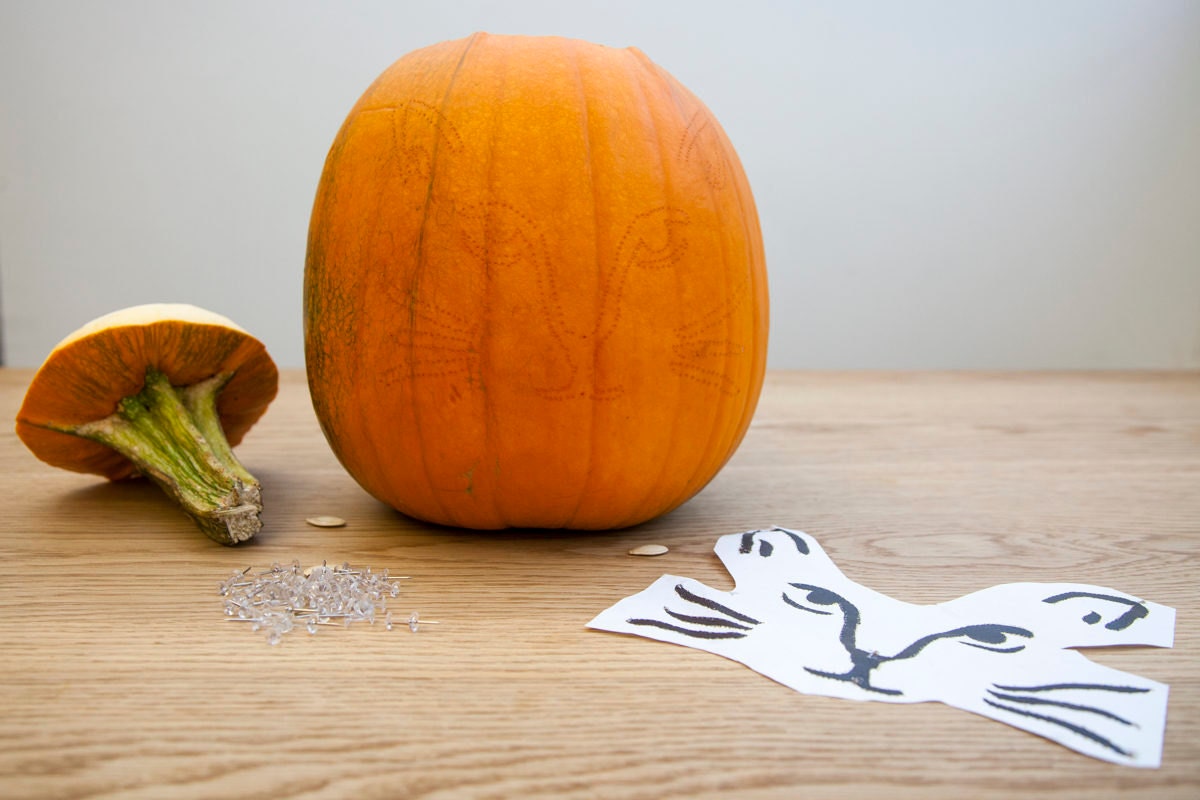
Step 4: Once you've finished outlining your design onto the pumpkin with push pins, remove the template. Optional: Use your marker or pen to connect the dots so you can clearly see what you will be carving out.
Step 5: Carefully carve your design into the pumpkin, following the holes you poked with your pins. For detailed areas, using a smaller knife is helpful. Don't rush – take your time and be as precise as possible.

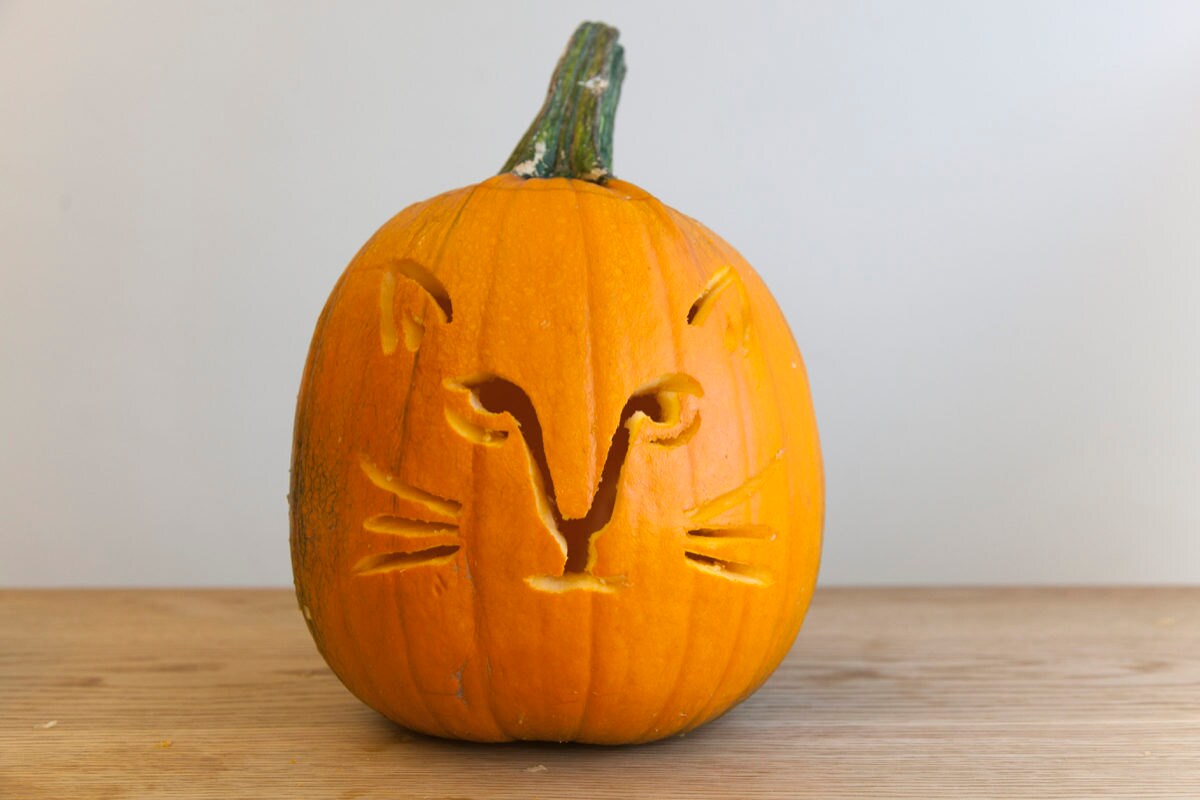
Step 6: When you're done carving, place a small tea light candle or LED light in the bottom of pumpkin. Now turn off the lights and admire your work! Note: Exercise caution and take your time when working with knives. Never leave lit candles unattended. All photographs by Marina Robel.