One cat's dander is another's crafting material. Here's to a project that only a cat lover could appreciate.


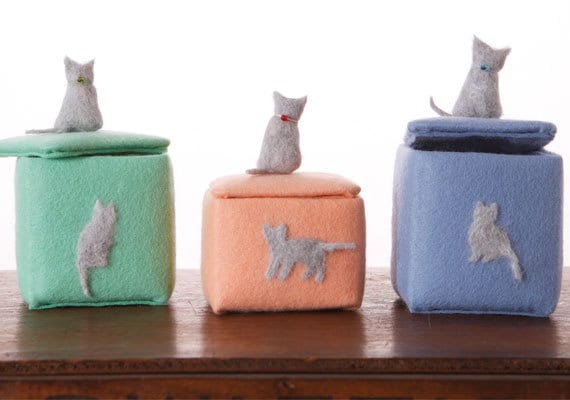
Cat ladies and gents, this one is for you! If you have a feline roommate, chances are you've drafted various plans of attack on the errant tumbleweeds of cat hair that tend to drift through the halls. For this week's How-Tuesday post, Amy Hirschman (translator) and Kaori Tsutaya (author) share a creative solution  from their book, Crafting With Cat HairRead on to learn how to make your own felt-covered treasure box.

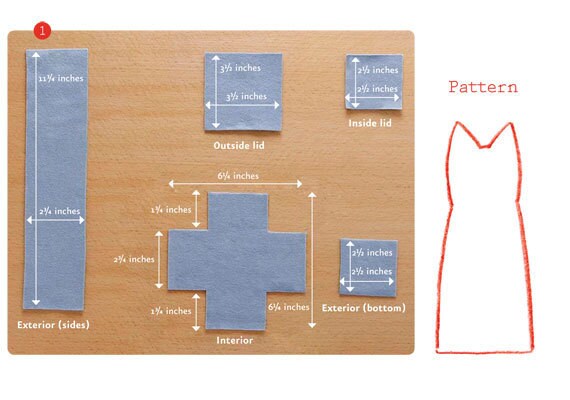
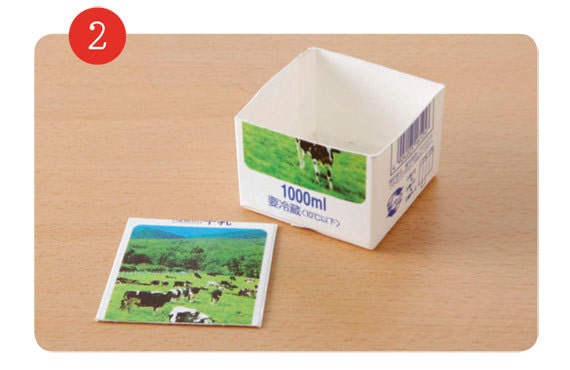
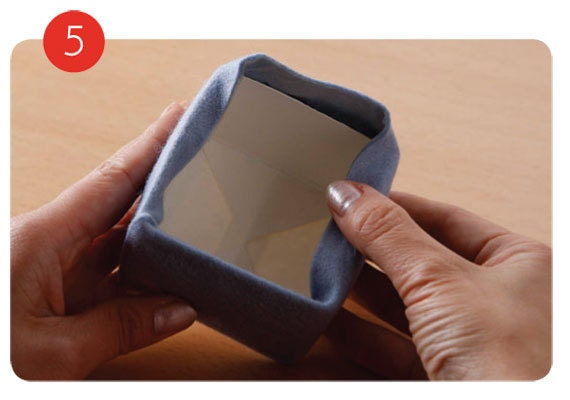
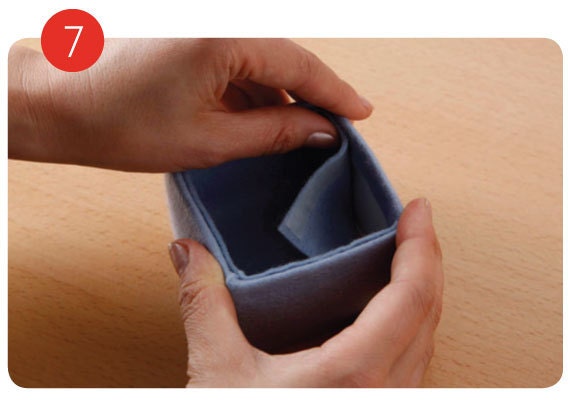
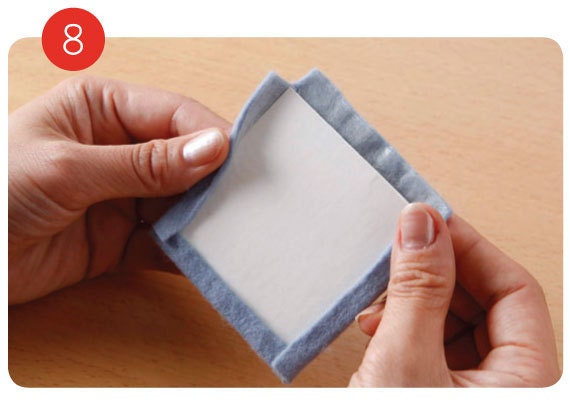
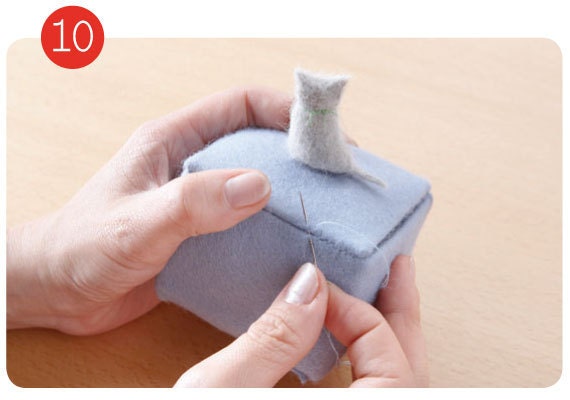
Recycle milk cartons and cat hair to make adorable containers for cat treats or knick-knacks. These little boxes are made from cut-up dairy boxes wrapped in sheets of store-bought felt. You can put them together simply with double-sided tape, so even if sewing isn't your specialty, it's okay.

Let's get started!


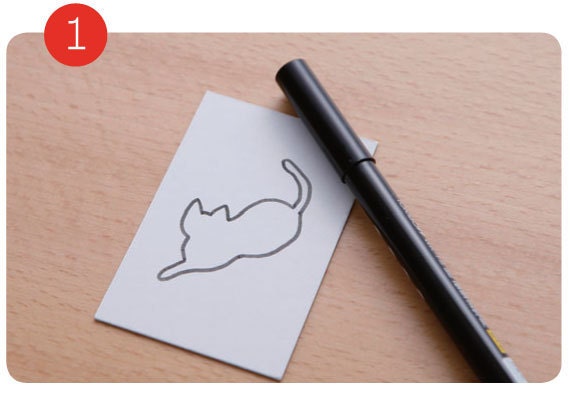
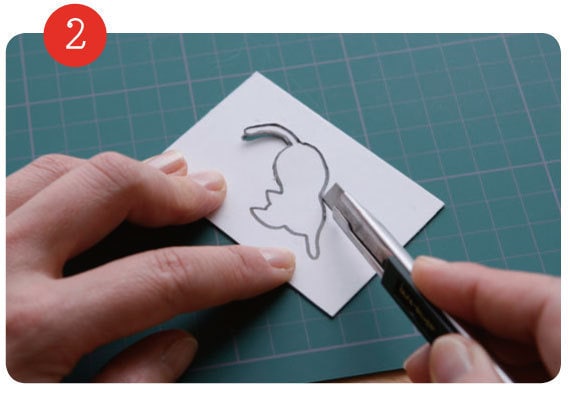
Supplies You’ll Need:

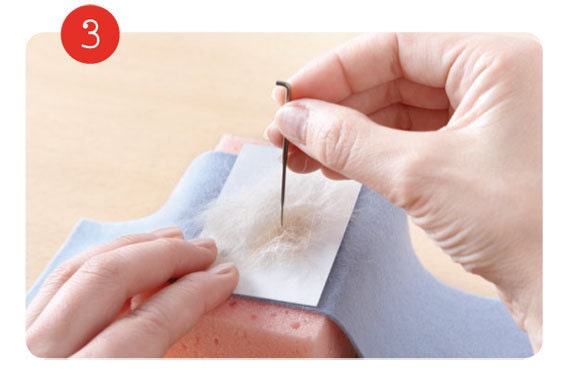
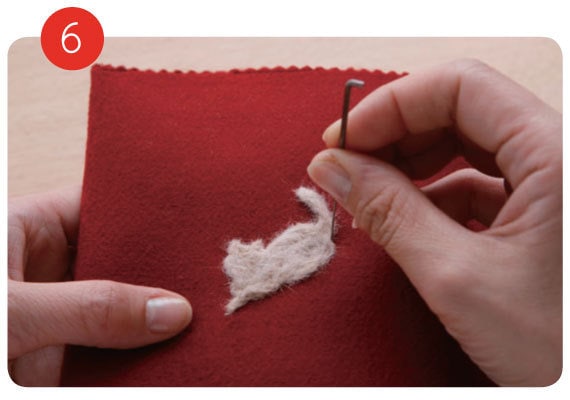
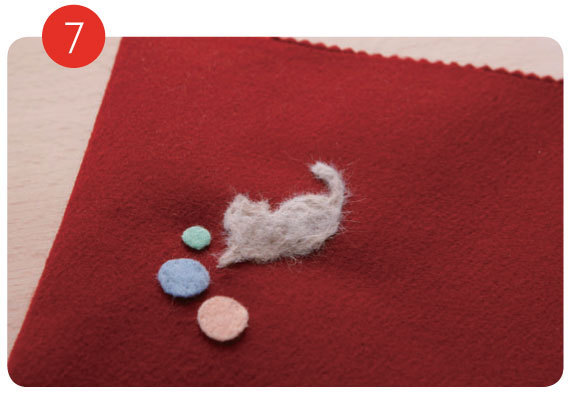
  • Cat hair (a mound just big enough to fill both hands)
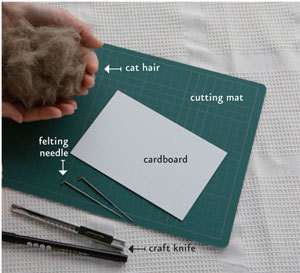
  • Cardboard
  • Pencil or pen
  • Craft knife
  • Cutting mat
  • Felting needle
  • Sponge
  • 1 milk (or other dairy) carton
  • 1 piece sheet-style felt
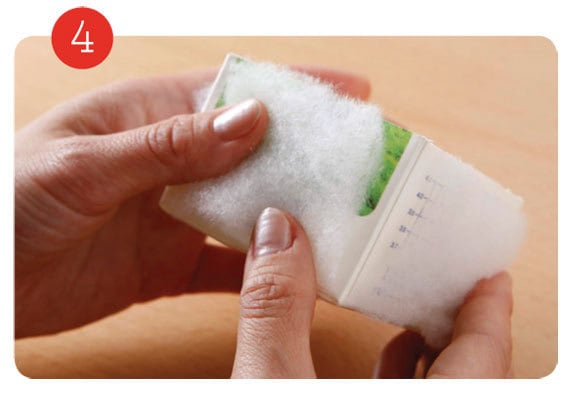
  • 4 pieces cotton, 1 1/2 by 2 1/2
  • 1 square piece cotton batting, 2 1/2 inches square
  • Decorative beads or thread
  • Double-sided tape
  • Ruler
  • Strong sewing needle
  • Thread
Directions To make the box:
1. Cut the sheet felt to the sizes shown above.
2. Cut the carton 2 1/2 inches from the bottom. Cut a lid from the scraps, making it a square with dimensions that match those of the bottom of the milk carton.
3. Place the pattern on top of the exterior felt piece; apply the cat hair (see below). Make the tail separately before attaching it. Decorate with beads or thread to your liking.
4. Tape batting to the four outer sides of the milk carton.
5. Apply double-sided tape to the back of the felt from step 3 and wrap it around the sides of the box. Then fold over the edges into the box opening.
6. Apply one of the 2 1/2-inch-square pieces of felt to the outside of the bottom of the box.
7. Put double-sided tape on the four ends of the cross-shaped piece of felt and apply felt to the interior of the box. Push tightly onto the bottom and four inside corners.
8. Tape pattern and felt on opposite sides of the lid. Cut the corners so the edges fold over neatly. Apply the other 2 1/2-inch-square felt to the underside of the lid.
9. Stuff a cat-hair felt finger puppet with cat hair [Ed note: The finger puppet project is covered in full detail in the book], roughly attach the bottom portion to cover the opening, and sew it onto the outside of the lid.
10. If you like, you may hinge the lid by sewing one side onto the box.   To apply the cat hair:
1. Trace this design onto cardboard or create your own design.
2. On top of the cutting mat, use the craft knife to cut out your design and make a pattern.
3. Place the design pattern wherever you like on the sheet of felt and then place that on top of the sponge.
4. Hold the pattern down firmly to keep it from slipping, put the cat hair into the design area, and stab evenly with the felting needle to secure the shape.
5. After you have applied the cat hair, remove the pattern. At this stage, the contours of the design are still rough.
6. Poke neatly around the contour of the design to secure it.
7. Cut out some designs from your other felt sheets for decoration and attach them with your felting needle for a perfect finish.

Thank you to Quirk Books for sharing this project with us. For more crafts to make with your kitty, check out Crafting With Cat Hair, available from Amazon or an independent bookstore near you.

More Things to Make | Pets Category on Etsy