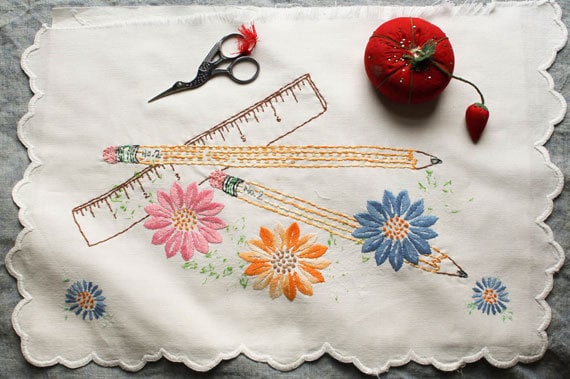
Sharpen your pencils, and ready your sewing hand! This embroidery sampler will teach you the ABC's of embroidered lines and stitches.
 Rebecca Ringquist lives and works in Brooklyn, New York, creating embroidered artworks and drawings. She also teaches workshops across the country, including at Squam Art Workshops, where I met her earlier this summer. Find her do-it-yourself embroidery samplers and more in her Etsy shop, dropcloth, and follow her latest news on the dropcloth blog. For this week's How-Tuesday, Rebecca has prepared a mini embroidery 101 course that will lead you through the ABC's of embroidered lines and stitches.
 When I first learned how to embroider, I immediately went home and added my name to everything. My bathrobe, my pillow case, my jean jacket, my blankets — nothing escaped a slowly stitched signature. Starting with a small sampler to learn six basic stitches, you can go on to embroider everything. Soon nothing will escape your able needle!
 You Will Need:
- Embroidery hoop (4-6” is best, but use what you have)
- Embroidery needle (any needle with an eye big enough for your thread will do)
- Dull tapestry needle
- Thread (embroidery floss works well, but try other threads for different textures)
- Sharp scissors (you don’t need anything fancy, just sharp)
- Erasable marker (Mar-B-Gone pens work really well for this, but an everyday pencil will do the trick)
- Fabric — either the Penmanship Paper Sampler from my shop, or your own piece of cotton or linen
- Optional: An additional piece of cloth for a backing fabric. This makes your fabric lie in the hoop a little better and makes for a nicer looking finished product. Linen or cotton works the best here.
Let's get started!
 1. Hooping your fabric. The first thing you’ll need to do is to position your fabric in the hoop. Lay down the part of your hoop without the hardware on it, and drape your fabric over the top. Make sure that the area of the fabric that you want to begin stitching is showing within the circle. Lay the second piece of the hoop (the one with the hardware) over the top, and tighten the bolt until your fabric is nice and tight like a drum-head.
2. Threading your needle. Thread a few needles so that you won’t have to stop and start what you’re doing to reload. If you’re using embroidery floss, I recommend separating it into sections of two or three before threading it for ease of use. Make sure your knot is big enough (you might need to double-knot) so that it won’t come poking through where it’s not wanted.
3. Practicing your letters. Old dictionaries and newspapers can be great places to find cool fonts, and nowadays you can also find interesting designs online at sites like dafont. On the other hand, if you’re adding your name to something, your own handwriting or signature might be best. Kids often have amazing handwriting that you can trace to get a cool effect. Once you have a design you like, practice drawing it a few times on paper before drawing the letters directly onto your fabric using a washable blue pen. If you don’t like the way it looks, wash it out and start over. Just be sure not to iron the wash-away pen, or it will become permanent.
4. Getting started with stitches. Embroidery is a pretty simple art form to pick up, but it really is worth the time to create a small sample to start with so you can make mistakes without losing your mind over “ruining” your favorite piece of fabric. The Penmanship Paper Sampler is a great thing to practice on. When you’re finished, you’ll have a visual record of six different stitches, and you can pick the perfect stitch for each project.
1. Hooping your fabric. The first thing you’ll need to do is to position your fabric in the hoop. Lay down the part of your hoop without the hardware on it, and drape your fabric over the top. Make sure that the area of the fabric that you want to begin stitching is showing within the circle. Lay the second piece of the hoop (the one with the hardware) over the top, and tighten the bolt until your fabric is nice and tight like a drum-head.
2. Threading your needle. Thread a few needles so that you won’t have to stop and start what you’re doing to reload. If you’re using embroidery floss, I recommend separating it into sections of two or three before threading it for ease of use. Make sure your knot is big enough (you might need to double-knot) so that it won’t come poking through where it’s not wanted.
3. Practicing your letters. Old dictionaries and newspapers can be great places to find cool fonts, and nowadays you can also find interesting designs online at sites like dafont. On the other hand, if you’re adding your name to something, your own handwriting or signature might be best. Kids often have amazing handwriting that you can trace to get a cool effect. Once you have a design you like, practice drawing it a few times on paper before drawing the letters directly onto your fabric using a washable blue pen. If you don’t like the way it looks, wash it out and start over. Just be sure not to iron the wash-away pen, or it will become permanent.
4. Getting started with stitches. Embroidery is a pretty simple art form to pick up, but it really is worth the time to create a small sample to start with so you can make mistakes without losing your mind over “ruining” your favorite piece of fabric. The Penmanship Paper Sampler is a great thing to practice on. When you’re finished, you’ll have a visual record of six different stitches, and you can pick the perfect stitch for each project.

 The Running Stitch: The running stitch is nothing more than a dashed line going through a piece of fabric. If you have more than one piece of fabric, it’s called the quilting stitch. Your needle starts on the backside to hide the knot, and jumps up to the top, going up and down while crossing from one edge of your fabric to another. You can draw on a line to follow, or make freeform lines.
 The Filled Running Stitch: Once you’ve stitched a few lines of Running Stitch, you can go back in with a second color and fill in the stitches for a fancy effect. Using a dull tapestry needle full of thread, start on the back side again. Come up next to the first stitch in the row of running stitches, and then weave in and out of the stitches, staying on top of the fabric. When you get to the end (or when you want to change colors), simply dip back down underneath with your needle and tie off. Experiment with different shapes and combinations of weaving to get rope and chain effects.
 The Back Stitch: To replicate the look of a line drawing, or to add text to your fabric, choose the back-stitch. To get started, make one stitch going forward. Then skip forward that same amount from the backside, and go back down where your first stitch left off. Get it? You’re going back. Then start fresh and make another stitch that bumps ahead one, skip ahead, fill in, repeat. If you’re going around curves, stay small to get a nice smooth edge. I like to keep all the stitches under ¼” as a general rule, but of course, rules are meant to be broken. This is hands-down my favorite stitch because it’s so versatile.
 The Couching Stitch: This stitch is worked with two needles, using two threads simultaneously, with one attaching the other to the fabric. It creates a raised effect, and since one of your stitches is basically being tacked down, it’s a great opportunity to use a thick thread or even yarn or wire. Bring both needles full of thread up at the beginning, and make tiny tacks up and over the bigger thread as you follow the design, attaching one thread with the other.
 The Chain Stitch: For this stitch, take a second to adjust your hoop. If you’re right handed, the chain stitch is easiest if your left thumb has easy access to the stitch, so move your hoop around until the area you want to work with is over in the left hand region. Then bring your needle up from underneath, and ease your needle through the fabric, leaving only the eye of the needle exposed. Before you push it all the way through, bring the thread from left to right around the point of the needle. This will give you a little preview of what your first “chain” or “link” will look like. Continue along like that until you’ve got a good amount of chains or until your line is finished, going back down just inside the first link as shown.
 The Split Stitch: This little stitch looks like a petite cousin of the chain stitch, but is worked differently. For best results, I recommend using six-strand embroidery floss. Make one stitch forward as for the back-stitch, and then bring your needle up from underneath in the middle of that first stitch, thereby “splitting” the first stitch. Continue along like that to create a chain like effect.
Now that you’ve tried six ways of making stitched lines on fabric with basic embroidery floss, I recommend trying out different threads. Perle cotton, sewing thread, silk floss, and wool crewel thread are all great ways to add different qualities to your work. Experiment, and discover a new way of drawing!
The Split Stitch: This little stitch looks like a petite cousin of the chain stitch, but is worked differently. For best results, I recommend using six-strand embroidery floss. Make one stitch forward as for the back-stitch, and then bring your needle up from underneath in the middle of that first stitch, thereby “splitting” the first stitch. Continue along like that to create a chain like effect.
Now that you’ve tried six ways of making stitched lines on fabric with basic embroidery floss, I recommend trying out different threads. Perle cotton, sewing thread, silk floss, and wool crewel thread are all great ways to add different qualities to your work. Experiment, and discover a new way of drawing!

If you stitch your own back-to-school embroidery, share a photo in the Etsy Labs Flickr group!


