This beginner-friendly fall fashion DIY combines two of our favorite trends: embellished denim and chunky rope weaving.
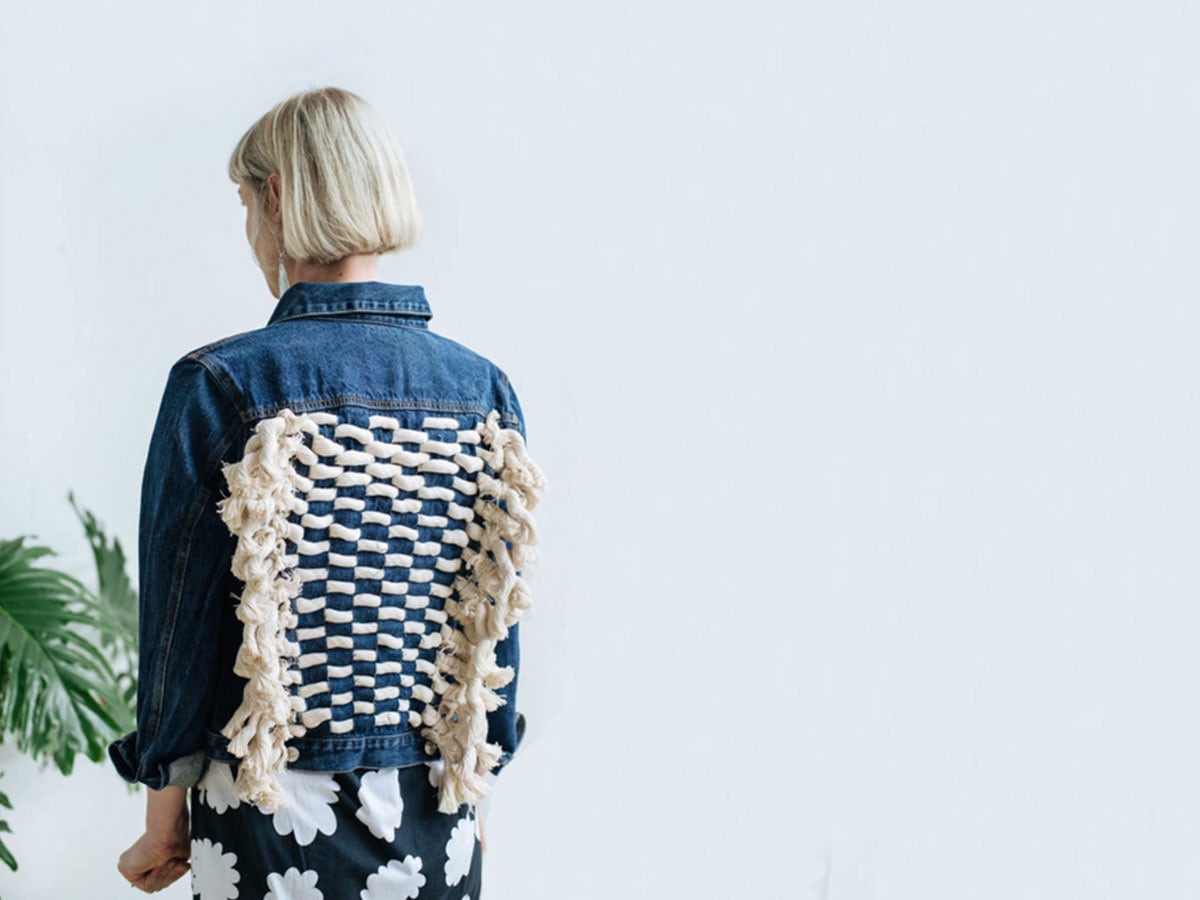
Fall is here and it's prime time to upgrade some old wardrobe favorites with a new twist or two—say, of thick, coiled cotton rope. This avant-garde (but beginner-friendly) DIY combines two of my favorite style trends—embellished denim and chunky weaving projects—into a wearable masterpiece that's guaranteed to turn heads on the sidewalk or in the halls. The techniques involved are simple: measure, cut, weave, and knot. (Trust me, you can do this.) Ready to get started? Read on. At a glance Time: 1 hour Difficulty: Beginner
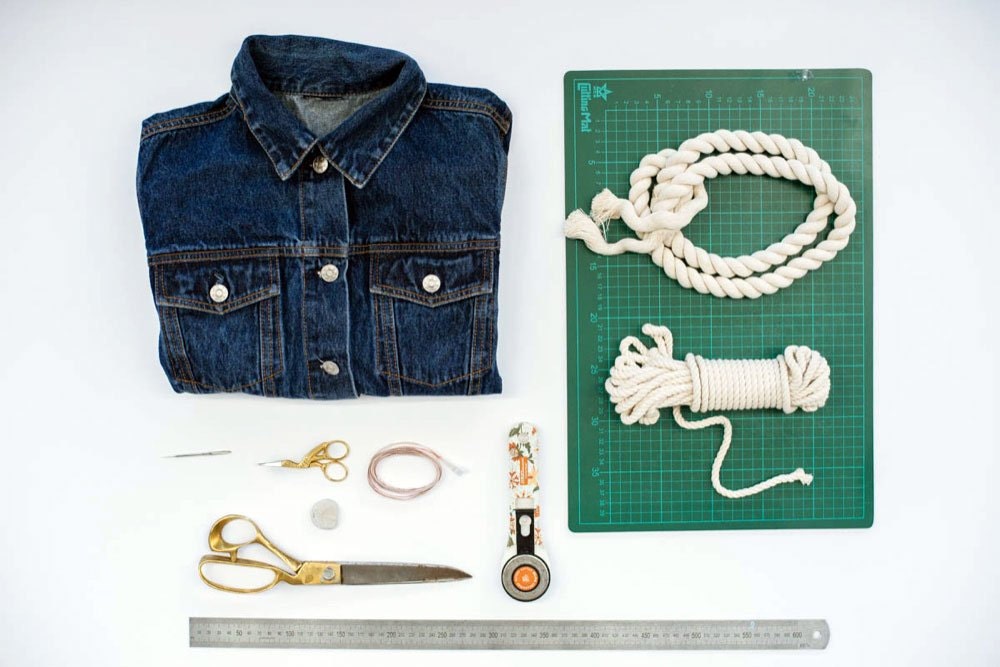 >
>You will need:
- Denim jacket
- Cutting mat
- Ruler
- Tailor's chalk
- Rotary cutter
- 10 yards of 22mm cotton rope
- 5 yards of 10mm cotton rope
- Scissors
- Optional: Crochet hook to help pull rope through
Step 1: Prepare your jacket

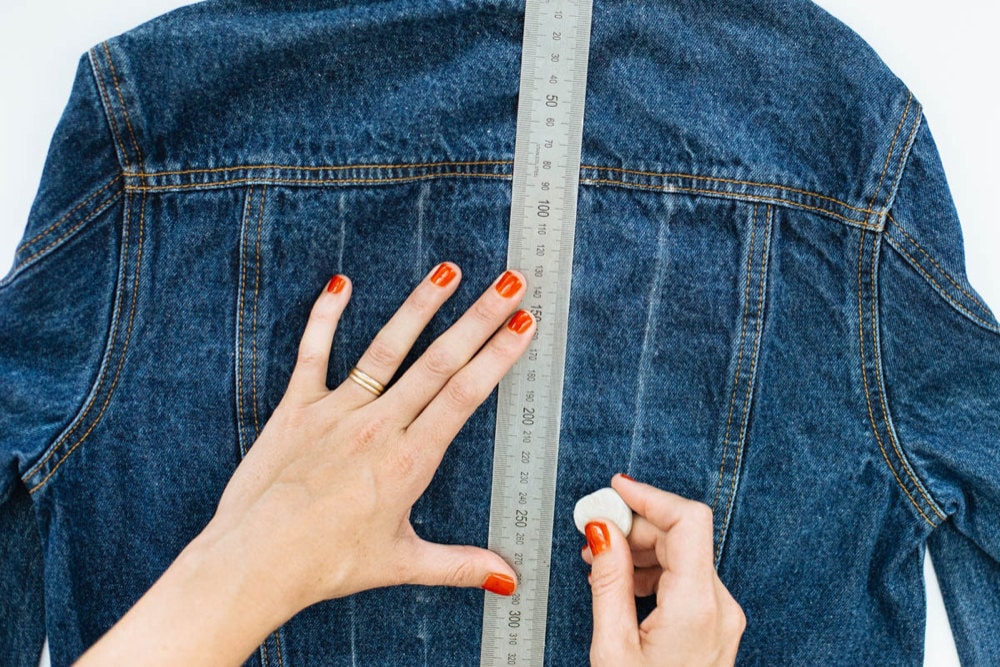
Start with a freshly washed denim jacket. Lay the jacket flat and slip a cutting mat inside to prepare the jacket for cutting. Then flip the jacket face down and plot out where you'll create the weaving on the back. Each jacket's back will be slightly different; we used the top and bottom seam of our jacket's back panel as borders and measured vertical cut lines between them, about every 1/2 inch. Mark your own cut lines using a ruler and tailor's chalk, leaving at least an inch of unmarked fabric at the waistline, which will remain intact.
Step 2: Cut the jacket to create a warp
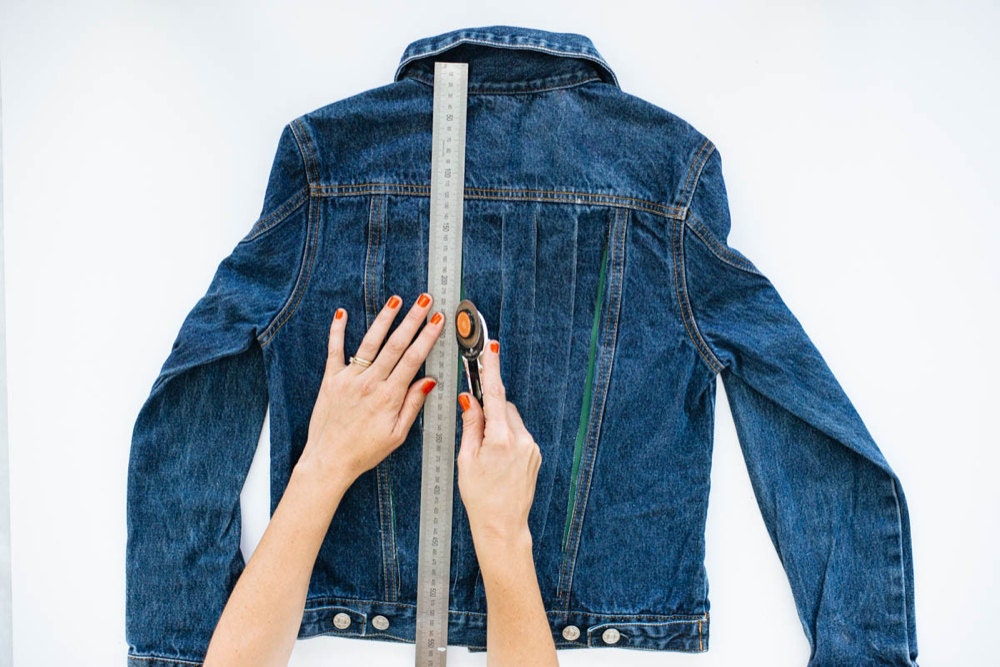
Use your ruler and a rotary cutter to cut along each chalk line. The resulting vertical slats will form the jacket's warp. In the following steps, you'll weave into this using the rope as weft. (If you've never heard these terms before, don't panic! You don't need prior weaving experience to complete this project, but if you'd like an overview anyway, you can study up on the basics here.)
Step 3: Prepare the rope
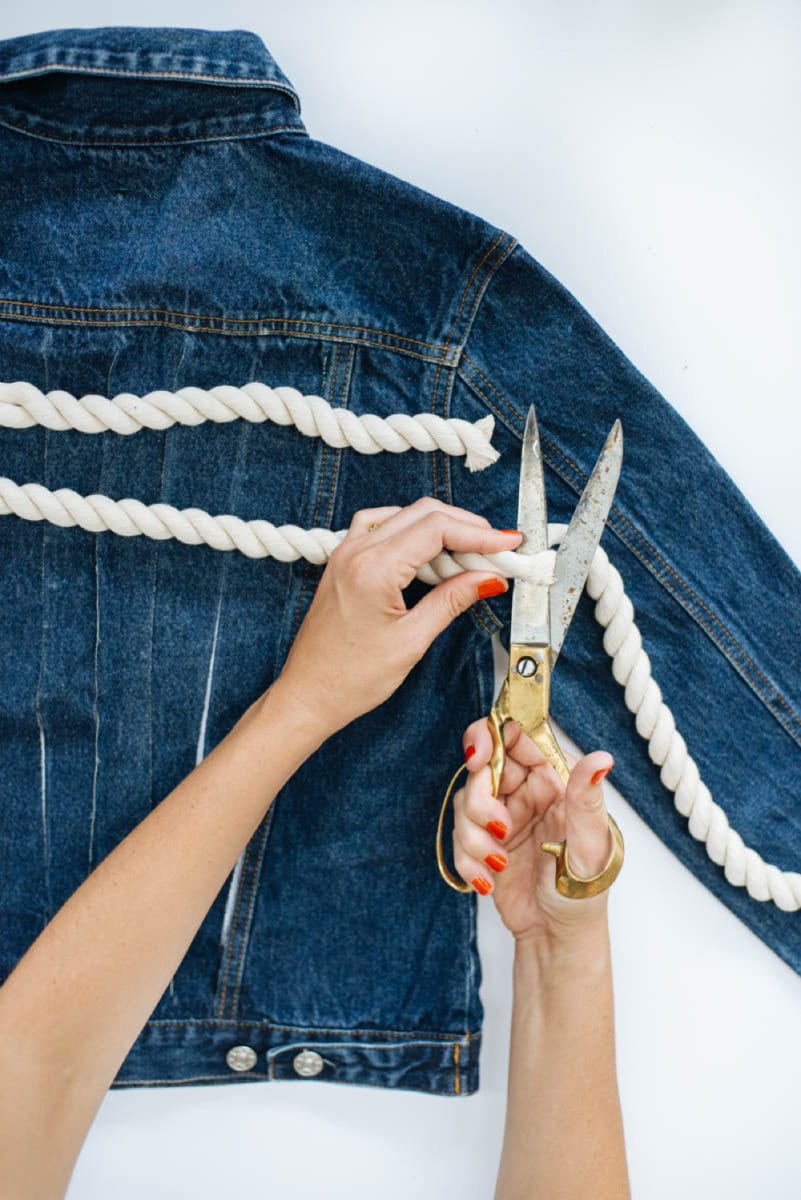
Cut and measure several lengths of your thicker rope to weave into the jacket's back panel. Each rope section should measure at least a few inches longer than the width of the jacket's cut section. (We used a total of 10 yards of 22mm cotton rope, cut into roughly two dozen 12-inch strips.) Next, untwist the thick rope into its separate strands; our rope consisted of three strands coiled together. (Note: the unwound strands of rope will be longer than the original coiled rope was.)
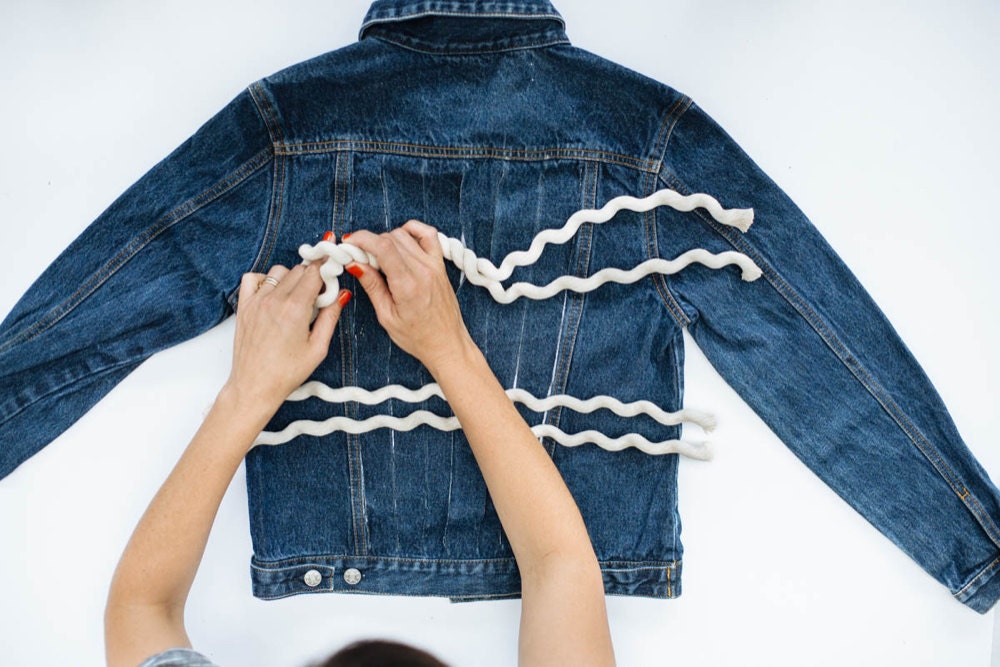
Step 4: Begin weaving
Remove the cutting board. Beginning at the bottom of the jacket, weave one length of rope over and under the denim warp, alternating at each cut. After each completed row, pull both ends of the rope to make sure they are even. The second length of rope should be woven in the opposite shed to the first (meaning: if the first piece went over, under, over, under, then the second piece should be the opposite—under, over, under, over). Continue adding strips of cotton rope until you reach the top of the jacket's cut section, making sure to weave an even number of rope strands into the jacket (you'll see why in Step 6).
Step 5: Secure the rope ends
Now it's time to secure the ends. Every time one of the rope ends finishes on the the top of the last warp piece of the jacket, use scissors to create an additional slit just past the final warp piece. Tuck the end of the rope through it so that its end emerges securely and in line with the rest.
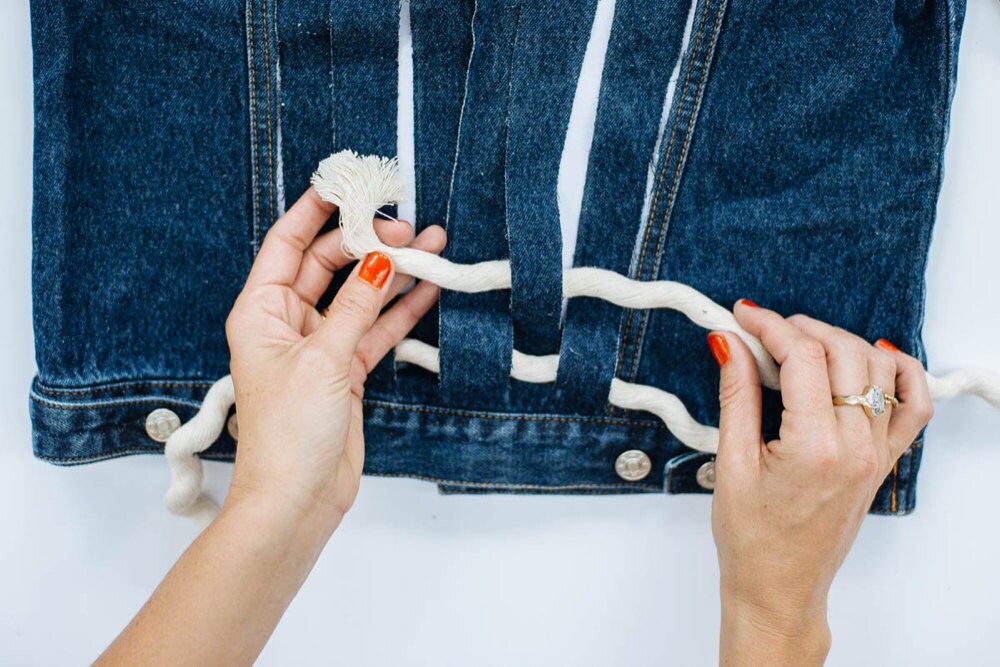
Step 6: Tie ends together
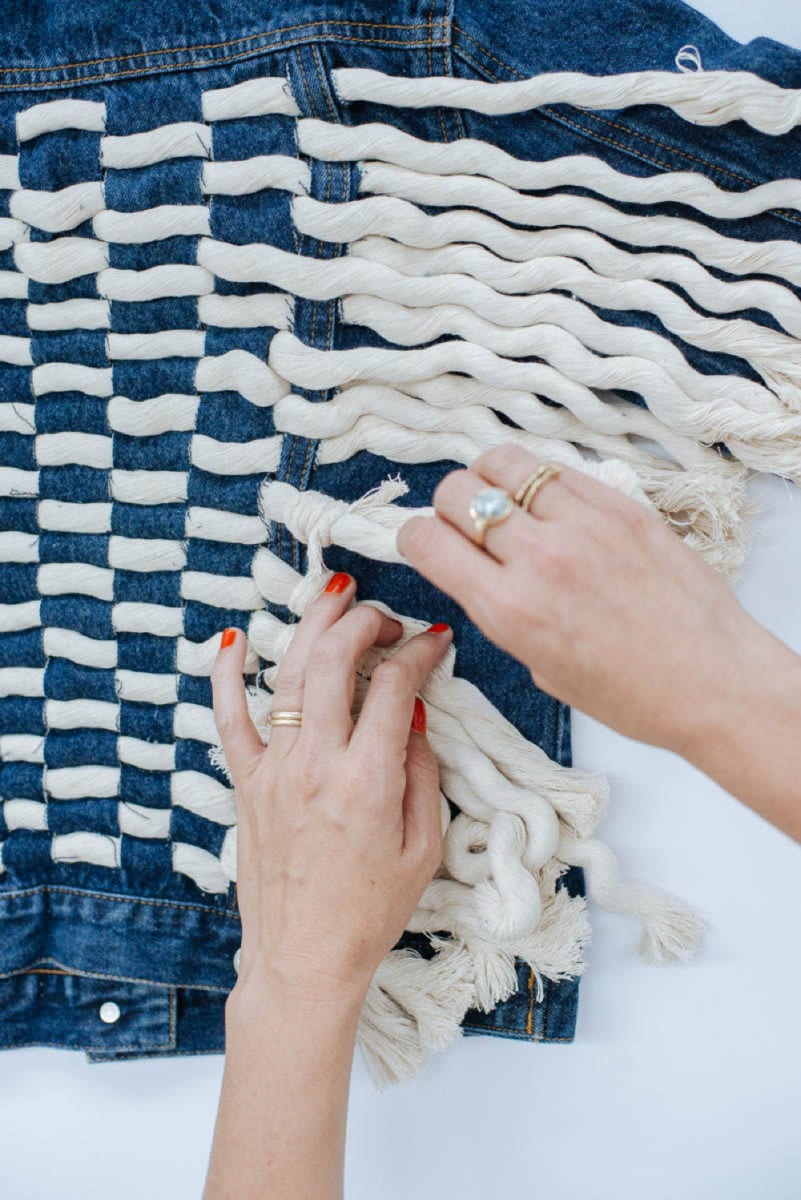
Now grab your thinner rope and use it to tie one pair of adjacent rope ends together with a double knot. Repeat, working one pair at a time, until all the rows of rope have been secured. When you're done, it will look like a row of tassels hanging from each side of the woven section.
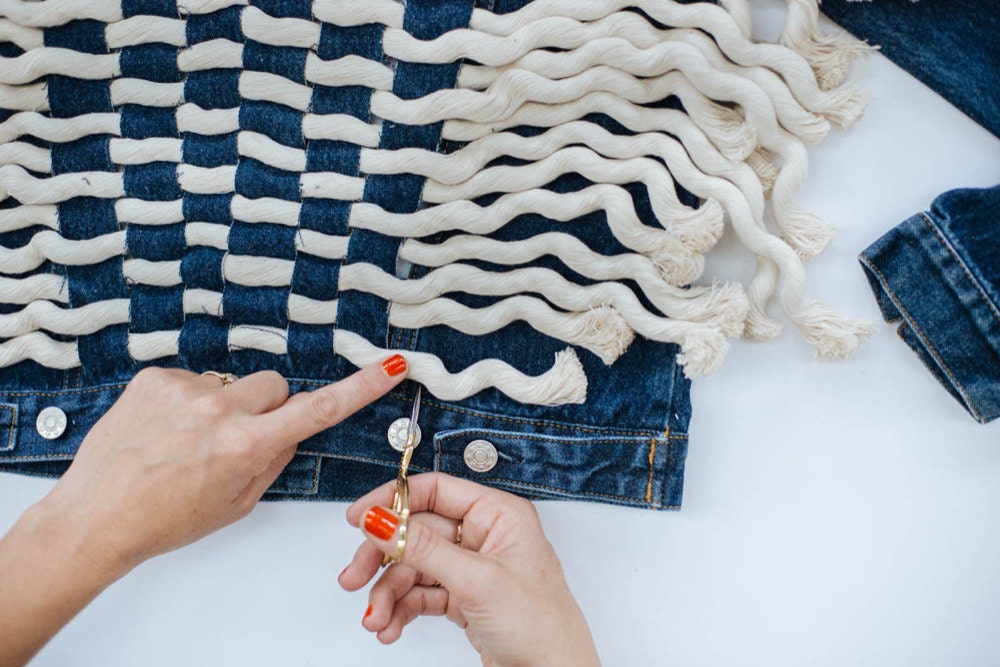
Step 7: Trim to finish
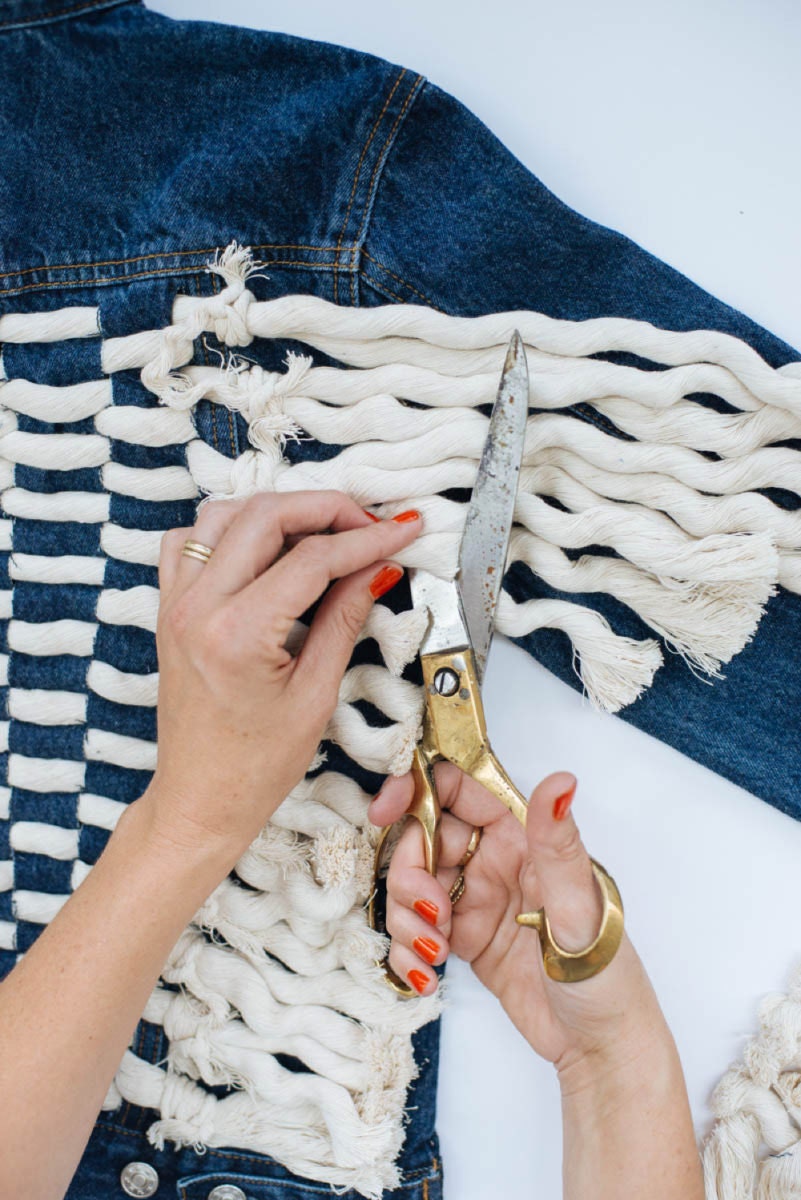
Trim the ends of the tassels to even lengths. Done! Photographs courtesy of Maryanne Moodie.


